Love this? Save it for later!
Share the inspiration with your friends
I wasn’t supposed to be at the craft store that afternoon. I’d run out of parchment paper—a tragedy when you’re mid-batch of cookies—and the closest shop was this massive craft superstore I usually avoid. But there I was, weaving through aisles of fake cobwebs and glow-in-the-dark skeletons, just trying to find the kitchen section. And that’s when I saw her. A mom, probably in her early thirties, with a toddler strapped into one of those cart seats that looks like a race car. She wasn’t trying to impress anyone. She was just… making something.
She had a box of pre-made pie crusts, a can of pumpkin puree, and a bag of candy eyes. Her kid was happily gnawing on a plastic skeleton hand while she explained to a friend on the phone that she was “throwing together something quick for the school party tomorrow.” Something quick. I watched her grab a second box of crusts, toss it in the cart, and wheel away without a second thought. I stood there, holding my parchment paper, completely distracted. The idea of those little pumpkin pies wrapped up like mummies—it hit me right there in the fluorescent lighting of the baking aisle. Honestly, I almost abandoned my cart to follow her and ask for details.
I didn’t, of course. That would have been weird. But I went home, grabbed my own pie crusts, and started experimenting. And let me tell you, those first attempts were not pretty. The first batch looked less like mummies and more like sad, leaky burritos. The second batch? The bandages were too thick, and they didn’t even look wrapped. But the third batch—the third batch was the one. The one where the little dough strips wrapped just right, the candy eyes stayed put, and the pumpkin filling stayed perfectly inside. That’s the recipe I’m sharing with you today. Maybe you’ve been there, standing in a grocery aisle or scrolling online, looking for that one Halloween treat that’s fun but not fussy. This is it.
Why You’ll Love This Recipe
Let me be straight with you—I’ve tested a lot of Halloween recipes over the years. Some are too complicated, some look great but taste like cardboard, and others just take forever. These Easy Mummy Pumpkin Hand Pies are none of those things. They are the Goldilocks of Halloween baking: just right.
- Quick & Easy: From start to finish, these come together in under 45 minutes. That includes baking time. Perfect for busy weeknights or last-minute Halloween party prep when you realize you forgot to sign up for the treat table. (We’ve all been there.)
- Simple Ingredients: No fancy grocery trips needed. You likely already have everything in your kitchen—store-bought pie crust, canned pumpkin, a few spices, and some candy eyes. That’s it. No special flours, no obscure extracts.
- Perfect for Halloween: These are the star of any Halloween party, classroom celebration, or spooky movie night. They’re cute without being overly creepy, so kids love them and adults don’t feel silly eating them.
- Crowd-Pleaser: I’ve brought these to three different gatherings now, and every single time, they disappear first. Kids grab them because they look fun. Adults grab them because they taste amazing. It’s a win-win.
- Unbelievably Delicious: The flaky, buttery crust paired with that warm, spiced pumpkin filling? It’s next-level comfort food. The texture is perfect—crispy on the outside, soft and tender on the inside.
What makes this recipe different from the rest? It’s the technique. I figured out the exact width for the dough strips so they look like authentic mummy bandages without being too thick or too thin. I also perfected the filling consistency so it doesn’t leak out during baking—a problem I ran into more times than I’d like to admit. This isn’t just another version of a pumpkin hand pie. It’s the best version. The one that makes you close your eyes after the first bite and think, “Yeah, this is exactly what Halloween should taste like.”
What Ingredients You Will Need
This recipe uses simple, wholesome ingredients to deliver bold flavor and satisfying texture without the fuss. Most of these are pantry staples, especially if you do any fall baking. Here’s what you’ll need:
For the Filling
- 1 can (15 oz) pumpkin puree (not pumpkin pie filling—make sure it’s 100% pure pumpkin)
- 1/4 cup brown sugar, packed (light or dark works; dark gives a deeper flavor)
- 1 large egg yolk (adds richness and helps bind the filling)
- 1 teaspoon pumpkin pie spice (or make your own: 1/2 tsp cinnamon, 1/4 tsp nutmeg, 1/4 tsp ginger, pinch of cloves)
- 1/2 teaspoon vanilla extract
- Pinch of salt (don’t skip this—it balances the sweetness)
For the Crust & Assembly
- 2 boxes refrigerated pie crusts (I recommend Pillsbury for consistent results, but any brand works)
- 1 large egg, beaten (for egg wash—gives that golden, glossy finish)
- Candy eyes (the little white and black ones you find in the baking aisle; Wilton makes good ones)
For Serving (Optional)
- Powdered sugar for dusting (makes them look like they’re wrapped in snowy bandages)
- Chocolate sauce or caramel sauce for dipping
Ingredient Selection Tips: Look for a pumpkin puree that’s thick and not watery. I’ve noticed that some store brands are runnier than others, which can make your filling too loose. If your puree looks watery, let it sit in a fine-mesh strainer for 10 minutes before mixing. For the pie crusts, I prefer the ones that come rolled up in the box rather than the frozen deep-dish shells—they’re easier to work with for this recipe.
Substitution Guidance: If you’re gluten-free, use a gluten-free pie crust (the refrigerated kind works best). For a dairy-free version, most refrigerated pie crusts are actually dairy-free, but double-check the label. You can swap the brown sugar with coconut sugar or maple sugar, though the flavor will be slightly different. And if you can’t find candy eyes, you can pipe little eyes on with melted white and dark chocolate after baking—it’s a bit more work but looks adorable.
Equipment Needed
You don’t need a professional bakery setup for these. Here’s what you’ll need:
- Baking sheets: Two standard half-sheet pans work perfectly. Line them with parchment paper or silicone baking mats for easy cleanup.
- Rolling pin: Even though the crusts come pre-rolled, you’ll want to roll them out just a tiny bit thinner. A standard rolling pin is fine; in a pinch, a wine bottle works too (I’ve done it).
- Pizza cutter or sharp knife: For cutting the dough strips. A pizza cutter makes this so much faster and gives cleaner edges.
- Round cookie cutter: A 3-inch round cutter is ideal. If you don’t have one, use a drinking glass with a similar diameter.
- Small bowl: For mixing the filling and for the egg wash.
- Pastry brush: For applying the egg wash. A silicone one is easiest to clean.
- Spatula: A thin metal spatula helps transfer the pies to the baking sheet without breaking them.
- Cooling rack: Essential for getting crispy bottoms. If you don’t have one, let them cool on the baking sheet for 5 minutes, then carefully transfer to a plate.
Budget-Friendly Tip: Don’t have a round cookie cutter? I’ve used the rim of a mason jar lid before—just make sure it’s clean! And if you don’t have a pastry brush, you can use a clean, unused paintbrush from the hardware store. Seriously. Just wash it thoroughly first with hot soapy water.
Preparation Method
Let’s get into the fun part. I’ve broken this down into clear steps with all the little details I wish someone had told me the first time.
- Preheat your oven to 375°F (190°C). Line two baking sheets with parchment paper or silicone mats. This is non-negotiable—without parchment, the bottoms can stick and tear when you try to lift them off.
- Make the pumpkin filling. In a medium bowl, whisk together the pumpkin puree, brown sugar, egg yolk, pumpkin pie spice, vanilla extract, and salt. Mix until completely smooth. Taste it. Seriously, do it. It should be sweet and spiced with a little warmth from the vanilla. If it tastes flat, add another pinch of salt or a dash more cinnamon. Set the bowl aside while you work on the crust.
- Prepare the pie crusts. Unroll both pie crusts onto a lightly floured surface. Use your rolling pin to roll each one out just slightly thinner—about 1/8 inch thick. You don’t want to go too thin, or the pies will be fragile. I learned this the hard way when my first batch fell apart in my hands.
- Cut out rounds. Using your 3-inch round cutter, cut out as many circles as you can from each crust. You should get about 6 to 7 per crust, so roughly 12 to 14 total. Gather the scraps, gently press them together, and re-roll to cut out more. Don’t overwork the dough, though—it gets tough if you handle it too much.
- Spoon the filling. Place half of the circles on your prepared baking sheets, spacing them about 2 inches apart. Spoon about 1 tablespoon of filling into the center of each circle. Don’t overfill—I know it’s tempting, but too much filling will leak out during baking and make a mess. Trust me on this one.
- Cut the mummy bandages. Take the remaining circles and cut them into thin strips. Aim for strips about 1/2 inch wide. A pizza cutter makes this super easy. You want them thin enough to look like bandages but thick enough that they won’t tear when you lift them.
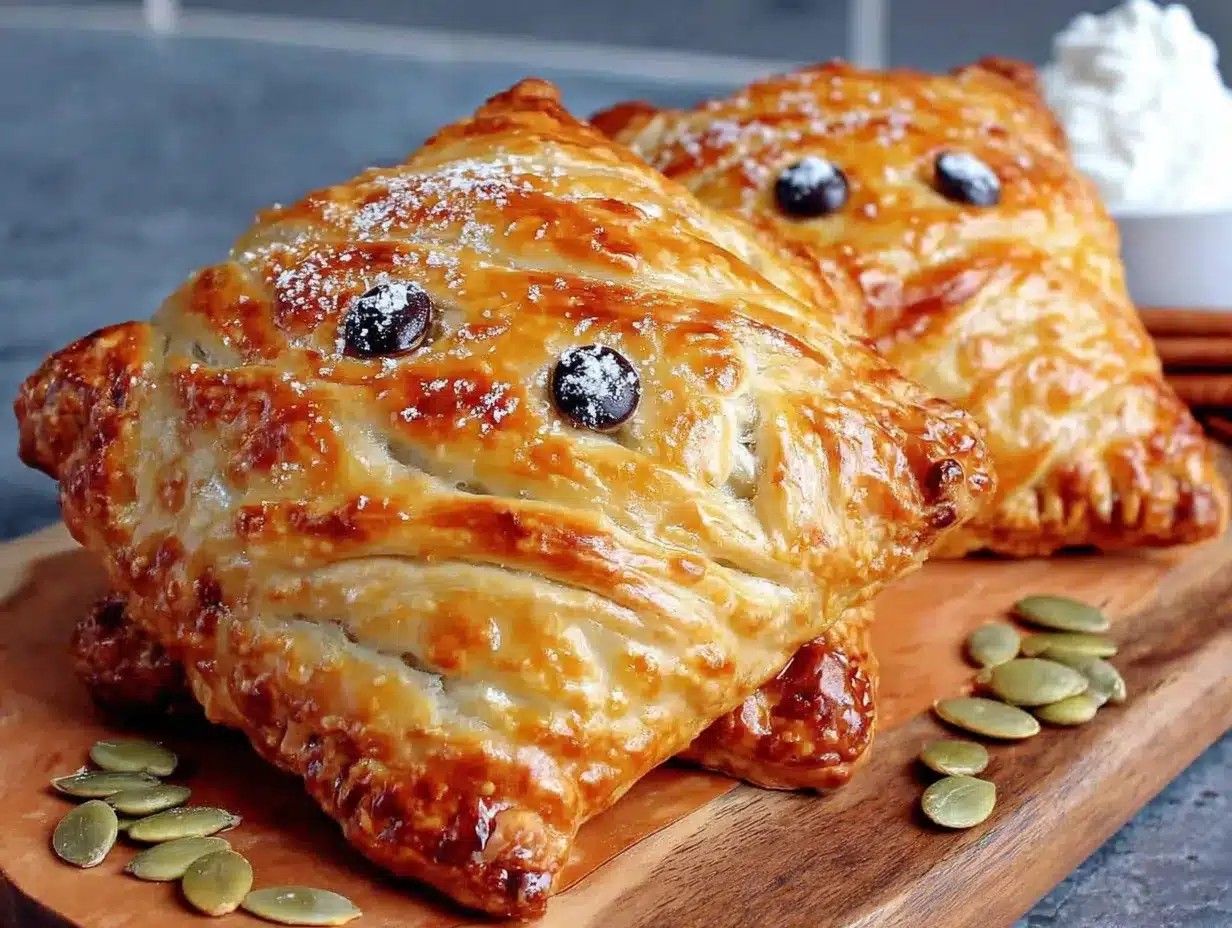
- Wrap the mummies. Here’s the technique: Lay 3 to 4 strips across each filled circle, spacing them slightly apart so you can see the filling peeking through. Then add a couple of strips going the other direction for that classic mummy wrap look. Don’t cover the entire surface—leave some gaps so the pumpkin filling is visible. Press the ends of the strips gently onto the bottom circle to seal them.
- Add the eyes. Before baking, press two candy eyes into the filling through the gaps in the bandages. Place them close together for that cute, slightly confused mummy expression. Press them in firmly so they don’t fall off during baking.
- Apply the egg wash. In a small bowl, beat the remaining egg with 1 tablespoon of water. Using your pastry brush, gently brush the egg wash over the dough strips. This gives them that beautiful golden-brown color. Don’t brush the filling or the eyes—just the dough.
- Bake. Place the baking sheets in the preheated oven and bake for 18 to 22 minutes, or until the crust is golden brown and the filling is bubbly. Rotate the pans halfway through for even browning. Your kitchen is going to smell incredible at this point.
- Cool. Let the mummy pies cool on the baking sheet for 5 minutes, then transfer them to a wire rack to cool completely. This step is important—if you try to move them too soon, they can break apart. I’ve definitely lost a few mummies this way.
- Finish and serve. Once cooled, you can dust them with powdered sugar for a snowy, spooky effect. Serve warm or at room temperature. They’re amazing either way.
Cooking Tips & Techniques
I’ve made these Easy Mummy Pumpkin Hand Pies at least a dozen times now, and I’ve collected a few tricks along the way. Let me share what I’ve learned so you don’t have to make the same mistakes I did.
The Bandage Width Matters: I cannot stress this enough. If your strips are too wide, they look like a blanket, not bandages. Too thin, and they break when you try to lift them. Half an inch is the sweet spot. I actually measured with a ruler the first few times until I got the hang of it by eye.
Don’t Skip the Egg Wash: I know it seems like an extra step, but the egg wash is what gives these pies that gorgeous golden color. Without it, the crust stays pale and looks unappetizing. If you’re vegan, use a milk wash (plant-based milk works fine) or a little melted vegan butter brushed on top.
Keep the Filling Thick: If your pumpkin filling seems runny, add a teaspoon of cornstarch or flour to thicken it. A watery filling will soak into the crust and make it soggy. Nobody wants a soggy mummy.
Chill the Dough: If your kitchen is warm, the dough can get sticky and hard to work with. Pop the cut circles in the fridge for 10 minutes before adding the filling. Cold dough is much easier to handle and holds its shape better in the oven.
One of My Biggest Failures: The first time I made these, I got distracted and left them in the oven too long. The candy eyes melted into weird, sad puddles. It was tragic. So set a timer, and check them at the 18-minute mark. The eyes should still be clearly visible when you pull them out.
Multitasking Strategy: While the first batch is baking, assemble the second batch. This keeps your workflow smooth and efficient. By the time the first batch comes out, the second batch is ready to go in.
Variations & Adaptations
One of the things I love about this recipe is how adaptable it is. Here are some variations I’ve tried and loved:
Pumpkin Cream Cheese Filling: Mix 4 ounces of softened cream cheese into the pumpkin filling for a richer, tangier version. It adds a lovely creaminess that balances the spice. Just make sure the cream cheese is fully incorporated with no lumps.
Apple Cinnamon Mummies: Swap the pumpkin puree for apple pie filling (chopped finely) and add an extra teaspoon of cinnamon. It’s a fall flavor twist that works beautifully. The apples give a different texture—more chunky than smooth—but it’s equally delicious.
Chocolate Pumpkin Mummies: Add 2 tablespoons of cocoa powder to the pumpkin filling and reduce the pumpkin pie spice to 1/2 teaspoon. The chocolate-pumpkin combo is underrated, honestly. It’s like a healthier version of a chocolate pumpkin muffin, but in pie form.
Gluten-Free Version: Use a gluten-free pie crust. I’ve tried several brands, and the Wholly Gluten Free brand works best. The dough is a bit more delicate, so handle it gently. You might need to press the edges together more carefully.
Vegan Version: Use a vegan pie crust (many store-bought ones are accidentally vegan), replace the egg yolk in the filling with a tablespoon of cornstarch mixed with 2 tablespoons of water, and use a plant-based milk wash instead of egg wash. The texture is slightly different but still delicious.
Savory Mummy Pies: For a non-dessert option, fill the pies with a mixture of mashed sweet potato, black beans, and cumin. Skip the sugar and candy eyes—use olive slices for eyes instead. It’s a fun appetizer for Halloween parties.
Serving & Storage Suggestions
These Easy Mummy Pumpkin Hand Pies are best served slightly warm, when the filling is still soft and the crust is at its flakiest. But they’re also fantastic at room temperature, which makes them perfect for parties where you don’t want to worry about timing.
Serving Ideas:
- Arrange them on a platter lined with orange or black napkins for a festive look.
- Dust with powdered sugar right before serving to mimic snow or spiderwebs.
- Serve with a side of warm caramel sauce or chocolate sauce for dipping. The contrast of the sweet dip with the spiced pumpkin is heavenly.
- Pair with a warm cup of apple cider or a pumpkin spice latte for the ultimate fall treat.
Storage Instructions:
- Refrigerator: Store in an airtight container for up to 4 days. The crust will soften slightly, but they’ll still taste great. To refresh them, pop them in a 300°F oven for 5 minutes.
- Freezer: These freeze beautifully. Place the cooled pies in a single layer on a baking sheet and freeze until solid (about 2 hours). Then transfer them to a freezer-safe bag or container. They’ll keep for up to 3 months. To reheat, bake directly from frozen at 350°F for 10 to 12 minutes.
- Reheating: The best way to reheat is in the oven. Microwave works in a pinch, but the crust will be soft rather than flaky. If you must microwave, do it in 15-second intervals and don’t overdo it.
Flavor Development: Honestly, these pies taste even better the next day. The spices have time to meld with the pumpkin, and the crust absorbs just a little bit of moisture from the filling, making everything more cohesive. So don’t stress about making them fresh the day of your party—they’re actually better made a day ahead.
Nutritional Information & Benefits
While these are definitely a treat, they’re not as indulgent as you might think. Here’s the approximate nutritional breakdown for one mummy pie:
| Nutrient | Amount per Serving |
|---|---|
| Calories | 185 |
| Total Fat | 9g |
| Saturated Fat | 4g |
| Carbohydrates | 24g |
| Fiber | 2g |
| Sugar | 10g |
| Protein | 3g |
| Vitamin A | 85% DV |
| Iron | 6% DV |
Health Benefits: Pumpkin is packed with vitamin A, which supports eye health and immune function. It’s also rich in fiber, which helps with digestion and keeps you feeling full. The spices—cinnamon, nutmeg, ginger—are anti-inflammatory and add flavor without extra sugar or salt. So while these are a dessert, they’re a dessert with some redeeming qualities.
Dietary Considerations: These pies are vegetarian. For a vegan version, see the variations section above. They contain gluten, dairy (in the crust), and eggs. If you have allergies, the substitutions listed earlier will work well.
My Personal Take: I love that I can serve these at a Halloween party and feel good about what I’m offering. They’re not loaded with artificial colors or preservatives. They’re real food dressed up in a fun costume—and that’s exactly what Halloween should be about.
FAQs
Can I use homemade pie crust instead of store-bought?
Absolutely! If you have a favorite pie crust recipe, use it. Just make sure to roll it thin enough—about 1/8 inch thick. Homemade crust will give you an even flakier texture, but it does require more time and effort. I use store-bought when I’m in a hurry, and homemade when I want to impress.
Why did my filling leak out during baking?
This usually happens for one of two reasons: either you overfilled the pies, or the filling was too runny. Make sure you’re using only about 1 tablespoon of filling per pie, and if your pumpkin puree seems watery, let it drain in a fine-mesh strainer for 10 minutes before mixing. Also, make sure the edges of the dough are pressed together firmly.
Can I make these ahead of time?
Yes! You can assemble the pies completely (including the candy eyes) and refrigerate them on the baking sheet for up to 24 hours before baking. Just cover them loosely with plastic wrap. You can also freeze them unbaked—freeze on a baking sheet, then transfer to a freezer bag. Bake from frozen, adding 3 to 5 minutes to the baking time.
My candy eyes fell off during baking. What went wrong?
This happened to me the first few times. The trick is to press the eyes firmly into the filling, not just rest them on top. The filling acts like glue when it bakes. Also, make sure you’re using the flat candy eyes, not the ones with pointed backs. If you’re still having trouble, you can add the eyes after baking using a tiny dab of frosting or melted chocolate as glue.
Can I use a different filling?
Definitely! These work with almost any thick filling. Try apple butter, sweet potato puree, or even chocolate hazelnut spread. Just make sure the filling isn’t too runny, and adjust the baking time if needed. For savory versions, use mashed potatoes or butternut squash puree with cheese.
Conclusion
These Easy Mummy Pumpkin Hand Pies have become my go-to Halloween treat for a reason. They’re fun to make, adorable to look at, and genuinely delicious to eat. Every time I bring them to a party, someone asks for the recipe. Every time I make them at home, my family gathers around the kitchen island before they’ve even cooled completely.
What I love most about this recipe is how it brings a little magic to the Halloween season without requiring hours in the kitchen. You don’t need to be a professional baker. You don’t need fancy equipment. You just need a few simple ingredients, a little patience, and the willingness to get a bit messy. And honestly, that’s what Halloween is all about—getting a little messy, having fun, and sharing something special with the people you care about.
So go ahead and make these. Customize them however you like. Add extra spice, swap the filling, or double the batch because trust me, one batch is never enough. And when you make them, I’d love to hear about it. Leave a comment below and tell me how they turned out. Did your kids help wrap the mummies? Did you try a crazy variation? Did you eat three in one sitting? (No judgment here.) Share your stories, your photos, and your own tips. Let’s make this Halloween the most delicious one yet.
Happy baking, and happy Halloween!
Pin This Recipe!

Easy Mummy Pumpkin Hand Pies: Best Halloween Treat

These adorable mummy-shaped pumpkin hand pies are the perfect Halloween treat. With a flaky crust, spiced pumpkin filling, and candy eyes, they’re fun to make and even more fun to eat.
- Prep Time: 20 minutes
- Cook Time: 20 minutes
- Total Time: 40 minutes
- Yield: 12-14 servings 1x
- Category: Dessert
- Cuisine: American
Ingredients
- 1 can (15 oz) pumpkin puree (not pumpkin pie filling)
- 1/4 cup brown sugar, packed
- 1 large egg yolk
- 1 teaspoon pumpkin pie spice (or 1/2 tsp cinnamon, 1/4 tsp nutmeg, 1/4 tsp ginger, pinch of cloves)
- 1/2 teaspoon vanilla extract
- Pinch of salt
- 2 boxes refrigerated pie crusts (e.g., Pillsbury)
- 1 large egg, beaten (for egg wash)
- Candy eyes (e.g., Wilton brand)
- Powdered sugar for dusting (optional)
- Chocolate sauce or caramel sauce for dipping (optional)
Instructions
- Preheat your oven to 375°F (190°C). Line two baking sheets with parchment paper or silicone mats.
- Make the pumpkin filling: In a medium bowl, whisk together the pumpkin puree, brown sugar, egg yolk, pumpkin pie spice, vanilla extract, and salt until completely smooth. Set aside.
- Prepare the pie crusts: Unroll both pie crusts onto a lightly floured surface. Roll each out to about 1/8 inch thick.
- Cut out rounds: Using a 3-inch round cookie cutter, cut out as many circles as possible from each crust (about 12-14 total). Gather scraps, gently press together, and re-roll to cut more.
- Spoon the filling: Place half of the circles on the prepared baking sheets, spacing them about 2 inches apart. Spoon about 1 tablespoon of filling into the center of each circle.
- Cut the mummy bandages: Take the remaining circles and cut them into thin strips, about 1/2 inch wide, using a pizza cutter or sharp knife.
- Wrap the mummies: Lay 3-4 strips across each filled circle, spacing them slightly apart. Add a couple of strips going the other direction. Press the ends gently onto the bottom circle to seal.
- Add the eyes: Press two candy eyes into the filling through the gaps in the bandages, placing them close together.
- Apply the egg wash: In a small bowl, beat the remaining egg with 1 tablespoon of water. Brush the egg wash gently over the dough strips, avoiding the filling and eyes.
- Bake: Place the baking sheets in the oven and bake for 18-22 minutes, or until the crust is golden brown and the filling is bubbly. Rotate the pans halfway through.
- Cool: Let the mummy pies cool on the baking sheet for 5 minutes, then transfer to a wire rack to cool completely.
- Finish and serve: Once cooled, dust with powdered sugar if desired. Serve warm or at room temperature.
Notes
For best results, keep the filling thick—if runny, add a teaspoon of cornstarch. Chill the dough if it gets sticky. Press candy eyes firmly into the filling to prevent them from falling off during baking. These can be made ahead and refrigerated unbaked for up to 24 hours, or frozen unbaked for up to 3 months.
Nutrition
- Serving Size: 1 mummy pie
- Calories: 185
- Sugar: 10
- Fat: 9
- Saturated Fat: 4
- Carbohydrates: 24
- Fiber: 2
- Protein: 3
Keywords: Halloween, pumpkin, hand pies, mummy, easy, fall, treat, party, kids



