Love this? Save it for later!
Share the inspiration with your friends
My sister-in-law had claimed to hate anything that looked “gimmicky” for a solid decade. No themed cupcakes. No holiday-shaped cookies. No food that winked at you from the plate. Then last Halloween, I made these no-bake monster eyeball truffles just for my own kids—and caught her sneaking one from the fridge when she thought nobody was looking. “Don’t tell anyone,” she muttered, already reaching for a second one. The truffles were supposed to be a fun, spooky treat for the kids, but honestly, I think I converted a truffle snob that night.
Let me tell you, these little guys are the kind of recipe that makes you feel like a kitchen genius without actually doing much work. I mean, they’re no-bake. That’s the whole point. You mash, roll, and dip—no oven required. And the best part? They actually taste incredible. The creamy, rich center paired with that glossy chocolate shell? It’s a dangerous combination. I found myself justifying a third one as “quality control,” and I’m not ashamed to admit it.
Maybe you’ve been there—scrolling through Halloween recipes, looking for something that isn’t just another sugar cookie cut into a ghost shape. Something that looks impressive but doesn’t require a pastry degree. Something that actually tastes good, not just looks cute. That’s where these monster eyeball truffles come in. They’re the perfect blend of spooky and delicious, and they’ve become a non-negotiable part of our October traditions. Even my sister-in-law asks for them now, and she still pretends she doesn’t like “gimmicky” food. Sure, Jan.
Why You’ll Love This Recipe
These no-bake monster eyeball truffles are not just another Halloween novelty. They’re a tried-and-true recipe that has survived multiple family gatherings, school parties, and even a few late-night cravings. Here’s why they’ve earned a permanent spot in my recipe box:
- No-Bake & Quick: You don’t need to turn on the oven. These come together in about 20 minutes of active time, then just chill. Perfect for busy parents or anyone who wants a treat without the heat.
- Simple Ingredients: No weird specialty items. You probably have most of this in your pantry already. Cream cheese, vanilla wafers, powdered sugar—all the good stuff.
- Perfect for Halloween Parties: They look like something out of a monster movie, but they’re completely kid-friendly. Great for school treats, potlucks, or just a fun afternoon project with the little ones.
- Crowd-Pleaser: I’ve served these to kids and adults alike, and they disappear every single time. The combination of creamy filling and chocolate coating is irresistible.
- Unbelievably Delicious: Let’s be real—some themed treats are all show and no flavor. These are the opposite. The sweet, creamy center with that snap of chocolate? It’s pure comfort food magic.
What makes these different from the other eyeball truffle recipes out there? It’s the texture. I spent a good three batches getting the filling just right—not too soft, not too firm, with just the right amount of sweetness. And the chocolate coating? I use a specific technique that gives it that glossy, professional finish without any special equipment. These aren’t just another version; they’re the version I’d serve to my own family without hesitation.
Honestly, this recipe is the kind that makes you close your eyes after the first bite. It’s comfort food disguised as a Halloween prop—and that’s exactly what makes it so special.
What Ingredients You Will Need
This recipe uses simple, pantry-friendly ingredients to create a treat that looks complicated but isn’t. Most of these are staples you probably already have on hand, which makes these perfect for a last-minute Halloween craving.
- Cream cheese, softened (8 ounces, full-fat for best texture—I recommend Philadelphia cream cheese for consistent results)
- Vanilla wafer cookies, finely crushed (about 2 cups, or one standard box—Nilla wafers work perfectly)
- Powdered sugar (1 cup, sifted to avoid lumps)
- Unsalted butter, softened (2 tablespoons, adds richness and helps the filling hold together)
- Vanilla extract (1 teaspoon, pure vanilla extract gives the best flavor)
- White candy melts or white chocolate chips (12 ounces, for coating—I prefer Ghirardelli white melting wafers for smooth melting)
- Coconut oil or shortening (1 tablespoon, helps thin the coating for a smooth finish)
- Blue candy melts or blue food coloring (for the iris—if using food coloring, use gel-based for vibrant color without thinning the chocolate)
- Mini chocolate chips or black decorating gel (for the pupil—mini chips give a nice texture, gel is easier for kids)
- Red food coloring gel (for the “bloodshot” veins—a little goes a long way)
- Piping bag or small zip-top bag (for applying the details)
Ingredient Tips & Substitutions:
If you’re dairy-free, you can use a vegan cream cheese alternative like Kite Hill, but make sure it’s the block-style, not whipped. The texture will be slightly softer, so you may need to chill the filling longer before rolling. For a gluten-free option, use gluten-free vanilla wafers—they work just as well. And if you can’t find candy melts, white chocolate chips with a bit of coconut oil will do the trick, just be careful not to overheat them.
One thing I learned the hard way: don’t skip the coconut oil in the coating. My first batch was a clumpy mess because I tried to melt the white chocolate straight. A little fat goes a long way toward that smooth, glossy finish you see in the photos.
Equipment Needed
You don’t need a fancy kitchen to make these monster eyeball truffles. Here’s what you’ll need:
- Food processor or rolling pin (for crushing the vanilla wafers—I use my food processor because it’s faster, but a zip-top bag and a rolling pin work great too)
- Mixing bowls (one large for the filling, one medium for the coating)
- Electric mixer or sturdy wooden spoon (the mixer makes the filling smoother, but you can do it by hand with some elbow grease)
- Baking sheet lined with parchment paper (for chilling the truffles)
- Microwave-safe bowl or double boiler (for melting the candy melts—microwave is faster, but a double boiler gives you more control)
- Candy thermometer (optional, but helpful if you’re prone to overheating chocolate)
- Piping bags or small zip-top bags (for applying the blue iris and red veins)
- Toothpicks or small skewers (for dipping the truffles in the coating)
- Paring knife or small offset spatula (for cleaning up the coating around the base)
If you don’t have a food processor, don’t worry. I’ve crushed vanilla wafers in a zip-top bag with a rolling pin more times than I can count. It’s a little more work, but it’s also a great way to get the kids involved—they love smashing things.
Preparation Method
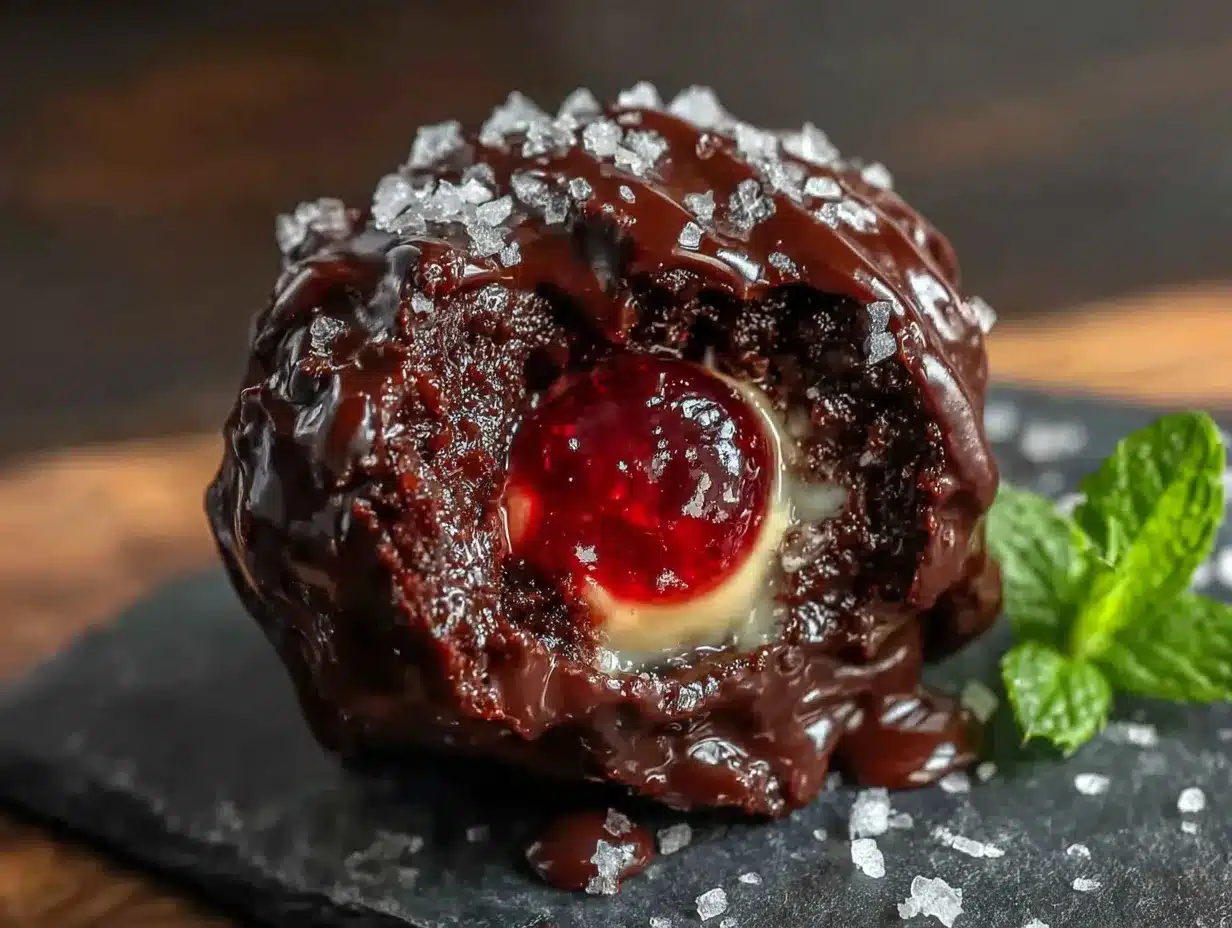
Making these no-bake monster eyeball truffles is surprisingly straightforward. Just follow these steps, and you’ll have a batch of spooky, delicious treats in no time.
- Crush the vanilla wafers. If using a food processor, pulse until you have fine crumbs—about the texture of sand. If using a bag and rolling pin, seal the wafers in a zip-top bag and crush them thoroughly. You should have about 2 cups of crumbs. Pro tip: Don’t leave any big chunks, or your truffles will have uneven texture.
- Make the filling. In a large mixing bowl, beat the softened cream cheese and butter together until smooth and creamy, about 2 minutes. Add the powdered sugar and vanilla extract, and beat until combined. The mixture should be thick and smooth. Sensory cue: It should smell sweet and creamy, like cheesecake batter.
- Add the crumbs. Gradually add the crushed vanilla wafers to the cream cheese mixture, mixing until fully incorporated. The dough should be firm enough to hold its shape when rolled. If it’s too sticky, add a few more tablespoons of crumbs. If it’s too dry, add a teaspoon of milk. Personal tip: I always err on the side of slightly sticky—it makes for a creamier truffle.
- Chill the dough. Cover the bowl with plastic wrap and refrigerate for at least 30 minutes. This makes the dough easier to handle and roll. Warning: Don’t skip this step. Warm dough will be a mess to work with.
- Roll the truffles. Once chilled, scoop out tablespoon-sized portions of dough and roll them into smooth balls. Place them on the parchment-lined baking sheet. You should get about 20-24 truffles. Troubleshooting: If the dough sticks to your hands, lightly dampen your palms with water.
- Freeze the truffles. Place the baking sheet in the freezer for 15-20 minutes. This firms them up so they hold their shape when dipped. Time saver: You can do this step while you melt the coating.
- Melt the white coating. In a microwave-safe bowl, combine the white candy melts and coconut oil. Microwave in 30-second intervals, stirring between each, until smooth and fully melted. Be careful not to overheat—white chocolate burns easily. Sensory cue: The coating should be smooth and runny, like thick cream.
- Dip the truffles. Remove the truffles from the freezer. Using a toothpick or skewer, dip each truffle into the melted coating, letting the excess drip off. Place the dipped truffle back on the parchment paper. Work quickly, as the coating will start to set. Personal tip: I use a fork for dipping—it lets the excess drip through the tines.
- Create the iris. While the coating is still wet, add a small dot of blue candy melt (or white coating tinted with blue food coloring) in the center of each truffle. Use a toothpick to spread it slightly, creating the iris. Visual cue: The iris should be about the size of a pea.
- Add the pupil. Immediately press a mini chocolate chip into the center of each blue dot, pointy side in. This creates the pupil. If using black decorating gel, pipe a small dot instead. Warning: Work quickly before the coating sets.
- Paint the veins. Once the coating has fully set (about 10 minutes), use a toothpick dipped in red food coloring gel to draw thin, wavy lines radiating from the iris. These are the “bloodshot” veins that make the eyeballs look spooky. Personal tip: Less is more—a few thin lines look better than thick, messy ones.
- Set the truffles. Let the truffles sit at room temperature until the coating is completely firm, about 30 minutes. Then transfer to an airtight container and refrigerate until ready to serve.
Cooking Tips & Techniques
I’ve made these no-bake monster eyeball truffles more times than I can count, and I’ve learned a few things along the way. Here are my best tips for success:
Temperature control is everything. The biggest mistake I made early on was not chilling the dough long enough. The filling needs to be cold and firm before you dip it, or the truffles will fall apart in the coating. Trust me, I’ve fished more than a few truffle pieces out of a bowl of melted chocolate. Give the dough at least 30 minutes in the fridge, and don’t skip the freezer step before dipping.
Thin your coating properly. White chocolate and candy melts are thick on their own. Adding a little coconut oil or shortening makes them much easier to work with. The coating should be thin enough to drip off the truffle smoothly, leaving a thin, even layer. If it’s too thick, your truffles will have clumpy, uneven coating. If it’s too thin, it won’t set properly. Aim for the consistency of warm honey.
Work in batches. Don’t try to dip all the truffles at once. The coating will start to set, and you’ll end up with a mess. Instead, work in batches of 6-8 truffles, keeping the rest in the freezer until you’re ready. This also gives you time to add the iris and pupil before the coating hardens.
Use a dipping tool. I’ve tried everything from spoons to my fingers (don’t recommend that one), and a fork or candy dipping tool works best. The tines let the excess coating drip through, giving you a cleaner finish. If you’re using a toothpick, you’ll need to clean up the hole it leaves behind—just dab a little extra coating over it.
Let the coating set completely before adding veins. I was impatient once and tried to add the red veins while the coating was still tacky. It smeared everywhere, and my truffles looked like they’d been in a horror movie. Wait until the coating is fully set—about 10-15 minutes—then add the veins with a steady hand.
Variations & Adaptations
These no-bake monster eyeball truffles are endlessly customizable. Here are some of my favorite variations:
Flavor Variations: Swap the vanilla extract for peppermint or almond extract for a different flavor profile. You can also add a tablespoon of cocoa powder to the filling for chocolate eyeballs—just reduce the powdered sugar by a tablespoon to keep the texture right.
Dietary Adaptations: For a dairy-free version, use vegan cream cheese and butter alternatives. The texture will be slightly softer, so chill the dough longer before rolling. For a gluten-free version, use gluten-free vanilla wafers—they work perfectly. And if you’re watching your sugar, you can use a sugar substitute like Swerve in the filling, but the texture will be a bit grainier.
Color Variations: Change the color of the iris to match a theme. Green for alien eyes, yellow for cat eyes, or purple for a magical twist. You can also use different colored candy melts for the coating—try dark chocolate for a spooky contrast, or green for a more monster-like appearance.
Seasonal Adaptations: These aren’t just for Halloween! For Christmas, use red and green irises with white coating. For Easter, pastel colors and flower-shaped pupils. For a birthday party, match the colors to the party theme. I once made a batch with pink irises and gold sprinkles for a unicorn-themed party, and they were a huge hit.
Personal Variation: My favorite twist is adding a pinch of salt to the filling. It sounds weird, but the salty-sweet combo is incredible. I also like to drizzle a little dark chocolate over the top after the coating sets—it adds a nice contrast and makes them look even more professional.
Serving & Storage Suggestions
These no-bake monster eyeball truffles are best served cold, straight from the fridge. The filling is firm and creamy, and the coating has a satisfying snap. I like to arrange them on a platter with some fake spiderwebs or plastic spiders for a spooky presentation. They’re perfect for Halloween parties, school treats, or just a fun afternoon snack.
Storage Instructions: Store the truffles in an airtight container in the refrigerator for up to 1 week. They actually get better after a day or two as the flavors meld together. If you’re making them ahead of time, you can freeze them for up to 3 months. Just place them in a single layer in a freezer-safe container, with parchment paper between layers. Thaw in the refrigerator overnight before serving.
Reheating Tips: These are meant to be served cold, so no reheating is needed. But if you want a softer texture, let them sit at room temperature for 10-15 minutes before serving. The coating will soften slightly, and the filling will become creamier.
Flavor Development: I’ve noticed that these truffles taste even better the next day. The vanilla and cream cheese flavors meld together, and the coating sets perfectly. So if you can resist eating them all right away, they’re worth the wait.
Nutritional Information & Benefits
Let’s be honest—these are a treat, not a health food. But that doesn’t mean they can’t fit into a balanced diet. Here’s the estimated nutritional breakdown per truffle (based on 24 truffles):
- Calories: 180
- Fat: 11g
- Carbohydrates: 20g
- Sugar: 14g
- Protein: 2g
Dietary Considerations: These truffles contain dairy and gluten (unless you use substitutions). They’re not suitable for vegans or those with dairy allergies without modification. However, they are nut-free (check your wafer and chocolate labels to be sure), making them a good option for nut-free classrooms.
Health Benefits: While these aren’t a health food, the cream cheese does provide a small amount of calcium and protein. And honestly, there’s a psychological benefit too—taking the time to make something fun and delicious with your kids is good for the soul. I always feel a little happier after a batch of these.
Personal Perspective: I believe in balance. We eat healthy meals most of the time, but when Halloween rolls around, I’m all in on the treats. These truffles are a way to indulge without going overboard—they’re rich and satisfying, so one or two is usually enough. Plus, they’re made with real ingredients, not artificial junk. That’s a win in my book.
Conclusion
These no-bake monster eyeball truffles are the perfect Halloween treat—fun to make, fun to eat, and surprisingly delicious. They’ve become a tradition in my house, and I hope they become one in yours too. Whether you’re making them for a party, a school event, or just because, they’re guaranteed to bring a smile to everyone’s face.
Don’t be afraid to customize them to your taste. Change the colors, try different flavors, or get the kids involved in the decorating. The best part of this recipe is how adaptable it is. And honestly, the imperfections are what make them charming. A lopsided iris or a slightly messy vein just adds to the monster vibe.
I’d love to hear how yours turn out! Leave a comment below and let me know if you tried any variations, or share a photo on social media and tag me. Happy Halloween, and happy truffle-making!
Frequently Asked Questions
Can I make these monster eyeball truffles ahead of time?
Absolutely! These truffles actually taste better after a day or two in the fridge. You can make them up to a week in advance and store them in an airtight container in the refrigerator. For longer storage, freeze them for up to 3 months.
Can I use dark chocolate instead of white chocolate for the coating?
Yes, you can. Dark chocolate will give the truffles a completely different look and flavor. The iris and pupil will be harder to see against the dark background, so you might want to use a lighter color for the iris, like yellow or green. The technique is the same.
My filling is too sticky to roll. What should I do?
If your filling is too sticky, it usually means there’s too much moisture. Try adding a few more tablespoons of crushed vanilla wafers until the dough holds its shape. Also, make sure your cream cheese is properly softened—cold cream cheese can create lumps that make the dough seem sticky when it’s actually just uneven.
How do I get the coating perfectly smooth?
The key to a smooth coating is thinning it properly. Add 1 tablespoon of coconut oil or shortening to the melted candy melts and stir until smooth. Also, work quickly—the coating will start to set as it cools. If it gets too thick, reheat it in the microwave for a few seconds.
Can I use food coloring instead of candy melts for the iris?
Yes, you can use white candy melts tinted with gel food coloring. Just melt the white candy melts as directed, then stir in a small amount of blue gel food coloring until you reach the desired shade. Avoid liquid food coloring, as it can seize the chocolate. For the red veins, gel food coloring applied with a toothpick works perfectly.
Pin This Recipe!

Easy No-Bake Monster Eyeball Truffles Recipe
These no-bake monster eyeball truffles are a fun, spooky Halloween treat that tastes incredible. With a creamy, rich center and glossy chocolate shell, they’re easy to make and perfect for parties.
- Prep Time: 20 minutes
- Cook Time: 0 minutes
- Total Time: 1 hour 20 minutes (includes chilling and setting time)
- Yield: 20-24 truffles 1x
- Category: Dessert
- Cuisine: American
Ingredients
- 8 ounces cream cheese, softened (full-fat, such as Philadelphia)
- 2 cups vanilla wafer cookies, finely crushed (about one standard box, such as Nilla wafers)
- 1 cup powdered sugar, sifted
- 2 tablespoons unsalted butter, softened
- 1 teaspoon pure vanilla extract
- 12 ounces white candy melts or white chocolate chips (such as Ghirardelli white melting wafers)
- 1 tablespoon coconut oil or shortening
- Blue candy melts or blue gel food coloring (for the iris)
- Mini chocolate chips or black decorating gel (for the pupil)
- Red food coloring gel (for the bloodshot veins)
- Piping bag or small zip-top bag (for applying details)
Instructions
- Crush the vanilla wafers into fine crumbs (about the texture of sand) using a food processor or a zip-top bag and rolling pin. You should have about 2 cups of crumbs.
- In a large mixing bowl, beat the softened cream cheese and butter together until smooth and creamy, about 2 minutes. Add the powdered sugar and vanilla extract, and beat until combined. The mixture should be thick and smooth.
- Gradually add the crushed vanilla wafers to the cream cheese mixture, mixing until fully incorporated. The dough should be firm enough to hold its shape when rolled. If too sticky, add more crumbs; if too dry, add a teaspoon of milk.
- Cover the bowl with plastic wrap and refrigerate for at least 30 minutes to make the dough easier to handle.
- Once chilled, scoop out tablespoon-sized portions of dough and roll into smooth balls. Place on a parchment-lined baking sheet. You should get about 20-24 truffles.
- Place the baking sheet in the freezer for 15-20 minutes to firm up the truffles before dipping.
- In a microwave-safe bowl, combine the white candy melts and coconut oil. Microwave in 30-second intervals, stirring between each, until smooth and fully melted. Be careful not to overheat.
- Remove the truffles from the freezer. Using a toothpick or skewer, dip each truffle into the melted coating, letting the excess drip off. Place the dipped truffle back on the parchment paper. Work quickly.
- While the coating is still wet, add a small dot of blue candy melt (or white coating tinted with blue food coloring) in the center of each truffle. Use a toothpick to spread it slightly, creating the iris.
- Immediately press a mini chocolate chip into the center of each blue dot, pointy side in, to create the pupil. If using black decorating gel, pipe a small dot instead.
- Once the coating has fully set (about 10 minutes), use a toothpick dipped in red food coloring gel to draw thin, wavy lines radiating from the iris for the bloodshot veins.
- Let the truffles sit at room temperature until the coating is completely firm, about 30 minutes. Then transfer to an airtight container and refrigerate until ready to serve.
Notes
Temperature control is key: chill the dough thoroughly before dipping. Thin the coating with coconut oil for a smooth finish. Work in batches to prevent the coating from setting too quickly. Let the coating set completely before adding veins.
Nutrition
- Serving Size: 1 truffle
- Calories: 180
- Sugar: 14
- Sodium: 95
- Fat: 11
- Saturated Fat: 7
- Carbohydrates: 20
- Protein: 2
Keywords: no-bake, Halloween, truffles, monster eyeballs, spooky treats, easy dessert



