Love this? Save it for later!
Share the inspiration with your friends
I wasn’t expecting dessert advice from my plumber, but there I was, standing in my kitchen with a dripping pipe, listening to Frank explain exactly how to make a no-bake pumpkin pie. He was supposed to be fixing the garbage disposal, but instead, he was telling me about his grandmother’s gingersnap crust recipe. I mean, who gets cooking tips from the person holding a wrench? Frank saw the cans of pumpkin puree on my counter and just started talking. “You’re overcomplicating it,” he said, wiping his hands on his coveralls. “Turn on the oven for what? You don’t need heat for pumpkin pie. Trust me on this.”
Honestly, I was skeptical at first. Thanksgiving had just passed, and I had made three traditional pumpkin pies that required serious oven time. My kitchen looked like a flour bomb had gone off. But Frank’s easy no-bake pumpkin pie idea stuck with me. Maybe you’ve been there—standing in a messy kitchen, wondering why something so simple has to be so complicated. Three days later, I tried his method. I swapped the standard graham cracker crust for a crunchy, spicy gingersnap version, and let me tell you, it was a game changer.
This recipe became my go-to for fall gatherings, last-minute dinner invites, and those random Tuesday nights when you just need a slice of something cozy. The best part? It takes fifteen minutes of actual work. No rolling pins, no blind baking, no stress. Just a creamy, dreamy pumpkin filling that sets up perfectly in the fridge. It’s the kind of dessert that makes people close their eyes after the first bite. And honestly, that’s the highest compliment a pie can get.
Why You’ll Love This Recipe
Let me tell you why this easy no-bake pumpkin pie has earned a permanent spot in my dessert rotation. I’ve tested this recipe at least a dozen times, tweaking the spice ratios and testing different crust thicknesses. It’s not just another pumpkin pie recipe—it’s the one that actually works every single time.
- Quick & Easy: Fifteen minutes of prep time, and the fridge does the rest of the work. Perfect for those moments when you need dessert but don’t want to turn on the oven.
- Simple Ingredients: You probably already have most of these in your pantry right now. Canned pumpkin, cream cheese, spices, and store-bought gingersnaps. No fancy grocery store trips required.
- Perfect for Fall Gatherings: Whether it’s Friendsgiving, a potluck, or just a cozy night in, this pie steals the show without stealing your time.
- Crowd-Pleaser: I’ve served this to kids, grandparents, and picky eaters. Everyone goes back for seconds. The gingersnap crust adds this warm, spicy crunch that regular crusts just can’t match.
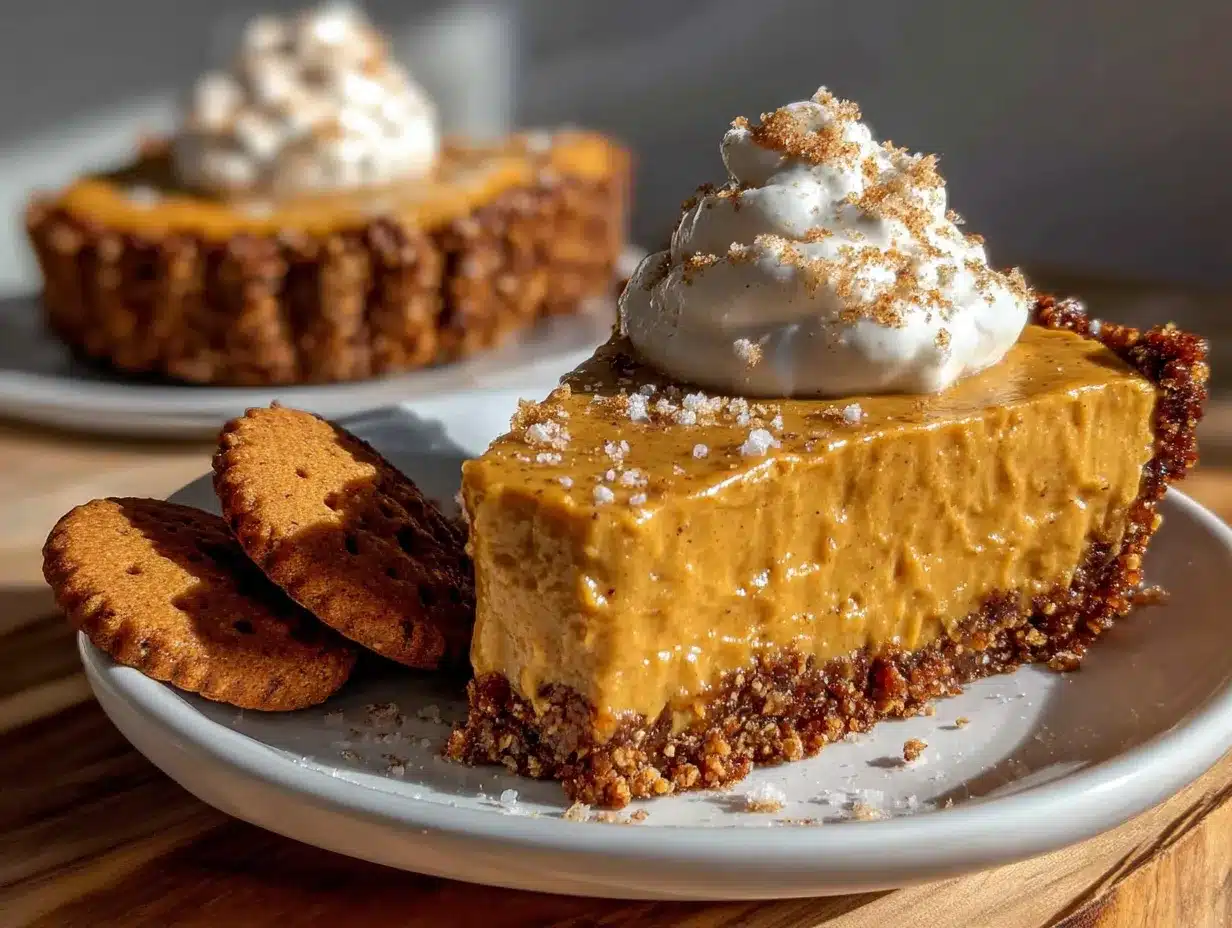
- Unbelievably Delicious: The texture is silky smooth, almost like a pumpkin cheesecake but lighter. The ginger and cloves in the crust pair perfectly with the creamy filling.
What makes this recipe different from all the others? It’s the texture, honestly. Most no-bake pumpkin pies use gelatin or cornstarch, which can leave a weird, jiggly consistency. My version uses cream cheese and a secret ingredient—a little bit of Greek yogurt—to create a filling that’s thick, luscious, and sliceable without being rubbery. It’s comfort food reimagined: faster, cooler, and somehow even more satisfying than the baked version.
What Ingredients You Will Need
This recipe uses simple, wholesome ingredients to deliver that classic pumpkin pie flavor without any complicated steps. Most of these are pantry staples, especially during the fall season.
For the Gingersnap Crust
- 2 cups gingersnap cookie crumbs (about 40 cookies, crushed finely—I recommend Nabisco or a store brand with real ginger)
- 6 tablespoons unsalted butter, melted (adds richness and helps the crust hold together)
- 2 tablespoons brown sugar, packed (adds depth and a hint of molasses)
- 1/4 teaspoon salt (balances the sweetness)
For the Pumpkin Filling
- 8 ounces cream cheese, softened to room temperature (use full-fat for the creamiest texture)
- 1 cup canned pumpkin puree (not pumpkin pie filling—make sure it’s 100% pure pumpkin)
- 1/2 cup granulated sugar
- 1/4 cup plain Greek yogurt (adds tanginess and helps stabilize the filling without gelatin)
- 1 teaspoon vanilla extract
- 1 teaspoon ground cinnamon
- 1/2 teaspoon ground ginger
- 1/4 teaspoon ground nutmeg
- 1/4 teaspoon ground cloves
- Pinch of salt
For the Topping (Optional but Recommended)
- 1 cup heavy whipping cream
- 2 tablespoons powdered sugar
- 1/2 teaspoon vanilla extract
- Crushed gingersnaps for garnish
I recommend using Libby’s canned pumpkin for consistent results—it’s thicker and less watery than some store brands. For the cream cheese, Philadelphia is my go-to because it softens evenly and blends without lumps. If you’re dairy-free, you can substitute the cream cheese with a vegan version and the Greek yogurt with coconut cream, though the texture will be slightly softer.
Equipment Needed
You don’t need a fancy kitchen to make this easy no-bake pumpkin pie. Here’s what you’ll need:
- 9-inch pie dish (glass or ceramic works best for even chilling)
- Food processor or zip-top bag and rolling pin (for crushing the gingersnaps—I’ve used both, and honestly, the bag method is oddly satisfying)
- Electric hand mixer or stand mixer (for beating the filling until smooth)
- Medium mixing bowl (for the crust)
- Large mixing bowl (for the filling)
- Spatula (for scraping every last bit of filling into the crust)
- Measuring cups and spoons
If you don’t have a food processor, don’t worry. Place the gingersnaps in a sturdy zip-top bag, seal it tight, and smash them with a rolling pin or even a heavy skillet. It’s a great way to release some stress, honestly. I’ve also used a meat tenderizer in a pinch—whatever works!
Preparation Method
Follow these steps carefully, and you’ll have a perfect no-bake pumpkin pie every time. The key is patience—let the fridge do its magic.
- Make the crust (5 minutes): In a medium bowl, combine the gingersnap crumbs, melted butter, brown sugar, and salt. Stir with a fork until the mixture looks like wet sand and holds together when you press it. If it’s too dry, add another tablespoon of melted butter. If it’s too wet, add a few more crumbs.
- Press the crust into the pie dish (3 minutes): Transfer the crumb mixture to your 9-inch pie dish. Use the bottom of a measuring cup or a flat-bottomed glass to press the crumbs firmly and evenly into the bottom and up the sides. Take your time here—a well-packed crust won’t crumble when you slice the pie. Place the crust in the refrigerator while you make the filling.
- Beat the cream cheese (3 minutes): In a large mixing bowl, beat the softened cream cheese with an electric mixer on medium speed until smooth and fluffy, about 2 minutes. Scrape down the sides of the bowl with a spatula. This step is crucial—lumps in the cream cheese will ruin the silky texture.
- Add the pumpkin and sugar (2 minutes): Add the pumpkin puree, granulated sugar, and Greek yogurt to the cream cheese. Beat on medium speed until fully combined and smooth, about 1 minute. The mixture should look pale orange and creamy.
- Add the spices and vanilla (1 minute): Add the vanilla extract, cinnamon, ginger, nutmeg, cloves, and salt. Beat on low speed until just combined. Taste the filling—it should be well-spiced but not overpowering. Adjust the spices to your preference.
- Fill the crust (2 minutes): Remove the crust from the refrigerator. Pour the pumpkin filling into the crust and spread it evenly with a spatula. Tap the pie dish gently on the counter to release any air bubbles.
- Chill the pie (4 hours minimum): Cover the pie loosely with plastic wrap or aluminum foil and refrigerate for at least 4 hours, preferably overnight. The filling needs this time to set properly. Don’t rush it—I once tried to serve it after 2 hours, and it was a soupy mess.
- Make the whipped topping (5 minutes, optional): Just before serving, pour the heavy cream, powdered sugar, and vanilla into a chilled bowl. Beat with an electric mixer on high speed until stiff peaks form, about 3-4 minutes. Spread or pipe the whipped cream over the set pie.
- Garnish and serve: Sprinkle crushed gingersnaps over the whipped cream. Slice with a sharp knife, wiping the blade clean between cuts for neat slices.
Cooking Tips & Techniques
After making this easy no-bake pumpkin pie more times than I can count, I’ve learned a few things the hard way. Let me save you some trouble.
Don’t skip softening the cream cheese. I know, I know—you’re in a hurry. But cold cream cheese creates lumps that no amount of beating can fix. Leave it on the counter for 30 minutes, or microwave it in 10-second bursts until it’s soft to the touch.
Press the crust firmly. The biggest mistake people make is being too gentle with the crust. You want it compacted like wet sand at the beach. Use the bottom of a glass and really push down. A loose crust will fall apart when you try to serve the pie.
Chill overnight if possible. Four hours is the minimum, but overnight is where the magic happens. The flavors meld together, the texture firms up perfectly, and the crust absorbs just enough moisture from the filling to become tender but not soggy.
Use room temperature ingredients. Cold pumpkin straight from the can can make the cream cheese seize up. Let everything come to room temperature for about 20 minutes before you start mixing.
Watch your spice levels. Gingersnaps are already spicy, so you might need less cinnamon and ginger in the filling than you think. I once went overboard with the cloves, and the pie tasted like holiday potpourri. Start with the measurements listed, then adjust to taste.
Variations & Adaptations
This recipe is incredibly flexible. Here are some variations I’ve tried and loved:
- Dairy-Free Version: Use dairy-free cream cheese (I like Kite Hill) and coconut cream instead of Greek yogurt. The texture will be slightly softer, so chill for at least 6 hours.
- Gluten-Free Option: Most gingersnaps contain wheat flour, but you can use gluten-free gingersnap cookies or substitute with gluten-free graham crackers mixed with 1/2 teaspoon ground ginger and 1/4 teaspoon cloves.
- Vegan Adaptation: Use vegan cream cheese, coconut cream, and a flax egg substitute (though the filling may be softer). Chill for 8 hours or overnight.
- Pumpkin Cheesecake Twist: Add an extra 4 ounces of cream cheese and reduce the Greek yogurt to 2 tablespoons. The filling becomes denser and more like a cheesecake.
- Maple Pumpkin Version: Replace the granulated sugar with 1/3 cup maple syrup and add 1/2 teaspoon maple extract. Reduce the Greek yogurt to 3 tablespoons to account for the extra liquid.
- Spiced Cranberry Topping: Simmer 1 cup fresh cranberries with 1/4 cup orange juice and 2 tablespoons maple syrup until thickened. Spoon over the set pie before serving.
My personal favorite variation is adding a tablespoon of bourbon to the filling. It adds this warm, smoky depth that pairs beautifully with the gingersnap crust. Just reduce the Greek yogurt by a tablespoon to keep the texture right.
Serving & Storage Suggestions
This easy no-bake pumpkin pie is best served cold, straight from the refrigerator. The filling should be firm but creamy, like a mousse. Let it sit at room temperature for about 10 minutes before slicing for cleaner cuts.
Serving Ideas:
- Top with a generous dollop of whipped cream and a sprinkle of cinnamon.
- Drizzle with caramel sauce for extra indulgence.
- Serve alongside a warm cup of spiced chai or coffee.
- Pair with vanilla ice cream for a hot-and-cold contrast.
Storage Instructions:
- Refrigerator: Cover the pie tightly with plastic wrap or store in an airtight container. It will keep for up to 5 days. The flavors actually improve after the first day.
- Freezer: Wrap the pie (without whipped topping) in plastic wrap, then foil. Freeze for up to 3 months. Thaw in the refrigerator overnight before serving. Add fresh whipped cream after thawing.
Reheating: This is a no-bake pie, so there’s no need to reheat it. However, if you prefer a softer texture, let it sit at room temperature for 20 minutes before serving.
One thing I’ve noticed: the crust stays crunchier for the first two days. After that, it softens slightly as it absorbs moisture from the filling. It’s still delicious, just different. If you want to keep the crust extra crunchy, you can pre-bake it at 350°F for 8 minutes before filling, but that sort of defeats the no-bake purpose.
Nutritional Information & Benefits
Here are the approximate nutritional values per slice (based on 8 servings, including whipped topping):
- Calories: 385
- Total Fat: 24g
- Saturated Fat: 14g
- Cholesterol: 75mg
- Sodium: 320mg
- Total Carbohydrates: 38g
- Dietary Fiber: 2g
- Sugars: 26g
- Protein: 6g
Health Benefits:
- Pumpkin is packed with vitamin A, which supports eye health and immune function. It’s also rich in fiber and low in calories.
- Ginger in the crust has anti-inflammatory properties and can aid digestion.
- Greek yogurt adds protein and probiotics, making this dessert slightly more balanced than traditional pumpkin pie.
Dietary Considerations: This recipe contains dairy and gluten. For a dairy-free version, see the variations section. For a gluten-free option, use gluten-free gingersnaps. This pie is naturally vegetarian and can be made vegan with appropriate substitutions.
Frequently Asked Questions
Can I use fresh pumpkin instead of canned?
Yes, but you’ll need to roast and puree the pumpkin first. Make sure to drain the puree through a cheesecloth or fine-mesh strainer to remove excess water. Fresh pumpkin has more moisture than canned, which can make the filling too soft.
How do I know when the pie is fully set?
The filling should be firm to the touch and should not jiggle when you gently shake the pie dish. It should feel similar to a firm cheesecake. If it’s still wobbly, give it another hour in the fridge.
Can I make this pie ahead of time?
Absolutely! This pie is perfect for making ahead. Prepare it up to 2 days in advance and keep it covered in the refrigerator. Add the whipped topping just before serving for the best presentation.
Why is my filling lumpy?
Lumpy filling usually means the cream cheese wasn’t softened enough before mixing. Make sure it’s at room temperature and beat it until completely smooth before adding the other ingredients. If you still have lumps, try straining the filling through a fine-mesh sieve.
Can I use a different cookie for the crust?
Yes, but the flavor will change. Graham crackers work well, but you’ll lose the spicy kick. Shortbread cookies make a milder crust. If you use a sweeter cookie, reduce the brown sugar to 1 tablespoon. My personal favorite alternative is speculoos cookies—they have a similar spice profile to gingersnaps.
Conclusion
This easy no-bake pumpkin pie with gingersnap crust has become my secret weapon for fall entertaining. It’s the dessert that looks impressive, tastes incredible, and takes almost no effort to make. Honestly, it’s hard to believe something this good comes together in just fifteen minutes. The creamy pumpkin filling, the spicy crunch of the crust, the pillowy whipped cream on top—it’s everything you want in a pumpkin pie without the stress of baking.
I hope you give this recipe a try and make it your own. Add extra ginger if you like it spicy, swap the toppings, or experiment with different crusts. That’s the beauty of no-bake desserts—they’re forgiving and fun to play with. Let me know in the comments how yours turns out! Did you add a special twist? Did your family fight over the last slice? I’d love to hear your stories. Happy no-baking, friends!
Pin This Recipe!
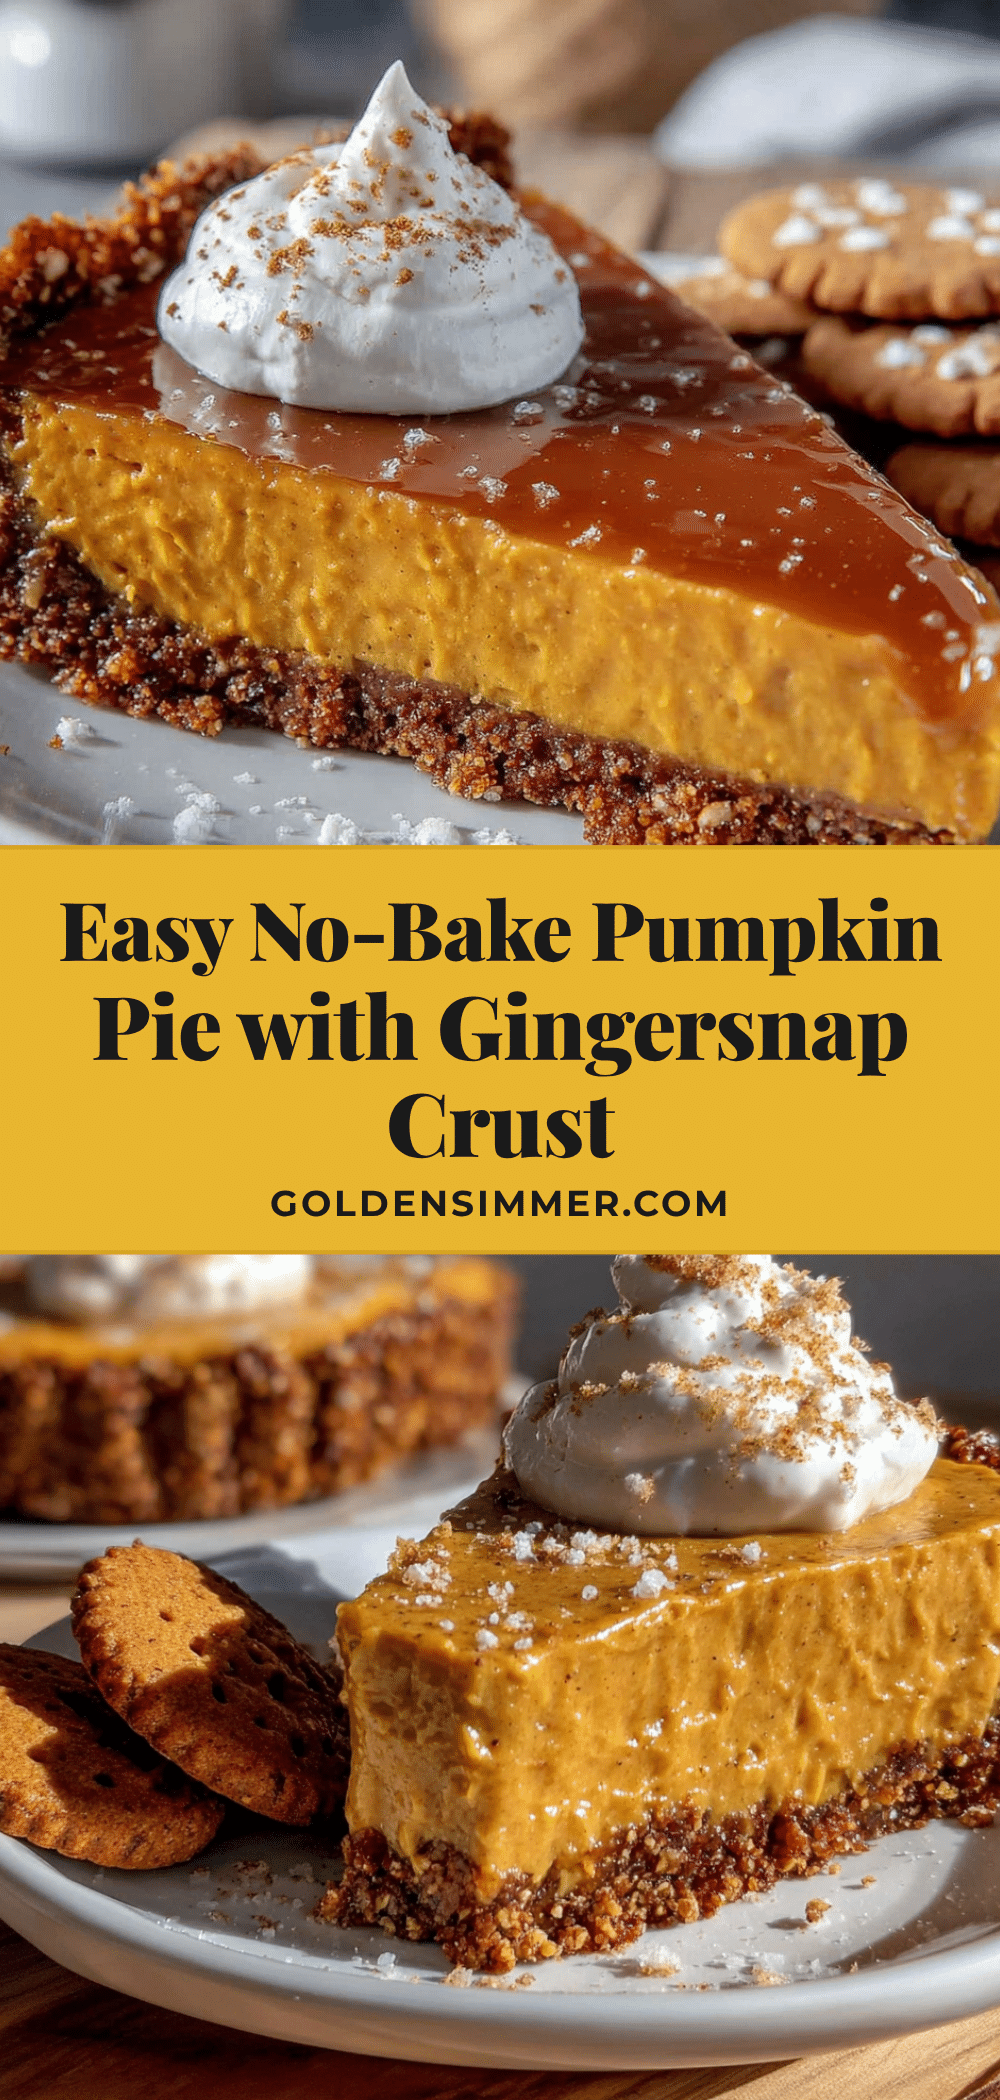
Easy No-Bake Pumpkin Pie with Gingersnap Crust (Best 15-Minute Dessert)

A creamy, dreamy no-bake pumpkin pie with a crunchy gingersnap crust that comes together in just 15 minutes. Perfect for fall gatherings, last-minute dinner invites, or cozy nights in.
- Prep Time: 15 minutes
- Cook Time: 0 minutes
- Total Time: 4 hours 15 minutes (includes chilling)
- Yield: 8 servings 1x
- Category: Dessert
- Cuisine: American
Ingredients
- 2 cups gingersnap cookie crumbs (about 40 cookies, crushed finely)
- 6 tablespoons unsalted butter, melted
- 2 tablespoons brown sugar, packed
- 1/4 teaspoon salt
- 8 ounces cream cheese, softened to room temperature
- 1 cup canned pumpkin puree (not pumpkin pie filling)
- 1/2 cup granulated sugar
- 1/4 cup plain Greek yogurt
- 1 teaspoon vanilla extract
- 1 teaspoon ground cinnamon
- 1/2 teaspoon ground ginger
- 1/4 teaspoon ground nutmeg
- 1/4 teaspoon ground cloves
- Pinch of salt
- 1 cup heavy whipping cream (for topping, optional)
- 2 tablespoons powdered sugar (for topping, optional)
- 1/2 teaspoon vanilla extract (for topping, optional)
- Crushed gingersnaps for garnish (optional)
Instructions
- Make the crust: In a medium bowl, combine the gingersnap crumbs, melted butter, brown sugar, and salt. Stir with a fork until the mixture looks like wet sand and holds together when pressed.
- Press the crust into the pie dish: Transfer the crumb mixture to a 9-inch pie dish. Use the bottom of a measuring cup or a flat-bottomed glass to press the crumbs firmly and evenly into the bottom and up the sides. Place the crust in the refrigerator while you make the filling.
- Beat the cream cheese: In a large mixing bowl, beat the softened cream cheese with an electric mixer on medium speed until smooth and fluffy, about 2 minutes. Scrape down the sides of the bowl with a spatula.
- Add the pumpkin and sugar: Add the pumpkin puree, granulated sugar, and Greek yogurt to the cream cheese. Beat on medium speed until fully combined and smooth, about 1 minute.
- Add the spices and vanilla: Add the vanilla extract, cinnamon, ginger, nutmeg, cloves, and salt. Beat on low speed until just combined. Taste and adjust spices to preference.
- Fill the crust: Remove the crust from the refrigerator. Pour the pumpkin filling into the crust and spread it evenly with a spatula. Tap the pie dish gently on the counter to release any air bubbles.
- Chill the pie: Cover the pie loosely with plastic wrap or aluminum foil and refrigerate for at least 4 hours, preferably overnight.
- Make the whipped topping (optional): Just before serving, pour the heavy cream, powdered sugar, and vanilla into a chilled bowl. Beat with an electric mixer on high speed until stiff peaks form, about 3-4 minutes. Spread or pipe the whipped cream over the set pie.
- Garnish and serve: Sprinkle crushed gingersnaps over the whipped cream. Slice with a sharp knife, wiping the blade clean between cuts for neat slices.
Notes
For best results, chill the pie overnight. The crust stays crunchier for the first two days. If you want to keep the crust extra crunchy, you can pre-bake it at 350°F for 8 minutes before filling, but that defeats the no-bake purpose. For a dairy-free version, use dairy-free cream cheese and coconut cream instead of Greek yogurt. For a gluten-free option, use gluten-free gingersnaps.
Nutrition
- Serving Size: 1 slice (1/8 of pie)
- Calories: 385
- Sugar: 26
- Sodium: 320
- Fat: 24
- Saturated Fat: 14
- Carbohydrates: 38
- Fiber: 2
- Protein: 6
Keywords: no-bake pumpkin pie, gingersnap crust, easy pumpkin pie, fall dessert, quick dessert, no-bake dessert