Love this? Save it for later!
Share the inspiration with your friends
I was standing in the checkout line at the hardware store—of all places—when the man behind me, holding a single rusty pipe wrench, started talking about chicken and rice. Not the kind you’d expect from a guy in a flannel shirt covered in sawdust. But there he was, explaining how his wife had taught him this one-pan garlic butter chicken and rice recipe that she’d learned from her grandmother, and how it had saved their weeknight dinners for twenty years. I wasn’t taking cooking advice from a stranger in the plumbing aisle—honestly, I was just trying to pay for a new garden hose. But he kept talking, and I kept listening, and by the time I left, I’d scribbled the gist of it on the back of my receipt.
That receipt got crumpled up, stuffed in my glovebox, and forgotten for about three months. Then one Tuesday night, staring into my fridge with zero inspiration, I remembered that conversation. I dug out the receipt, smoothed it on the counter, and gave it a shot. Let me tell you—that first bite was a moment. The rice was perfectly fluffy, the chicken was tender and golden, and the garlic butter sauce had soaked into every grain. I mean, I actually texted my sister about it, which is something I rarely do for a Tuesday dinner.
This easy one-pan garlic butter chicken and rice has become my go-to for those nights when I want something that feels special but doesn’t require a sink full of dishes. Maybe you’ve been there—standing in your own kitchen, hungry and tired, wishing dinner could just happen without a production. This recipe is that wish come true. It’s simple enough for a beginner but impressive enough to serve company, and it all comes together in one pan. No juggling multiple pots, no complicated techniques—just honest, delicious food that makes you wonder why you ever bothered with anything fussier.
Why You’ll Love This Recipe
This isn’t just another chicken and rice recipe—it’s the one that’ll earn a permanent spot in your weekly rotation. I’ve tested it more times than I can count, tweaking the liquid ratios, playing with the heat levels, and even burning a batch or two (you know, for science). Here’s why it works so well:
- One Pan, Minimal Mess: Everything cooks in a single skillet or Dutch oven. That means less time scrubbing and more time actually enjoying your meal. Honestly, this is the kind of recipe that makes you feel like you’ve hacked the system.
- Simple Pantry Ingredients: You probably already have most of these items in your kitchen. Chicken thighs, rice, garlic, butter, chicken broth—nothing fancy, nothing hard to find. No trips to specialty stores required.
- Perfect for Busy Weeknights: From start to finish, this dish comes together in about 45 minutes. Most of that time is hands-off while the rice simmers, giving you a chance to set the table, pour a glass of wine, or just stare at the wall for a few minutes.
- Crowd-Pleasing Flavors: Garlic butter is basically magic, and when it infuses tender chicken and fluffy rice, everyone at the table is happy. Kids love it, adults love it, and even picky eaters tend to clean their plates.
- Foolproof Results Every Time: The method is designed to be forgiving. Even if you’re not a confident cook, the step-by-step process ensures your rice comes out perfectly cooked and your chicken stays juicy.
What really sets this easy one-pan garlic butter chicken and rice apart is the technique of toasting the rice in the garlic butter before adding the liquid. That extra step adds a nutty depth that you just don’t get from dumping everything in at once. It’s a small thing, but it makes a huge difference in the final dish. This isn’t just another weeknight dinner—it’s the kind of meal that makes you close your eyes after that first forkful and think, yeah, this is exactly what I needed.
What Ingredients You Will Need
This recipe uses straightforward ingredients that work together to create something truly satisfying. The beauty is in the simplicity—each component plays a specific role in building flavor and texture without any fuss.
- Chicken Thighs (1.5 lbs / 680g): Boneless, skinless thighs are my go-to here. They stay juicy during cooking and have more flavor than chicken breasts. If you prefer breasts, go for it, but keep an eye on cooking time to avoid dryness.
- Butter (4 tablespoons / 56g), unsalted: We’re using real butter here—no substitutes. It creates the rich base for the garlic and helps the rice toast evenly. I prefer unsalted so I can control the salt level.
- Garlic (6 cloves, minced): Fresh garlic is non-negotiable in this dish. Pre-minced stuff from a jar won’t give you the same aromatic punch. Take the extra 30 seconds to mince it yourself—you’ll taste the difference.
- Long-Grain White Rice (1.5 cups / 300g): Basmati or jasmine work beautifully. The long grains stay separate and fluffy rather than clumping together. Avoid short-grain rice here unless you’re going for a risotto-like texture.
- Chicken Broth (3 cups / 710ml): Use good-quality broth—it’s the main liquid, so its flavor matters. Low-sodium is fine, just adjust your salt accordingly. Homemade is amazing if you have it, but boxed works perfectly.
- Onion (1 medium, diced): Yellow or sweet onion adds a subtle sweetness that balances the garlic. Dice it small so it melts into the rice as it cooks.
- Paprika (1 teaspoon): Smoked paprika adds a lovely depth, but sweet paprika works too. This is where you can play with heat—add a pinch of cayenne if you like things spicy.
- Dried Thyme (1/2 teaspoon): Earthy and slightly floral, thyme pairs beautifully with garlic butter. You can substitute rosemary or oregano if that’s what you have on hand.
- Salt and Black Pepper (to taste): Season generously. The rice needs enough salt to taste good on its own, not just the chicken.
- Fresh Parsley (for garnish): Optional but recommended—it adds a pop of color and freshness that cuts through the richness.
I recommend using chicken thighs from a trusted brand like Bell & Evans or Springer Mountain Farms if you can find them. For the broth, Swanson’s low-sodium works great, but Kitchen Basics has a richer flavor that I personally love. And please, please use real butter—margarine or spreads will mess with the texture and taste.
Equipment Needed
You don’t need a lot of fancy gear for this one, which is part of the appeal. Here’s what you’ll want to have on hand:
- Large Skillet or Dutch Oven (12-inch / 30cm): A heavy-bottomed pan with a tight-fitting lid is ideal. Cast iron, stainless steel, or non-stick all work—just make sure it’s oven-safe if you plan to finish it in the oven. I use my trusty Lodge cast iron skillet for this, and it’s never let me down.
- Wooden Spoon or Spatula: For stirring the rice and scraping up any browned bits from the bottom of the pan. Metal utensils can scratch non-stick surfaces, so wooden or silicone is safer.
- Sharp Knife and Cutting Board: For mincing garlic, dicing onion, and trimming any excess fat from the chicken. A good chef’s knife makes prep feel effortless.
- Measuring Cups and Spoons: Accuracy matters for the liquid-to-rice ratio. Eyeballing it can lead to mushy or undercooked rice.
- Lid or Foil: If your skillet doesn’t have a lid, a sheet of heavy-duty aluminum foil works as a tight seal. Just crimp it around the edges.
If you don’t have a Dutch oven, a deep non-stick skillet with straight sides is a great budget-friendly alternative. I’ve even made this in a large stainless steel pot in a pinch—it worked fine, though the rice stuck a little more. Just be patient with the stirring and you’ll be okay.
Preparation Method
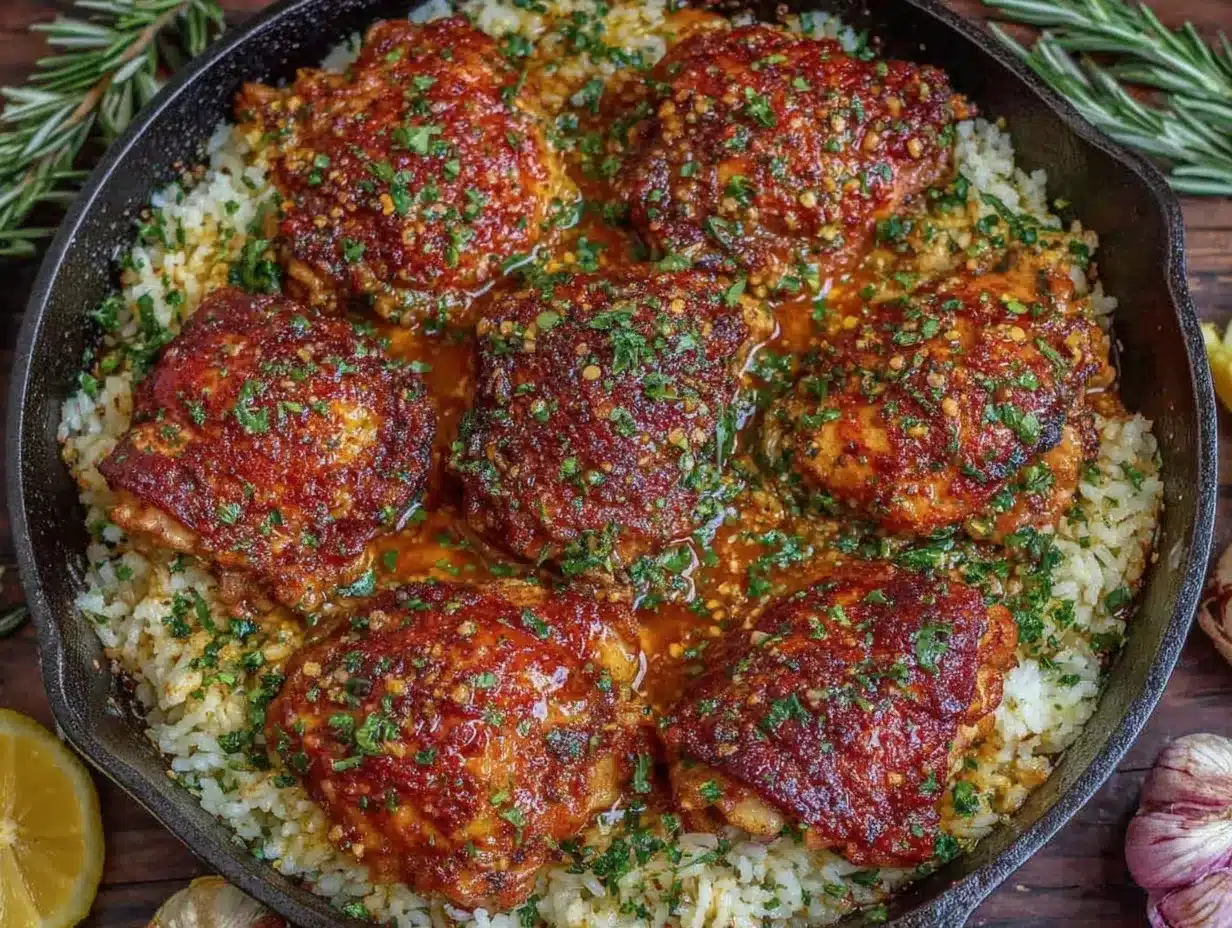
Let’s get cooking. This process is straightforward, but I’ll walk you through each step with the little details that make a difference.
- Prep Your Ingredients (10 minutes): Start by patting the chicken thighs dry with paper towels. This helps them brown instead of steam. Season both sides generously with salt, pepper, and half the paprika. Dice the onion, mince the garlic, and measure out your rice and broth. Having everything ready before you start cooking makes the process so much smoother—trust me on this one.
- Brown the Chicken (8-10 minutes): Heat 2 tablespoons of butter in your skillet over medium-high heat. Once it’s melted and sizzling, add the chicken thighs in a single layer—don’t overcrowd the pan. Cook for 4-5 minutes per side until golden brown and crispy. The chicken won’t be fully cooked through yet, and that’s fine. Transfer the thighs to a plate and set them aside. Don’t wipe out the pan—those browned bits are flavor gold.
- Sauté the Aromatics (3-4 minutes): Reduce the heat to medium and add the remaining 2 tablespoons of butter. Once melted, toss in the diced onion and cook for 2 minutes until softened and translucent. Add the minced garlic and cook for another 30-60 seconds until fragrant—don’t let it burn or it’ll turn bitter. Stir in the remaining paprika and dried thyme, letting the spices bloom for about 15 seconds.
- Toast the Rice (2-3 minutes): Add the rice to the pan and stir it well, coating every grain in that garlic butter mixture. Cook for 2-3 minutes, stirring constantly, until the rice starts to look slightly translucent at the edges and gives off a nutty aroma. This toasting step is what sets this easy one-pan garlic butter chicken and rice apart from the rest—it adds a depth of flavor that you can’t get any other way.
- Add the Broth and Simmer (2 minutes): Pour in the chicken broth and stir everything together, scraping the bottom of the pan to release any stuck-on bits. Bring it to a gentle boil, then season with a little more salt and pepper. Taste the broth—it should be well-seasoned since the rice will absorb it.
- Return the Chicken and Cook (20-25 minutes): Nestle the browned chicken thighs back into the rice, pushing them down slightly so they’re partially submerged. Reduce the heat to low, cover the pan with a tight-fitting lid, and let it simmer gently. Do NOT lift the lid during cooking—the steam is what cooks the rice evenly. Set a timer for 20 minutes and resist the urge to peek.
- Rest and Fluff (5 minutes): After 20 minutes, turn off the heat and let the pan sit covered for another 5 minutes. This resting period allows the rice to absorb any remaining liquid and steam to perfection. After resting, remove the lid, fluff the rice gently with a fork, and check that the chicken is cooked through (internal temp of 165°F / 74°C). If the rice is still a bit wet, let it sit uncovered for a few more minutes.
- Garnish and Serve: Sprinkle fresh parsley over the top for a pop of color and freshness. Serve straight from the pan—this is a one-pan wonder, after all. The rice should be fluffy, the chicken tender, and the whole dish rich with garlic butter goodness.
Cooking Tips & Techniques
Over the years, I’ve made this recipe more times than I can count, and I’ve definitely learned a few things the hard way. Here are the tips that make a real difference:
- Don’t Skip Toasting the Rice: I know it’s tempting to just dump everything in and walk away, but that toasting step is where the magic happens. It adds a nutty flavor and helps the rice maintain its structure during simmering. I once skipped it because I was in a hurry, and the rice turned out bland and mushy. Never again.
- Use a Heavy-Bottomed Pan: Thin pans distribute heat unevenly, which can lead to burnt rice on the bottom and undercooked rice on top. A heavy skillet or Dutch oven ensures even heat and prevents scorching. If you’re using a thinner pan, keep the heat on the lower side and stir more frequently during the toasting stage.
- Resist the Urge to Peek: Every time you lift that lid, steam escapes, and that steam is what cooks the rice. If you’re worried about burning, trust the low heat and the timing. I ruined my first batch by checking it three times—the rice came out uneven and crunchy in spots. Learn from my mistake.
- Adjust Liquid for Different Rice Types: Long-grain white rice needs a 2:1 liquid-to-rice ratio. If you’re using brown rice, increase the broth to 3.5 cups and extend the cooking time to 40-45 minutes. For jasmine or basmati, stick with the 2:1 ratio but reduce cooking time by a few minutes.
- Let the Chicken Rest Before Searing: Cold chicken straight from the fridge won’t brown as well. Let it sit at room temperature for 15 minutes before cooking. This ensures a beautiful golden crust without overcooking the exterior.
One more thing—if you’re using a non-stick pan, be careful with high heat. Non-stick coatings can degrade above 500°F, so keep things at medium or medium-high for the browning step. Cast iron or stainless steel can handle higher heat without issue.
Variations & Adaptations
This recipe is incredibly versatile, and I’ve experimented with quite a few twists over the years. Here are some of my favorites:
- Vegetable-Packed Version: Add a cup of frozen peas and carrots during the last 5 minutes of cooking, or stir in a handful of fresh spinach right before serving. The spinach wilts beautifully into the hot rice, adding color and nutrients without extra effort.
- Creamy Garlic Butter Chicken and Rice: Stir in 1/4 cup of heavy cream or full-fat coconut milk after adding the broth. It makes the rice extra luxurious and adds a subtle sweetness that balances the garlic. I tried this on a whim one rainy Sunday, and it’s now my cold-weather favorite.
- Spicy Kick: Add 1/2 teaspoon of red pepper flakes along with the garlic, or use a pinch of cayenne pepper in the spice mix. For an even bigger punch, slice a fresh jalapeño and tuck it into the rice before covering. The heat builds as it cooks, so adjust to your tolerance.
- Herb-Infused Version: Swap the dried thyme for fresh rosemary or oregano. Tuck a few sprigs into the pan before covering, then remove them before serving. Fresh herbs add a brightness that dried just can’t match.
- Dairy-Free Adaptation: Use olive oil or a high-quality vegan butter in place of regular butter. The flavor changes slightly, but it’s still delicious. Just make sure your broth is also dairy-free.
I once made a lemon-herb version by adding the zest of one lemon and a tablespoon of lemon juice along with the broth. It was bright and fresh—perfect for spring. Don’t be afraid to play around and make this recipe your own. That’s the beauty of a simple dish like this.
Serving & Storage Suggestions
This dish is best served hot, straight from the pan. The rice is at its fluffiest right after resting, and the chicken is at its juiciest. Here’s how to make the most of it:
- Serving Temperature: Serve immediately while the rice is steaming. If you’re making it ahead, reheat gently with a splash of broth to restore moisture.
- Presentation: Spoon the rice onto plates or into shallow bowls, then top with a chicken thigh and a sprinkle of fresh parsley. A squeeze of lemon juice over the top adds brightness and cuts through the richness.
- Complementary Sides: A simple green salad with a vinaigrette works beautifully to balance the richness. Steamed green beans or roasted asparagus also pair well. For a heartier meal, serve with crusty bread to soak up any remaining garlic butter sauce.
- Beverage Pairings: A crisp white wine like Sauvignon Blanc or a light Pinot Grigio complements the garlic butter flavors. For beer drinkers, a pale lager or pilsner works great. Non-alcoholic options include sparkling water with lemon or a tall glass of iced tea.
- Storage: Store leftovers in an airtight container in the refrigerator for up to 4 days. The flavors actually meld and deepen overnight, making it even better the next day.
- Reheating: The best way to reheat is in a skillet over medium-low heat with a splash of chicken broth or water. Cover and cook for 5-7 minutes, stirring occasionally, until heated through. Microwaving works in a pinch but can dry out the rice—add a damp paper towel over the bowl to trap steam.
- Freezing: This dish freezes surprisingly well. Portion it into freezer-safe containers and freeze for up to 3 months. Thaw overnight in the fridge and reheat as directed above. The rice might be slightly softer after freezing, but the flavor remains excellent.
I’ve found that this easy one-pan garlic butter chicken and rice actually develops more depth of flavor after a day in the fridge. The garlic mellows, the spices meld, and everything becomes even more cohesive. So don’t hesitate to make a double batch—you’ll thank yourself later.
Nutritional Information & Benefits
Here’s an approximate nutritional breakdown per serving (based on 4 servings):
| Nutrient | Amount |
|---|---|
| Calories | 520 |
| Protein | 35g |
| Carbohydrates | 48g |
| Fat | 20g |
| Saturated Fat | 9g |
| Fiber | 1g |
| Sodium | 680mg |
This dish offers a good balance of protein from the chicken and energy from the rice. Chicken thighs are rich in B vitamins, particularly B6 and B12, which support energy metabolism and brain function. The garlic provides allicin, a compound with potential immune-boosting and anti-inflammatory properties. Butter, while high in saturated fat, also contains fat-soluble vitamins A, D, E, and K. If you’re watching your sodium, use low-sodium broth and go easy on the added salt. For a lighter option, swap chicken thighs for boneless, skinless breasts and reduce the butter to 2 tablespoons.
This recipe is naturally gluten-free, making it suitable for those with celiac disease or gluten sensitivity. It’s also nut-free and egg-free, though always check your specific ingredient labels to be sure. If you’re following a low-carb diet, you can serve the chicken and garlic butter sauce over cauliflower rice instead of regular rice—just reduce the broth to 1 cup and cook for about 10 minutes covered.
Conclusion
This easy one-pan garlic butter chicken and rice has become a staple in my kitchen for good reason. It’s the kind of recipe that delivers big flavor without demanding a lot of time or effort. Whether you’re a seasoned cook looking for a reliable weeknight dinner or a beginner wanting to build confidence in the kitchen, this dish has your back.
I love that this recipe is forgiving enough to accommodate my lazy days but impressive enough to serve when friends come over. The garlic butter sauce seeps into every grain of rice, the chicken stays tender and juicy, and the whole thing comes together in one pan. Honestly, what more could you ask for from a Tuesday night dinner?
I’d love to hear how this turns out for you. Did you add your own twist? Did your picky eater actually clean their plate? Drop a comment below and share your experience—your feedback might just inspire someone else’s dinner tonight. And if you loved this recipe, consider sharing it with a friend who could use a little less stress in their kitchen. Happy cooking, friends!
Frequently Asked Questions
Can I use chicken breasts instead of thighs?
Absolutely. Boneless, skinless chicken breasts work well, though they cook faster and can dry out more easily. Reduce the simmering time to 15-18 minutes and check for doneness at 165°F (74°C). You might want to pound thicker breasts to an even thickness for more consistent cooking.
Why is my rice still crunchy after 20 minutes?
Crunchy rice usually means one of three things: the heat was too low, the lid wasn’t tight enough, or you peeked too often. Make sure your pan has a snug-fitting lid and that the heat is on low—not too low, but enough to maintain a gentle simmer. If it’s still crunchy after 20 minutes, add 1/4 cup of broth, cover, and cook for another 5 minutes.
Can I make this in a slow cooker or Instant Pot?
For the Instant Pot, use the sauté function for browning and toasting, then pressure cook on high for 5 minutes with a natural release. Use slightly less broth (2.5 cups) since less liquid evaporates. For a slow cooker, brown the chicken and toast the rice in a skillet first, then transfer everything to the slow cooker and cook on low for 3-4 hours. The rice may be softer with this method.
How can I prevent the rice from sticking to the bottom?
Using a heavy-bottomed pan is the best prevention. Also, make sure you’re using enough butter and broth, and don’t stir the rice once it’s covered and simmering. If you’re using a thinner pan, keep the heat on the lower side of low and consider using a heat diffuser. Letting the rice rest for 5 minutes after cooking helps release any stuck grains.
Can I add vegetables directly to the pan?
Yes, and it’s a great way to make this a complete one-pan meal. Add frozen peas and carrots during the last 5 minutes of cooking, or stir in fresh spinach or kale right before serving. For heartier veggies like bell peppers or zucchini, sauté them with the onion in step 3 before adding the garlic. Just keep in mind that watery vegetables can affect the rice texture, so adjust the broth slightly if needed.
Pin This Recipe!

Easy One-Pan Garlic Butter Chicken and Rice Recipe

This easy one-pan garlic butter chicken and rice is a weeknight dinner hero. Tender chicken thighs and fluffy rice are cooked together in a rich garlic butter sauce, all in one pan for minimal cleanup.
- Prep Time: 10 minutes
- Cook Time: 35 minutes
- Total Time: 45 minutes
- Yield: 4 servings 1x
- Category: Main Course
- Cuisine: American
Ingredients
- 1.5 lbs (680g) boneless, skinless chicken thighs
- 4 tablespoons (56g) unsalted butter
- 6 cloves garlic, minced
- 1.5 cups (300g) long-grain white rice (basmati or jasmine)
- 3 cups (710ml) chicken broth
- 1 medium onion, diced
- 1 teaspoon paprika (smoked or sweet)
- 1/2 teaspoon dried thyme
- Salt and black pepper to taste
- Fresh parsley for garnish
Instructions
- Prep your ingredients: Pat chicken thighs dry with paper towels. Season both sides generously with salt, pepper, and half the paprika. Dice the onion, mince the garlic, and measure out rice and broth.
- Brown the chicken: Heat 2 tablespoons of butter in a large skillet or Dutch oven over medium-high heat. Add chicken thighs in a single layer and cook for 4-5 minutes per side until golden brown. Transfer to a plate and set aside.
- Sauté the aromatics: Reduce heat to medium. Add remaining 2 tablespoons of butter. Cook diced onion for 2 minutes until softened. Add minced garlic and cook for 30-60 seconds until fragrant. Stir in remaining paprika and dried thyme.
- Toast the rice: Add rice to the pan and stir to coat in the garlic butter mixture. Cook for 2-3 minutes, stirring constantly, until rice is slightly translucent and nutty.
- Add the broth: Pour in chicken broth and stir, scraping up any browned bits. Bring to a gentle boil. Season with salt and pepper.
- Return the chicken and cook: Nestle the browned chicken thighs into the rice. Reduce heat to low, cover tightly, and simmer for 20-25 minutes. Do not lift the lid.
- Rest and fluff: Turn off heat and let the pan sit covered for 5 minutes. Remove lid, fluff rice with a fork, and check that chicken is cooked through (internal temperature of 165°F / 74°C).
- Garnish and serve: Sprinkle fresh parsley over the top. Serve straight from the pan.
Notes
Don’t skip toasting the rice—it adds nutty depth. Use a heavy-bottomed pan for even heat. Resist the urge to peek while simmering. For brown rice, increase broth to 3.5 cups and cook 40-45 minutes. Let chicken rest at room temperature for 15 minutes before searing for better browning.
Nutrition
- Serving Size: 1 serving (about 1/4
- Calories: 520
- Sugar: 2
- Sodium: 680
- Fat: 20
- Saturated Fat: 9
- Carbohydrates: 48
- Fiber: 1
- Protein: 35
Keywords: one-pan chicken and rice, garlic butter chicken, easy weeknight dinner, one skillet meal, chicken thigh recipe



