Love this? Save it for later!
Share the inspiration with your friends
My neighbor, a man named Frank who I’d only ever seen grilling steaks and ribs, had claimed to hate pumpkin bread for forty-two years. Forty-two years. He said it was “too sweet,” “too wet,” “a sad excuse for a baked good,” and a bunch of other things I politely pretended not to hear. I mean, who actively hates pumpkin bread? It’s practically a hug in loaf form. But Frank was a man of strong opinions, especially about food. So, when our building’s annual fall potluck rolled around, I decided to make my version of the classic, mostly because I had a can of pumpkin puree that was about to expire. I didn’t even tell him what it was. I just put a slice on a plate, handed it to him, and said, “Try this.” He took a bite. Then another. Then he looked at me with this confused, almost betrayed expression. “What is this?” he asked. I just smiled. The man who hated pumpkin bread ate three slices. I think he might have had a fourth when he thought no one was looking. Honestly, that moment was more satisfying than any compliment. It proved what I’d always suspected: it’s not that people don’t like a thing; they just haven’t had the right version yet. And this crowd-pleasing pumpkin bread with cream cheese swirl? It’s the right version.
This isn’t just another pumpkin bread recipe. It’s the one that makes people close their eyes after the first bite. It’s the one that disappears from the dessert table before the store-bought pies are even touched. The secret is a simple cream cheese swirl that cuts through the warm, spiced pumpkin flavor with a tangy, rich ribbon of goodness. It looks impressive—like something you’d see in a fancy bakery window—but honestly, it’s one of the easiest things you can bake. You don’t need a stand mixer or any special equipment. Just a few bowls, a whisk, and a loaf pan. Maybe you’ve been there, staring at another dry, bland pumpkin loaf, wondering why you bothered. I promise you, this is not that loaf. This is the one that converts the haters and makes the fans swoon. Let me tell you how to make it.
Why You’ll Love This Recipe
This isn’t just a recipe I threw together on a whim. After years of testing (and eating my fair share of failures), I can confidently say this version hits every single note perfectly. It’s been family-approved, neighbor-tested, and has earned a permanent spot in my fall baking rotation. Here’s why I think you’ll feel the same way:
- Quick & Easy: From start to oven in about 15 minutes. No complicated steps, no temperamental techniques. It’s a one-bowl batter (plus the swirl), so cleanup is a breeze. Perfect for a busy weeknight when you need a dessert in a pinch.
- Simple Ingredients: You probably have 90% of these ingredients in your pantry right now. Canned pumpkin, flour, sugar, eggs, oil, and basic spices. The cream cheese for the swirl is the only “special” ingredient, and it’s as basic as it gets.
- Perfect for Hosting: This is the ultimate potluck or dinner party dessert. It travels well, slices beautifully, and looks way more complicated than it is. It’s the kind of thing that makes people think you spent all day in the kitchen when you really just threw it together between laundry loads.
- Unbelievably Delicious: The texture is what gets me every time. It’s incredibly moist without being gummy, with a tender crumb that practically melts in your mouth. The cream cheese swirl adds a tangy, rich layer that balances the sweet, spiced pumpkin perfectly. It’s comfort food at its finest.
- Crowd-Pleaser: I’ve served this to kids, adults, picky eaters, and even pumpkin skeptics (hi, Frank!). It gets rave reviews every single time. It’s sweet enough to feel like a treat, but not so sweet that it’s cloying. It’s just right.
What makes this recipe different from the dozens of others out there? It’s the balance. So many pumpkin breads are either too dry or too dense. This one uses oil for moisture and a specific ratio of wet to dry ingredients that I’ve dialed in over countless batches. The cream cheese swirl isn’t an afterthought—it’s a carefully crafted mixture that stays creamy and doesn’t sink to the bottom. It’s the kind of recipe where every element has been considered, and it shows in the final bite. This is the bread you make when you want to impress without the stress.
What Ingredients You Will Need
This recipe uses simple, humble ingredients to create something truly special. The magic is in the combination and the technique, not in any hard-to-find fancy items. Let’s break down what you’ll need for both the pumpkin bread base and the cream cheese swirl.
For the Pumpkin Bread
- All-Purpose Flour (1 ¾ cups / 220g): This gives the bread its structure. I don’t recommend substituting a gluten-free flour blend here without expecting a different texture. For the best results, spoon the flour into your measuring cup and level it off—don’t scoop it, or you’ll pack it down and end up with dry bread.
- Granulated Sugar (1 cup / 200g): Provides sweetness and helps create that tender crumb. You can reduce it to ¾ cup if you prefer a less sweet bread, but I find this amount is perfect to balance the tangy cream cheese.
- Brown Sugar (½ cup / 100g, packed): This adds moisture and a deep, almost caramel-like flavor that pairs beautifully with the pumpkin and spices. Make sure it’s packed firmly into your measuring cup.
- Baking Soda (1 teaspoon): This is the main leavening agent. It reacts with the acidity in the pumpkin and brown sugar to help the bread rise. Make sure it’s fresh—old baking soda can lead to a flat, dense loaf.
- Baking Powder (½ teaspoon): A little extra lift to ensure a light, airy crumb.
- Salt (½ teaspoon): Don’t skip it! Salt enhances all the other flavors and prevents the bread from tasting flat.
- Ground Cinnamon (2 teaspoons): The star of the show. I use a good-quality cinnamon for the best flavor.
- Ground Nutmeg (½ teaspoon): Adds warmth and a subtle, earthy note. Freshly grated is amazing if you have it.
- Ground Ginger (½ teaspoon): A little kick of spice that keeps the flavor profile interesting.
- Ground Cloves (¼ teaspoon): Use a light hand here—cloves are potent. They add that classic “pumpkin pie” aroma.
- Vegetable Oil (½ cup / 120ml): This is the key to an incredibly moist bread that stays fresh for days. Use a neutral-flavored oil like canola, grapeseed, or avocado oil. Do not substitute melted butter—it will change the texture and make the bread denser.
- Large Eggs (2, at room temperature): They bind the ingredients together and add richness. Room-temperature eggs incorporate more easily into the batter, resulting in a better texture.
- Vanilla Extract (1 teaspoon): Enhances the sweetness and rounds out the spice flavors. Use pure vanilla extract if you can—it makes a difference.
- Canned Pumpkin Puree (1 ¾ cups / 15-ounce can): Make sure you’re buying 100% pure pumpkin puree, NOT pumpkin pie filling. The pie filling is pre-sweetened and spiced, which will throw off the entire recipe. Libby’s is my go-to brand for consistent results.
For the Cream Cheese Swirl
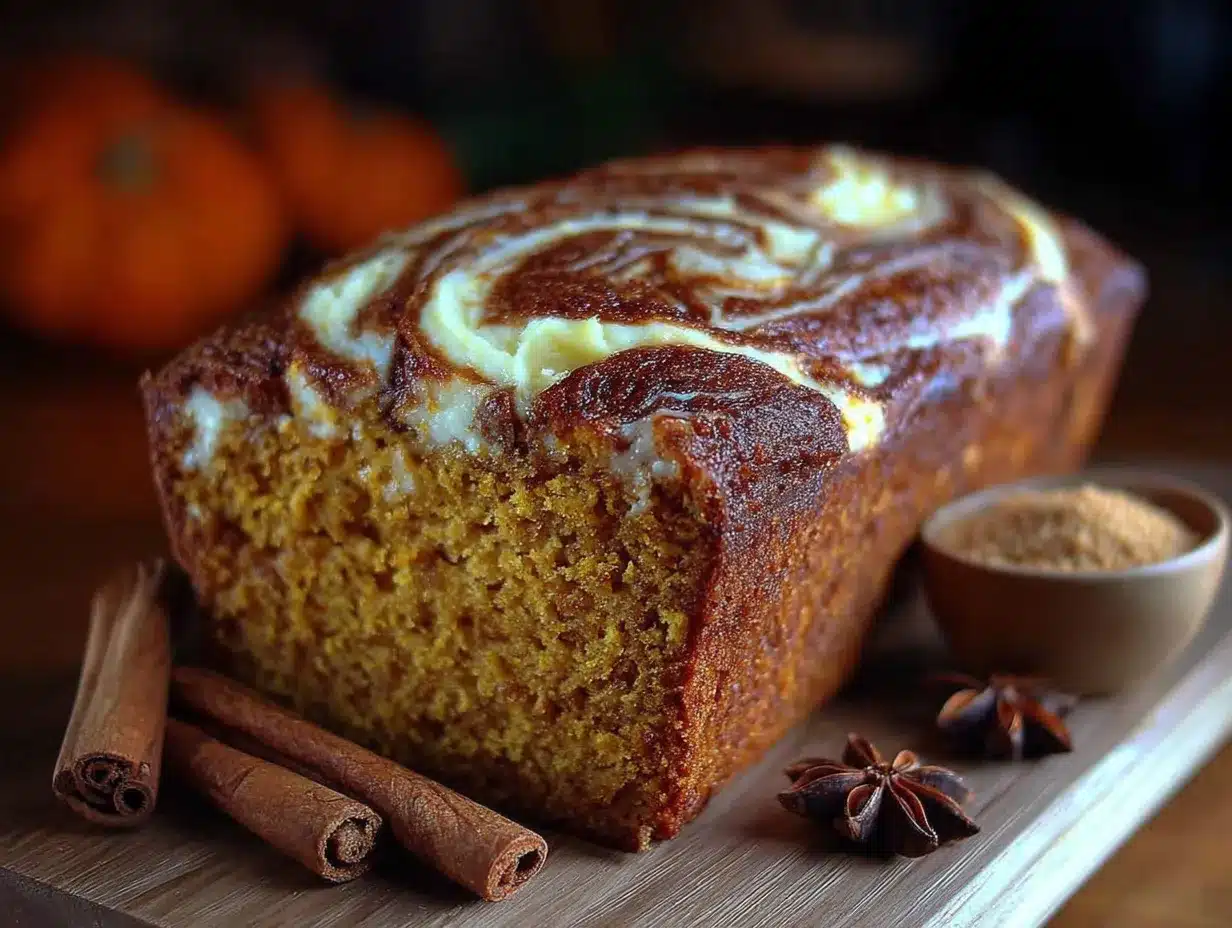
- Cream Cheese (8 ounces / 226g, softened): This is the star of the swirl. It needs to be at room temperature so it blends smoothly into a creamy, lump-free mixture. I recommend using a full-fat block of cream cheese, not the spreadable kind in a tub, for the best texture and tang.
- Granulated Sugar (¼ cup / 50g): Sweetens the cream cheese just enough to balance its tanginess.
- Large Egg Yolk (1): This adds richness and helps the swirl set up nicely in the oven, creating a distinct, creamy ribbon rather than just melting into the batter.
- Vanilla Extract (½ teaspoon): A little extra flavor to complement the sweet cream cheese.
Equipment Needed
One of the best things about this recipe is that it doesn’t require any fancy gadgets. If you have a basic kitchen, you’re good to go. Here’s what you’ll need:
- 9×5-inch Loaf Pan: This is the standard size. A dark, non-stick pan will give you a darker crust, while a glass or light-colored metal pan will yield a lighter one. I prefer a light-colored metal pan for even baking. If you only have an 8×4-inch pan, the baking time will be longer, and the loaf will be taller.
- Two Large Mixing Bowls: One for the dry ingredients, one for the wet ingredients. I like using glass or stainless steel bowls.
- Whisk: For combining the dry ingredients and the wet ingredients. A sturdy whisk is your best friend here.
- Rubber Spatula: Essential for folding the batter together and scraping every last bit of the cream cheese swirl into the pan.
- Hand Mixer or Stand Mixer: This is only for the cream cheese swirl. You can absolutely whisk it by hand if you have the arm strength and patience, but a mixer makes it smooth and lump-free in seconds. A hand mixer is perfectly fine.
- Small Offset Spatula or Butter Knife: This is the secret tool for creating a beautiful swirl pattern. You’ll use it to gently swirl the cream cheese mixture into the pumpkin batter.
- Parchment Paper: I highly recommend lining your loaf pan with a sling of parchment paper. It makes lifting the finished bread out of the pan a breeze, and it makes for perfectly clean slices.
- Cooling Rack: A wire rack allows air to circulate around the loaf, preventing the bottom from getting soggy as it cools.
I once tried to make this without a hand mixer for the cream cheese, using just a fork. Let me tell you, it was a workout. The swirl was lumpy, and while it still tasted good, it wasn’t as pretty. A mixer is a small investment for a much better result. If you don’t have one, just make sure your cream cheese is very, very soft.
Preparation Method
Alright, let’s get baking! This process is straightforward, but I’ll walk you through every step with the little tips and tricks I’ve learned along the way. The key is to not overmix the batter—that’s the number one mistake that leads to tough, dense bread.
- Preheat and Prep: First things first, preheat your oven to 350°F (175°C). While it’s heating up, grease your 9×5-inch loaf pan with butter or non-stick spray. Then, cut a piece of parchment paper long enough to hang over the two long sides of the pan (this is your sling). Press it into the pan. This step is a game-changer—I promise you’ll thank me later.
- Mix the Dry Ingredients: In a large bowl, whisk together the 1 ¾ cups all-purpose flour, 1 cup granulated sugar, ½ cup packed brown sugar, 1 teaspoon baking soda, ½ teaspoon baking powder, ½ teaspoon salt, 2 teaspoons cinnamon, ½ teaspoon nutmeg, ½ teaspoon ginger, and ¼ teaspoon cloves. Whisk until everything is evenly distributed. This not only mixes the ingredients but also aerates the flour, which helps create a lighter loaf.
- Mix the Wet Ingredients: In a separate large bowl, whisk together the ½ cup vegetable oil, 2 large eggs (room temperature), 1 teaspoon vanilla extract, and the entire 15-ounce can of pumpkin puree. Whisk until the mixture is smooth and fully combined. It should be a beautiful, vibrant orange color.
- Combine Wet and Dry: Pour the wet ingredients into the bowl with the dry ingredients. Here’s the crucial part: use a rubber spatula to fold the mixture together. Stir gently, scraping from the bottom of the bowl, just until you no longer see streaks of flour. A few small lumps are perfectly fine—do not overmix! Overmixing develops the gluten, which will make your bread tough and rubbery. This step should take no more than 30 seconds.
- Make the Cream Cheese Swirl: In a smaller bowl, beat the 8 ounces of softened cream cheese with a hand mixer (or stand mixer) until it’s completely smooth and creamy, with no lumps. Add the ¼ cup granulated sugar, 1 egg yolk, and ½ teaspoon vanilla extract. Beat again until the mixture is smooth, light, and fluffy. It should be the consistency of a thick frosting.
- Assemble the Loaf: Pour about two-thirds of the pumpkin batter into your prepared loaf pan and spread it into an even layer. Now, dollop the cream cheese mixture over the top of the batter. You don’t need to be precise—just spoon it on in small, even mounds. Then, pour the remaining pumpkin batter over the cream cheese, gently spreading it to cover as much as possible. It’s okay if a little cream cheese peeks through.
- Create the Swirl: This is the fun part. Take a small offset spatula or a butter knife and insert it straight down into the batter. Drag it through the batter in a figure-eight or zig-zag pattern, going from one end of the pan to the other. Don’t over-swirl! You want distinct ribbons of cream cheese, not a fully blended mess. Two or three passes is usually plenty.
- Bake: Place the pan in the preheated oven and bake for 55 to 65 minutes. The exact time will depend on your oven. The bread is done when a wooden skewer or toothpick inserted into the center comes out clean or with just a few moist crumbs attached. If it comes out with wet batter, it needs more time. If the top is browning too quickly (after about 45 minutes), tent the pan loosely with a piece of aluminum foil.
- Cool: Let the bread cool in the pan on a wire rack for at least 20 minutes. This allows it to set up. Then, using the parchment paper sling, lift the loaf out of the pan and transfer it to the wire rack to cool completely. I know it’s tempting, but resist slicing into it while it’s still warm—it will be too fragile and will likely crumble. Patience, my friend.
One time, I was rushing and forgot to add the brown sugar to the dry mix. I realized it halfway through folding the batter. I just dumped it in and mixed a little more. The bread was fine, but it was a little less tender. Lesson learned: always double-check your ingredients! It’s a small step that saves a lot of heartache.
Cooking Tips & Techniques
Over the years, I’ve made this bread more times than I can count, and I’ve made every mistake in the book. Here are the things I wish someone had told me when I first started baking it.
- The Room Temperature Rule: This is not just a suggestion. Room-temperature eggs and cream cheese are crucial. A cold egg can seize the batter, and cold cream cheese will be lumpy no matter how much you beat it. Take them out of the fridge at least 30 minutes before you start baking. If you’re in a hurry, you can place the eggs in a bowl of warm water for 5 minutes.
- Don’t Overmix the Batter: I know I keep saying this, but it’s the most important tip. Mix just until the flour disappears. A few lumps are your friend. Overmixing develops gluten, which leads to a dense, tough, almost rubbery loaf. You want a tender, soft crumb. Treat the batter with a gentle hand.
- The Swirl Technique: The biggest mistake people make with cream cheese swirls is going crazy with the knife. They mix and mix until the swirl is completely incorporated into the batter, and you lose that beautiful, distinct ribbon of cheese. Less is more here. Two or three gentle passes with your knife or spatula is all you need. You want pockets of creamy, tangy cheesecake-like filling.
- Check for Doneness Properly: A toothpick test is the most reliable method. But don’t just check the center—the edges can look done while the middle is still raw. Insert the toothpick in the very center of the loaf. If it comes out clean or with a few moist crumbs (not wet batter), it’s done. If the top is getting too dark before the center is set, just tent it with foil.
- Cooling is Key: This bread is very moist and delicate when it’s hot. Slicing it too early will result in a crumbly mess. Let it cool in the pan for 20 minutes to firm up, then transfer it to a wire rack to cool completely. I usually wait at least 2 hours before slicing. It’s worth the wait.
I once had a loaf where the cream cheese swirl completely sank to the bottom. It was a sad, sad sight. I learned that this happens when the cream cheese mixture is too thin (usually from not beating it enough or using a low-fat version) or if the pumpkin batter is too thin. A thick, well-beaten cream cheese mixture and a properly measured pumpkin batter are your safeguards.
Variations & Adaptations
This recipe is a fantastic base, and it’s incredibly forgiving. Here are some of my favorite ways to change it up, depending on my mood or what I have on hand.
- Chocolate Chip Pumpkin Bread: This is probably my most-requested variation. After you mix the batter, gently fold in 1 cup of semi-sweet or dark chocolate chips. The combination of warm pumpkin spice and melted chocolate is absolutely divine. You can also sprinkle a few extra chips on top before baking for a prettier presentation.
- Nutty Streusel Topping: For a little extra crunch, make a simple streusel. Combine ¼ cup all-purpose flour, ¼ cup brown sugar, ¼ cup chopped pecans or walnuts, and 3 tablespoons of cold butter. Use your fingers to rub the butter into the dry ingredients until it forms coarse crumbs. Sprinkle this over the batter before baking. It creates a beautiful, crunchy top crust.
- Gluten-Free Adaptation: I’ve tested this with a good-quality 1:1 gluten-free baking flour blend (like Bob’s Red Mill or King Arthur), and it works wonderfully. The texture is slightly more tender and a little more crumbly, but the flavor is spot on. Make sure your blend contains xanthan gum. No other changes to the recipe are needed.
- Dairy-Free Swirl: To make the cream cheese swirl dairy-free, use a high-quality dairy-free cream cheese alternative. Brands like Kite Hill or Tofutti work well. Just make sure it’s the block-style, not the spreadable kind. The texture might be slightly less firm, but the tangy flavor is still there.
- Spice It Up: If you like a more intense spice profile, add a pinch of cardamom or allspice to the dry ingredients. You can also use a pumpkin pie spice blend instead of the individual spices. Use about 2 ½ teaspoons of the blend.
Serving & Storage Suggestions
This bread is incredibly versatile. It’s perfect for breakfast, brunch, a midday snack, or dessert. Here’s how I like to serve and store it.
Serving: This bread is amazing at room temperature. Slice it thick and serve it on a nice plate. For a truly decadent treat, toast a slice lightly and spread it with a little butter or a dollop of maple cream cheese. It’s also fantastic served warm with a scoop of vanilla ice cream and a drizzle of caramel sauce for a show-stopping dessert. If you’re hosting, arrange the slices on a wooden board with some fresh apple slices and a cup of hot cider for a beautiful fall display.
Storage: This is one of those rare quick breads that actually gets better on the second day. The flavors meld together and the texture becomes even more moist. Store the completely cooled bread tightly wrapped in plastic wrap or in an airtight container at room temperature for up to 4 days. Do not refrigerate it, as the fridge will dry it out.
Freezing: This bread freezes beautifully. I often make two loaves and freeze one for later. To freeze, let the loaf cool completely. Wrap it tightly in a layer of plastic wrap, then a layer of aluminum foil. It will keep in the freezer for up to 3 months. To thaw, just let it sit on the counter for a few hours or overnight in the fridge. You can also freeze individual slices for a quick grab-and-go treat.
Reheating: If you want that just-baked warmth, pop a slice in the microwave for 10-15 seconds, or toast it in a toaster oven for a few minutes. The toaster oven gives it a slightly crisper edge, which I love.
Nutritional Information & Benefits
Let’s be real—this is a treat, not a health food. But it does have some redeeming qualities, especially compared to a lot of other desserts. Here’s a rough estimate of the nutritional information per slice (based on 12 slices):
- Calories: Approximately 350-400
- Fat: 18-22g
- Carbohydrates: 45-50g
- Protein: 5-7g
- Fiber: 2-3g
- Sugar: 28-32g
Health Benefits: The star ingredient, pumpkin, is a nutritional powerhouse. It’s packed with Vitamin A (in the form of beta-carotene), which is great for your eyes and immune system. It’s also a good source of fiber, which helps with digestion and keeps you feeling full. The cream cheese adds a bit of calcium and protein. So, while this isn’t a salad, it’s a dessert that offers a little more than empty calories. I feel good about serving it to my family because I know exactly what’s in it, and the pumpkin gives me a small, happy excuse to call it a “vegetable” bread.
Dietary Considerations: As written, this recipe contains gluten, dairy, and eggs. See the variations section above for gluten-free and dairy-free adaptations. It is nut-free as written.
Conclusion
So there you have it—my tried-and-true, neighbor-approved, crowd-pleasing pumpkin bread with cream cheese swirl. It’s the recipe that turned a pumpkin bread hater into a three-slice eater. It’s the one I make for every fall potluck, every Thanksgiving, every time I just want to fill my kitchen with the warm, cozy smell of cinnamon and nutmeg. It’s simple enough for a beginner baker but impressive enough to be the star of the dessert table.
I hope you give it a try. Don’t be afraid to make it your own—add some chocolate chips, top it with a streusel, or just leave it perfectly plain with that beautiful cream cheese ribbon. The most important thing is to enjoy the process and the delicious result. I’d love to hear how it turns out for you! Did you make any changes? Did it convert any pumpkin skeptics in your life? Drop a comment below and let me know. And if you snap a picture, tag me on social media—I love seeing your bakes. Happy baking, my friends!
Frequently Asked Questions
Can I use fresh pumpkin instead of canned?
Yes, you can! You’ll need about 1 ¾ cups of fresh pumpkin puree. However, fresh pumpkin has a higher water content than canned, which can make the bread more dense and wet. To combat this, after you puree the cooked pumpkin, let it drain in a cheesecloth-lined sieve for an hour or so to remove some of the excess liquid. Canned pumpkin is more consistent and reliable, which is why I recommend it for the best results.
Why did my cream cheese swirl sink to the bottom?
This is a common problem! It usually happens for one of two reasons. First, your cream cheese mixture might have been too thin. Make sure your cream cheese is well-beaten and thick. Second, your pumpkin batter might have been too thin. Be sure to measure your flour correctly (spoon and level) and don’t overmix. A thick batter will better support the weight of the cream cheese.
Can I make this into muffins instead of a loaf?
Absolutely! This batter works wonderfully for muffins. Line a 12-cup muffin tin with paper liners. Fill each cup about ⅔ full with the pumpkin batter. Dollop a small spoonful of the cream cheese mixture on top and gently swirl it in with a toothpick. Bake at 350°F (175°C) for 18-22 minutes, or until a toothpick inserted into the center of a muffin comes out clean.
How do I know when the bread is fully baked?
The most reliable way is the toothpick test. Insert a wooden skewer or toothpick into the very center of the loaf. If it comes out clean or with just a few moist crumbs attached (not wet batter), it’s done. The top should be golden brown and spring back lightly when you touch it. If the top is browning too fast but the center isn’t done, tent the pan with aluminum foil.
Can I reduce the sugar in this recipe?
You can, but be careful. The sugar does more than just sweeten—it also contributes to the bread’s moistness and tender texture. I’ve successfully reduced the granulated sugar to ¾ cup without any issues, but I wouldn’t go any lower than that. Reducing the brown sugar will affect the moisture level and the deep, caramel-like flavor. If you want a less sweet bread, I recommend reducing the granulated sugar first.
Pin This Recipe!
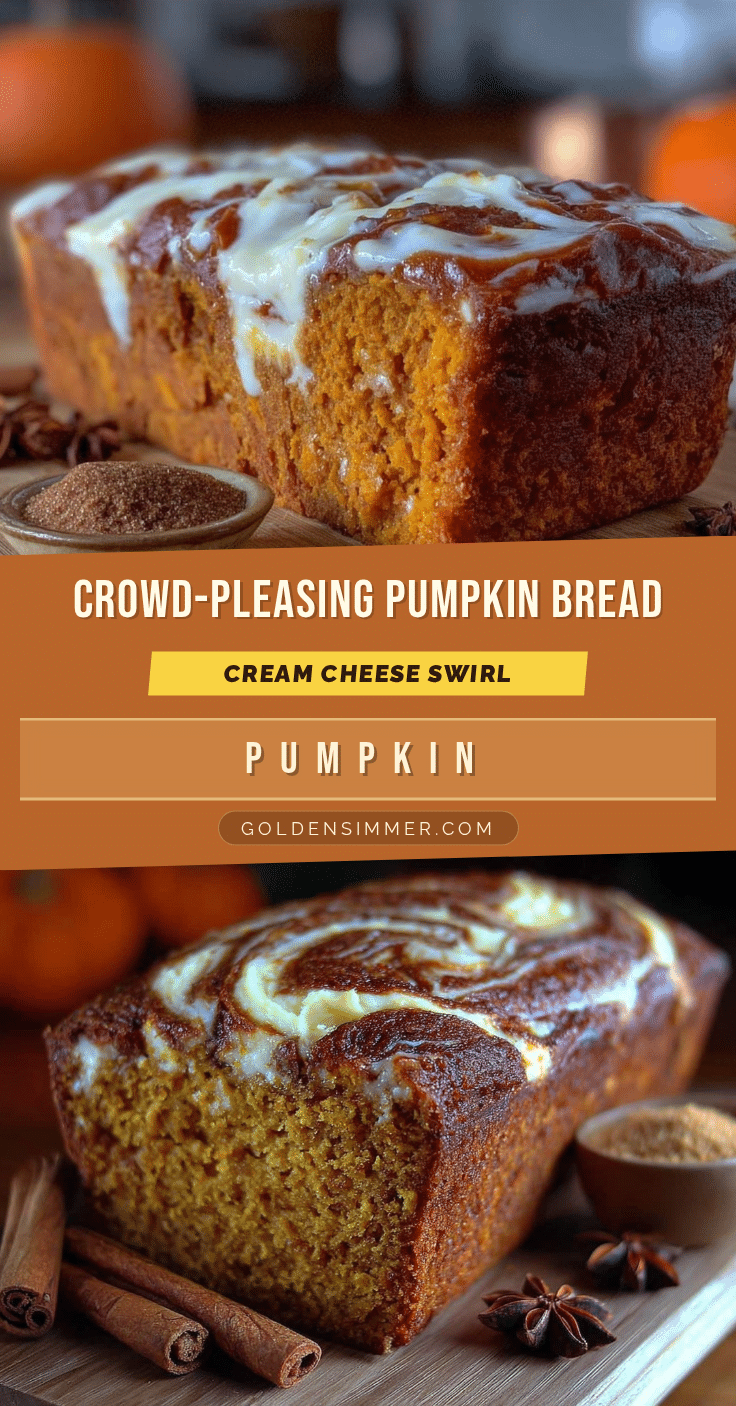
Easy Pumpkin Bread with Cream Cheese Swirl Recipe
This isn’t just another pumpkin bread recipe. It’s the one that makes people close their eyes after the first bite. The secret is a simple cream cheese swirl that cuts through the warm, spiced pumpkin flavor with a tangy, rich ribbon of goodness.
- Prep Time: 15 minutes
- Cook Time: 55-65 minutes
- Total Time: 1 hour 20 minutes
- Yield: 12 servings 1x
- Category: Dessert
- Cuisine: American
Ingredients
- 1 ¾ cups (220g) all-purpose flour
- 1 cup (200g) granulated sugar
- ½ cup (100g) packed brown sugar
- 1 teaspoon baking soda
- ½ teaspoon baking powder
- ½ teaspoon salt
- 2 teaspoons ground cinnamon
- ½ teaspoon ground nutmeg
- ½ teaspoon ground ginger
- ¼ teaspoon ground cloves
- ½ cup (120ml) vegetable oil
- 2 large eggs, at room temperature
- 1 teaspoon vanilla extract
- 1 ¾ cups (15-ounce can) canned pumpkin puree
- 8 ounces (226g) cream cheese, softened
- ¼ cup (50g) granulated sugar (for swirl)
- 1 large egg yolk
- ½ teaspoon vanilla extract (for swirl)
Instructions
- Preheat your oven to 350°F (175°C). Grease a 9×5-inch loaf pan and line it with a parchment paper sling, leaving overhang on the long sides.
- In a large bowl, whisk together the all-purpose flour, granulated sugar, packed brown sugar, baking soda, baking powder, salt, cinnamon, nutmeg, ginger, and cloves until evenly distributed.
- In a separate large bowl, whisk together the vegetable oil, room-temperature eggs, vanilla extract, and canned pumpkin puree until smooth and fully combined.
- Pour the wet ingredients into the dry ingredients. Use a rubber spatula to fold the mixture together gently, just until no streaks of flour remain. Do not overmix; a few small lumps are fine.
- In a smaller bowl, beat the softened cream cheese with a hand mixer or stand mixer until completely smooth. Add the ¼ cup granulated sugar, egg yolk, and ½ teaspoon vanilla extract. Beat again until the mixture is smooth, light, and fluffy.
- Pour about two-thirds of the pumpkin batter into the prepared loaf pan and spread it into an even layer. Dollop the cream cheese mixture over the batter in small, even mounds. Pour the remaining pumpkin batter over the cream cheese, gently spreading to cover.
- Use a small offset spatula or butter knife to create a swirl pattern by inserting it straight down into the batter and dragging it in a figure-eight or zig-zag pattern. Do not over-swirl; two or three passes is enough.
- Bake for 55 to 65 minutes, or until a wooden skewer or toothpick inserted into the center comes out clean or with just a few moist crumbs. If the top browns too quickly, tent the pan loosely with aluminum foil after about 45 minutes.
- Let the bread cool in the pan on a wire rack for at least 20 minutes. Then, using the parchment paper sling, lift the loaf out of the pan and transfer it to the wire rack to cool completely before slicing.
Notes
Room-temperature eggs and cream cheese are crucial for best results. Do not overmix the batter to avoid a dense loaf. For the swirl, less is more—two or three gentle passes with the knife is enough. Let the bread cool completely before slicing to prevent crumbling. Store tightly wrapped at room temperature for up to 4 days, or freeze for up to 3 months.
Nutrition
- Serving Size: 1 slice
- Calories: 350400
- Sugar: 2832
- Fat: 1822
- Carbohydrates: 4550
- Fiber: 23
- Protein: 57
Keywords: pumpkin bread, cream cheese swirl, fall baking, quick bread, pumpkin recipe, easy dessert



