Love this? Save it for later!
Share the inspiration with your friends
There used to be a tiny, hole-in-the-wall bakery attached to a gas station on Route 9 that made the most addictive snack mix. When they closed their doors during the pandemic, I was honestly devastated. After six attempts—some burnt, some way too salty, one that my husband politely called “aggressively seasoned”—I finally cracked the code. This mason jar snack mix is that exact recreation, and it’s become my secret weapon for teacher appreciation week.
Honestly, I never thought I’d be the parent making Pinterest-worthy gifts. But last spring, my son’s teacher, Mrs. Patterson, mentioned she loved salty-sweet snacks during a parent-teacher conference. My brain immediately went back to that bakery mix. So I grabbed my biggest mixing bowl and got to work.
You know that feeling when you want to show gratitude but don’t have a ton of time? That’s exactly what this is for. It’s thoughtful without being fussy, personal without being complicated. And let me tell you—the first time I sent one to school, Mrs. Patterson actually emailed me for the recipe. That’s when I knew I had something special.
The best part? This comes together in under 15 minutes, uses ingredients you probably already have in your pantry, and looks absolutely gorgeous layered in a mason jar. It’s the kind of gift that says “I appreciate you” without saying a word.
Why You’ll Love This Recipe
I’ve tested this mix about a dozen times to get the perfect balance of salty, sweet, and crunchy. Here’s why it works so well for teacher appreciation gifts:
- Quick & Easy: Comes together in under 15 minutes, perfect for last-minute teacher gifts or holiday gifting.
- Simple Ingredients: No fancy grocery trips needed; you likely already have everything in your kitchen.
- Perfect for Gifting: Mason jars make it portable, presentable, and reusable—teachers love that!
- Crowd-Pleaser: The sweet-and-salty combo gets rave reviews from kids and adults alike.
- Unbelievably Delicious: The texture and flavor combo is next-level comfort food.
What makes this different from other snack mixes? It’s all in the layering. Instead of tossing everything together and losing the individual flavors, this method keeps each ingredient distinct. The pretzels stay crunchy, the chocolate chips don’t get crushed, and every bite is a surprise.
This recipe isnt just good—it is the kind that makes you close your eyes after the first bite. It’s comfort food reimagined—healthier, faster, but with the same soul-soothing satisfaction. Perfect for impressing teachers without stress, or turning a simple snack into something memorable.
What Ingredients You Will Need
This recipe uses simple, wholesome ingredients to deliver bold flavor and satisfying texture without the fuss. Most of these are pantry staples, which makes this mix incredibly easy to throw together anytime.
For the Snack Mix Base
- 2 cups mini pretzels (I prefer Snyder’s of Hanover for their perfect salt level)
- 1 cup Chex cereal (rice or corn work great; use gluten-free if needed)
- 1 cup Cheerios (honey nut adds a touch of sweetness)
- 1 cup salted peanuts (or almonds if peanuts aren’t allowed at school)
- 1 cup M&M’s (use school colors or seasonal colors for extra fun)
- 1/2 cup white chocolate chips (Ghirardelli melts beautifully)
- 1/2 cup semi-sweet chocolate chips (adds richness)
For the Seasoning Blend
- 2 tablespoons melted butter (salted butter gives the best flavor)
- 1 tablespoon Worcestershire sauce (trust me on this—it’s the secret ingredient)
- 1/2 teaspoon garlic powder
- 1/2 teaspoon onion powder
- 1/4 teaspoon cayenne pepper (optional, for a tiny kick)
- 1/4 teaspoon smoked paprika (adds depth)
Ingredient Tips: Look for mini pretzels rather than regular-sized ones—they layer better in the jar. If you’re making this for a classroom, check for nut allergies and swap peanuts for sunflower seeds or pumpkin seeds. In fall, I love using candy corn instead of M&M’s for a seasonal twist.
Substitution Guidance: Use dairy-free butter and vegan chocolate chips for a plant-based version. Gluten-free pretzels and certified gluten-free cereal work perfectly for gluten-sensitive teachers.
Equipment Needed
You don’t need much for this recipe, which is part of its charm. Here’s what you’ll need:
- Large mixing bowl (stainless steel or glass works best)
- Measuring cups and spoons
- Rubber spatula (for mixing without breaking the pretzels)
- Wide-mouth mason jars (quart-sized or pint-sized depending on how much you’re making)
- Funnel (optional but makes layering much easier)
- Ribbon or twine (for decorating the jar)
- Gift tag (with instructions for the teacher)
I’ve made this with both wide-mouth and regular mason jars, and trust me—wide-mouth is the way to go. Regular jars are frustrating to layer in because the opening is too narrow. You can find wide-mouth jars at any grocery store or online. If you don’t have a funnel, just roll a piece of paper into a cone shape—it works like a charm.
Budget-Friendly Tip: Ask friends or neighbors to save their mason jars for you. I’ve collected dozens this way, and it saves so much money.
Preparation Method
This recipe comes together in about 15 minutes, with most of that time being layering. Here’s how to do it:
- Preheat your oven to 250°F (120°C). Line a baking sheet with parchment paper.
- Mix the dry base: In a large bowl, combine the mini pretzels, Chex cereal, Cheerios, and salted peanuts. Toss gently to distribute evenly.
- Make the seasoning: In a small bowl, whisk together the melted butter, Worcestershire sauce, garlic powder, onion powder, cayenne (if using), and smoked paprika.
- Season the mix: Pour the butter mixture over the dry ingredients and toss gently with a rubber spatula until everything is lightly coated. You want a thin, even coating—not soggy.
- Bake: Spread the seasoned mix in a single layer on the prepared baking sheet. Bake for 10-12 minutes, stirring halfway through. The mix should be fragrant and slightly golden. Let it cool completely on the baking sheet—about 20 minutes.
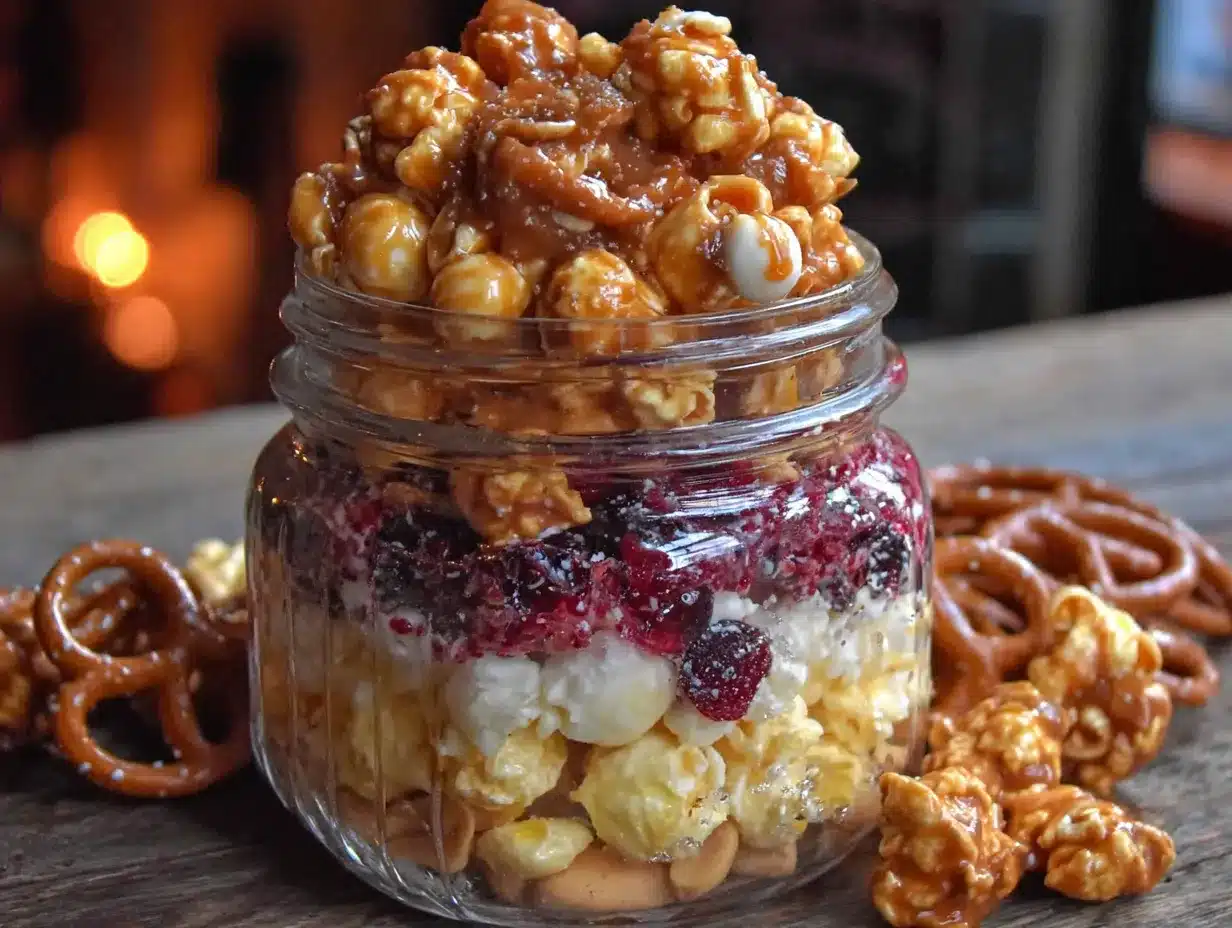
- Layer the jar: Once cooled, start layering your ingredients in the mason jar. Begin with a layer of the seasoned mix, then add a layer of M&M’s, then white chocolate chips, then semi-sweet chocolate chips. Repeat until the jar is full. The key is to press down gently after each layer to create clean lines.
- Seal and decorate: Screw on the lid, tie a ribbon around the neck, and attach a gift tag with serving instructions.
Sensory Cues: When the mix comes out of the oven, you should smell the Worcestershire and garlic—it should be savory and inviting. The pretzels should look dry, not greasy. When you tap the jar, each layer should be distinct and visible through the glass.
Personal Tip: I once forgot to let the mix cool completely before layering, and the chocolate chips melted into a sad, sticky mess. Learn from my mistake—patience is key here!
Cooking Tips & Techniques
After making this dozens of times, I’ve learned a few tricks that make a big difference:
- Don’t oversaturate: The butter mixture should just coat the ingredients, not soak them. If you add too much, the pretzels will get soft instead of staying crunchy.
- Cool completely: This is non-negotiable. Warm mix will melt the chocolate chips and ruin your beautiful layers. I usually let it cool while I clean up the kitchen.
- Pack tightly: When layering, press down firmly after each layer. This creates those Instagram-worthy stripes and prevents the mix from settling unevenly during transport.
- Use a chopstick: If you’re having trouble getting the layers to stay put, use a chopstick to gently push the mix into the corners of the jar.
Common Mistake Alert: The first time I made this, I used regular pretzels instead of mini ones. They didn’t fit through the jar opening, and I ended up breaking them all into crumbs. Stick with mini pretzels—they’re worth it.
Timing Strategy: I like to bake the seasoned mix the night before and let it cool overnight. Then in the morning, I layer the jars while drinking my coffee. It makes the process feel less rushed.
Variations & Adaptations
This recipe is incredibly flexible. Here are some variations I’ve tried and loved:
Seasonal Variations
- Fall Harvest: Swap M&M’s for candy corn and add dried cranberries. Use pumpkin pie spice instead of cayenne.
- Winter Wonderland: Use red and green M&M’s, add crushed candy canes, and drizzle with white chocolate.
- Spring Fling: Pastel M&M’s and freeze-dried strawberries for a fruity twist.
Dietary Adaptations
- Nut-Free: Replace peanuts with roasted chickpeas or sunflower seeds. Check labels on cereals to ensure they’re nut-free.
- Gluten-Free: Use gluten-free pretzels and certified gluten-free Chex and Cheerios.
- Vegan: Use vegan butter, dairy-free chocolate chips, and vegan Worcestershire sauce.
Flavor Twists
- Spicy Southwest: Add chili powder and lime zest to the seasoning. Use dark chocolate chips for contrast.
- S’mores Inspired: Add mini marshmallows and crushed graham crackers. Use milk chocolate chips.
- Cookie Dough: Add edible cookie dough bits and drizzle with caramel sauce.
My personal favorite variation is the Spicy Southwest—the heat from the chili powder paired with the sweetness of the M&M’s is addictive. I made it for a teacher who loved spicy food, and she said it was the best gift she’d ever received from a student.
Serving & Storage Suggestions
This snack mix is best served at room temperature, straight from the jar. The contrast between the crunchy, savory base and the sweet chocolate chips is pure magic.
Serving Ideas:
- Pour into a bowl for classroom parties or staff room gatherings.
- Pair with a hot coffee or tea for the ultimate afternoon pick-me-up.
- Use as a topping for ice cream or yogurt parfaits.
Storage Instructions:
- At Room Temperature: Store in an airtight container for up to 2 weeks. Mason jars work perfectly for this.
- In the Refrigerator: You can refrigerate for up to a month, but let it come to room temperature before serving to restore crunchiness.
- In the Freezer: Freeze the unlayered seasoned mix in a freezer bag for up to 3 months. Layer fresh chocolate chips when you’re ready to gift.
Reheating Tip: If the mix loses its crunch, spread it on a baking sheet and warm in a 300°F oven for 5 minutes. Let it cool completely before serving.
Flavor Development: The seasoned mix actually gets better after a day or two—the flavors meld together beautifully. If you’re making this for a teacher appreciation event, prepare it 1-2 days in advance for optimal taste.
Nutritional Information & Benefits
Here’s the honest truth—this is a treat, not a health food. But it does have some redeeming qualities:
- Estimated per serving (1/4 cup): 180 calories, 9g fat, 24g carbs, 4g protein, 12g sugar.
- Peanuts provide protein and healthy fats. They also add a satisfying crunch that keeps you from overeating.
- Dark chocolate chips offer antioxidants. Go for 70% cacao for maximum benefits.
- Whole grain cereals add fiber. Chex and Cheerios aren’t just filler—they contribute to the texture and offer some nutritional value.
Dietary Considerations: This recipe contains gluten, dairy, peanuts, and soy. For allergen-friendly versions, see the variations section above.
Personal Wellness Perspective: I believe in balance. This snack mix is meant to be enjoyed in moderation—a handful here and there, not the whole jar in one sitting. It’s the perfect way to show appreciation without overthinking it.
Conclusion
This easy teacher appreciation mason jar snack mix is more than just a gift—it’s a way to say “thank you” in a language everyone understands. It’s simple enough for a busy weeknight, beautiful enough for Pinterest, and delicious enough to earn you the title of “favorite parent” (not that I’m competitive or anything).
I love this recipe because it reminds me of that little bakery that started it all. Every time I layer those pretzels and M&M’s, I think about Mrs. Patterson’s smiling face and how something so simple can make someone’s day. That’s the magic of homemade gifts—they carry a little piece of your heart.
Now it’s your turn! Have you made this snack mix for your child’s teacher? What variations did you try? Drop a comment below—I’d love to hear your stories. And if you’re looking for more easy gifting ideas, check out our easy homemade granola recipe or our 5-minute chocolate truffles for other thoughtful treats.
Happy gifting, friends!
Frequently Asked Questions
Can I make this snack mix ahead of time?
Absolutely! The seasoned mix can be made up to 2 weeks ahead and stored in an airtight container. Just add the chocolate chips and layer the jar when you’re ready to gift.
How long does this snack mix stay fresh?
It stays fresh for up to 2 weeks at room temperature if stored properly. The key is keeping it in an airtight container to prevent the pretzels from getting stale.
Can I use different types of chocolate?
Definitely! White chocolate, dark chocolate, milk chocolate, or even caramel chips all work beautifully. Just make sure they’re in chip or chunk form for easy layering.
What if my child’s teacher has food allergies?
No problem! Check out the variations section for nut-free, gluten-free, and vegan options. You can easily customize the mix to meet any dietary restriction.
How much does this recipe make?
This recipe fills about 3-4 pint-sized mason jars or 2 quart-sized jars, depending on how tightly you pack the layers. Perfect for multiple teachers or one very generous gift!
Pin This Recipe!
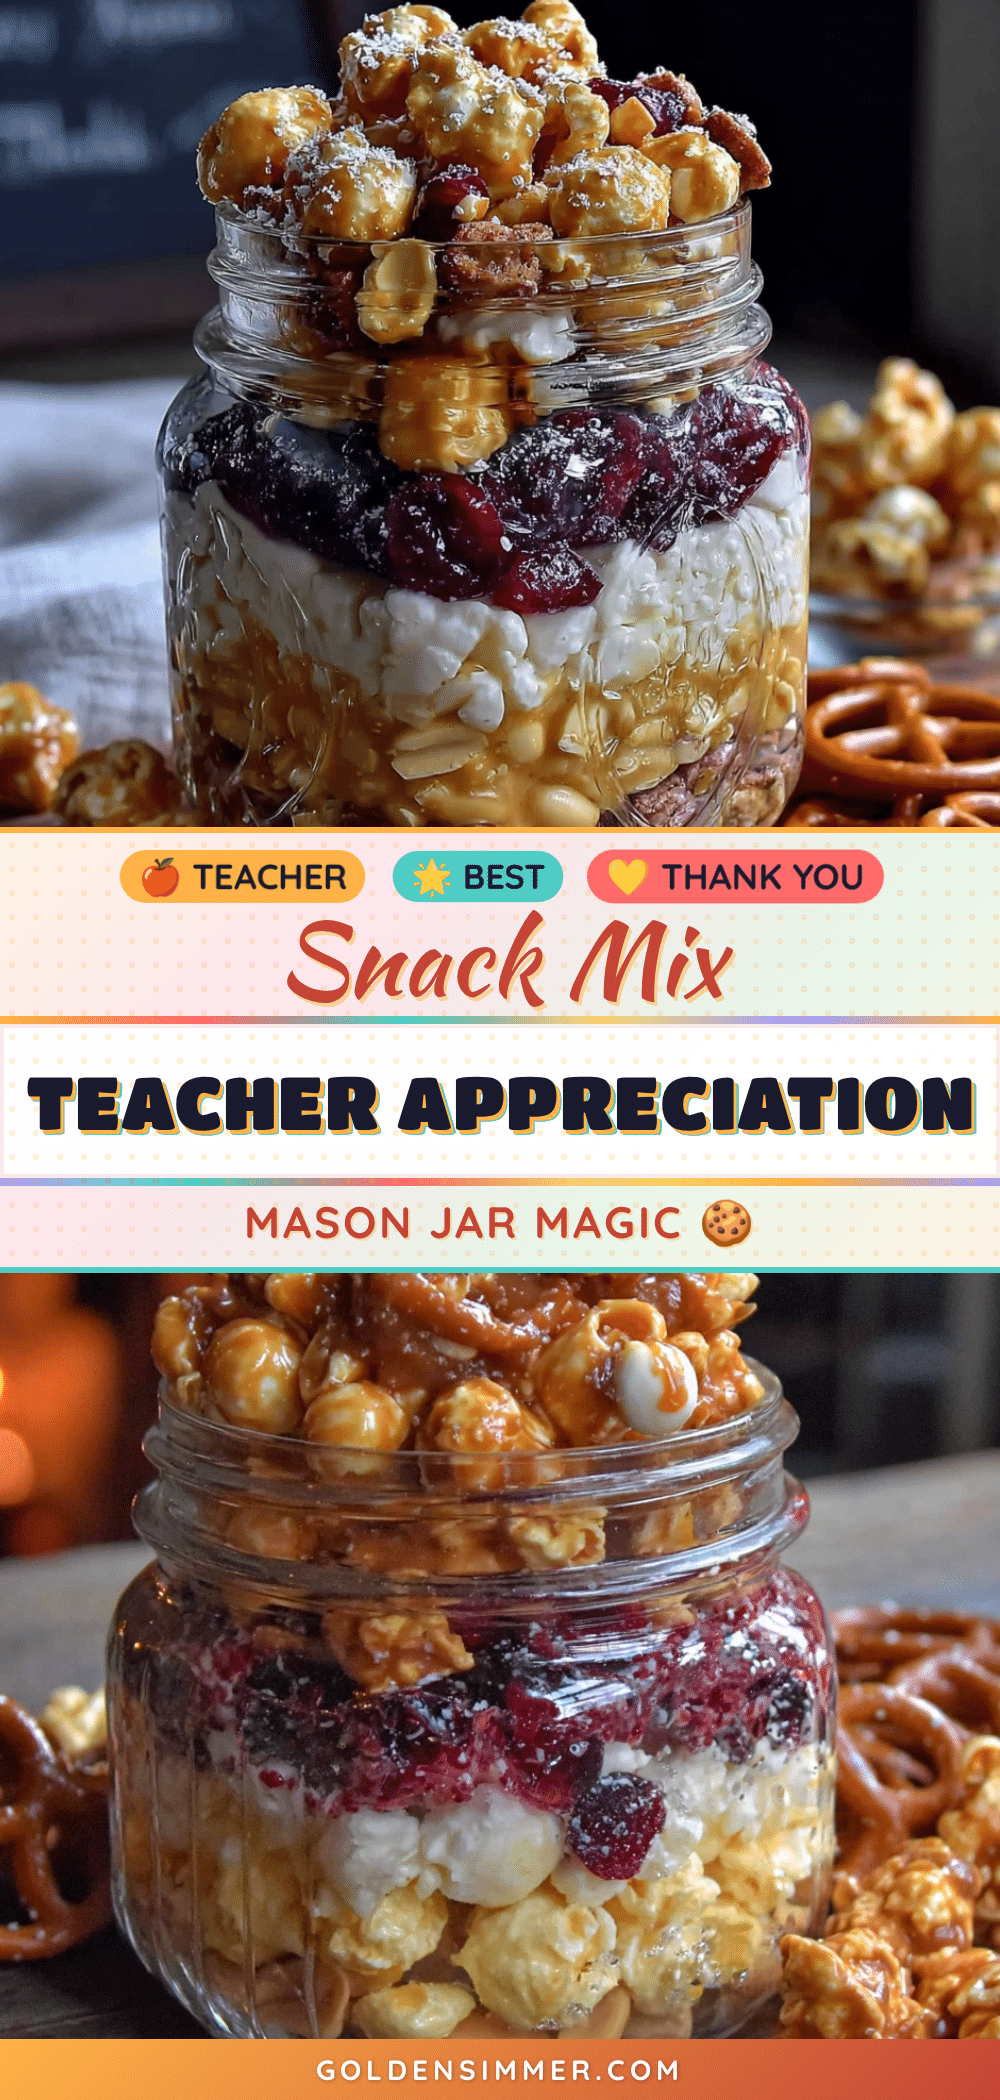
Easy Teacher Appreciation Mason Jar Snack Mix: Best DIY Gift
A quick and easy sweet-and-salty snack mix layered in a mason jar, perfect for teacher appreciation gifts. Made with pretzels, Chex cereal, Cheerios, peanuts, M&M’s, and chocolate chips, it comes together in under 15 minutes.
- Prep Time: 15 minutes
- Cook Time: 12 minutes
- Total Time: 27 minutes
- Yield: 3-4 pint-sized jars or 2 quart-sized jars 1x
- Category: Snack
- Cuisine: American
Ingredients
- 2 cups mini pretzels
- 1 cup Chex cereal (rice or corn)
- 1 cup Cheerios (honey nut recommended)
- 1 cup salted peanuts
- 1 cup M&M’s
- 1/2 cup white chocolate chips
- 1/2 cup semi-sweet chocolate chips
- 2 tablespoons melted salted butter
- 1 tablespoon Worcestershire sauce
- 1/2 teaspoon garlic powder
- 1/2 teaspoon onion powder
- 1/4 teaspoon cayenne pepper (optional)
- 1/4 teaspoon smoked paprika
Instructions
- Preheat oven to 250°F (120°C). Line a baking sheet with parchment paper.
- In a large bowl, combine mini pretzels, Chex cereal, Cheerios, and salted peanuts. Toss gently.
- In a small bowl, whisk together melted butter, Worcestershire sauce, garlic powder, onion powder, cayenne (if using), and smoked paprika.
- Pour butter mixture over dry ingredients and toss gently with a rubber spatula until lightly coated.
- Spread seasoned mix in a single layer on prepared baking sheet. Bake for 10-12 minutes, stirring halfway through, until fragrant and slightly golden. Let cool completely on baking sheet (about 20 minutes).
- Once cooled, layer ingredients in a wide-mouth mason jar: start with seasoned mix, then M&M’s, white chocolate chips, and semi-sweet chocolate chips. Repeat layers, pressing down gently after each layer.
- Seal jar with lid, tie ribbon around neck, and attach a gift tag with serving instructions.
Notes
Let the seasoned mix cool completely before layering to prevent chocolate chips from melting. Use mini pretzels for easier layering. For nut-free version, replace peanuts with sunflower seeds or pumpkin seeds. For gluten-free, use gluten-free pretzels and certified gluten-free cereals. For vegan, use dairy-free butter and vegan chocolate chips.
Nutrition
- Serving Size: 1/4 cup
- Calories: 180
- Sugar: 12
- Sodium: 200
- Fat: 9
- Saturated Fat: 4
- Carbohydrates: 24
- Fiber: 2
- Protein: 4
Keywords: teacher appreciation, snack mix, mason jar gift, easy gift, sweet and salty, homemade gift, pretzel mix, chocolate snack mix



