Love this? Save it for later!
Share the inspiration with your friends
It was 11:47 PM on a random Tuesday in late October, and I had this very specific, almost ridiculous craving for Thanksgiving in cookie form. I didn’t have any fancy cookie cutters—you know, the ones shaped like turkeys or pilgrim hats that you buy on a whim and then lose in the back of a drawer. But I had my own two hands, a batch of sugar cookie dough I’d thrown together out of boredom, and the slightly unhinged idea that my actual handprint could be the star of the show. Honestly, it felt like a weird art project more than baking. I traced my hand on parchment paper, cut it out, and used it as a template for the dough. The result? A bunch of cookies that looked like little turkey silhouettes, complete with five “feathers” for fingers. I mean, it was 11:47 PM, and I was giggling alone in my kitchen over cookie dough fingers. That night, I knew I had stumbled onto something special—a tradition that was less about perfection and more about pure, silly fun. And now, every year, these Easy Turkey Hand Sugar Cookies are the thing that kicks off the Thanksgiving season in my house. Maybe you’ve been there, staring at your pantry at a weird hour, wondering what culinary chaos you could create. This is that recipe, and it’s a keeper.
Why You’ll Love This Recipe
Let me tell you, after testing this recipe about four times (and eating way too many test cookies), I can confidently say this is the best way to make Thanksgiving treats without losing your mind. These cookies aren’t just cute—they’re a whole activity. Here’s why they work so well:
- Incredibly Easy: You don’t need any special cookie cutters. Just your hand, a knife, and a little patience. It’s foolproof, even for beginner bakers.
- Simple Ingredients: Everything is probably in your kitchen right now. Butter, sugar, flour, eggs—the basics. No weird extracts or hard-to-find decorations.
- Perfect for Kids and Adults: This is the kind of recipe where everyone gets involved. Kids love tracing their hands, and adults love the nostalgic, messy fun of it all. It’s a crowd-pleaser for Thanksgiving gatherings.
- Customizable to the Max: You can go classic with royal icing and candy corn, or keep it simple with a dusting of cinnamon sugar. The base cookie is so good that it works any way you decorate it.
- Makes a Great Gift: Honestly, a box of these homemade turkey hand cookies is a better hostess gift than any store-bought pie. They show you put in the time and the love.
What makes this recipe different from all the other sugar cookie recipes out there? It’s the hand shape. There’s something about seeing your own handprint turned into a cookie that makes people smile. It’s personal. It’s goofy. And it tastes incredible—soft in the middle, slightly crisp at the edges, with a buttery vanilla flavor that reminds me of my grandmother’s kitchen. This isn’t just another sugar cookie; it’s a memory in the making.
What Ingredients You Will Need
This recipe uses simple, wholesome ingredients to create a soft, buttery sugar cookie that holds its shape beautifully. The dough is sturdy enough to handle the handprint cutting process without falling apart, which is honestly the biggest challenge with shaped cookies.
- Unsalted Butter (1 cup, 2 sticks, softened): I always use unsalted so I can control the salt level. Let it sit out for about an hour until it’s soft to the touch but not melting. For best results, I recommend Kerrygold or Land O’Lakes—they have a higher fat content that makes the cookies richer.
- Granulated Sugar (1 cup, 200g): Standard white sugar. It gives the cookies that classic sweetness and helps with browning. You can reduce it to ¾ cup if you prefer a less sweet cookie, but I wouldn’t go lower than that.
- Large Egg (1, room temperature): Room temperature eggs incorporate better into the butter-sugar mixture. If you forgot to take it out of the fridge, just place it in a bowl of warm water for 5 minutes.
- Vanilla Extract (2 teaspoons): Pure vanilla extract makes a noticeable difference. Imitation works in a pinch, but the flavor won’t be as deep. I love Nielsen-Massey for special batches.
- All-Purpose Flour (2 ½ cups, 312g): Spoon and level your flour—don’t scoop directly from the bag, or you’ll end up with dry, crumbly dough. If you’re using a gluten-free flour blend, add 1 teaspoon of xanthan gum if it’s not already included.
- Baking Powder (1 teaspoon): This gives the cookies a slight lift without making them puff up too much. You want them to hold their shape.
- Salt (½ teaspoon): Balances the sweetness and enhances the butter flavor. I use fine sea salt for baking.
- For the Royal Icing (optional but recommended): 2 cups powdered sugar, 2 tablespoons meringue powder, 3-4 tablespoons water. This makes a stiff icing that dries hard and is perfect for decorating. If you don’t have meringue powder, you can use 1 egg white and 1 ½ cups powdered sugar, but it won’t hold up as well for detailed designs.
- For Decorating (your choice): Candy corn for the “feathers,” mini chocolate chips for eyes, orange sprinkles for the beak, and red gel icing for the wattle. You can also use colored sanding sugar for a simpler look.
Equipment Needed
You don’t need a lot of fancy gear for this, which is part of the charm. Here’s what you’ll need:
- Mixing Bowls: One large bowl for the dough, one small bowl for the icing. Glass or stainless steel works best.
- Electric Mixer: A hand mixer or stand mixer with the paddle attachment. You can cream the butter and sugar by hand, but your arm will get tired. Trust me, I’ve done it.
- Rolling Pin: A standard rolling pin. If you don’t have one, a wine bottle works in a pinch—just make sure it’s clean and dry.
- Parchment Paper: Essential for rolling out the dough without sticking and for lining your baking sheets. I go through a ton of this during the holidays.
- Sharp Knife or Pizza Cutter: For cutting out the hand shapes. A pizza cutter actually works better because it glides through the dough smoothly.
- Baking Sheets: Two large, rimmed baking sheets. If you only have one, just bake in batches and let the sheet cool completely between rounds.
- Cooling Rack: A wire rack for cooling the cookies. If you don’t have one, you can use a clean kitchen towel, but the bottoms might get a little soft.
- Piping Bags (or Zip-Top Bags): For the royal icing. You can use a small piping tip, but honestly, snipping the corner of a zip-top bag works just as well for beginners.
Budget-friendly tip: Skip the fancy cookie cutters and piping tips. Your hand and a zip-top bag are all you really need. I’ve been doing it this way for years and it never fails.
Preparation Method
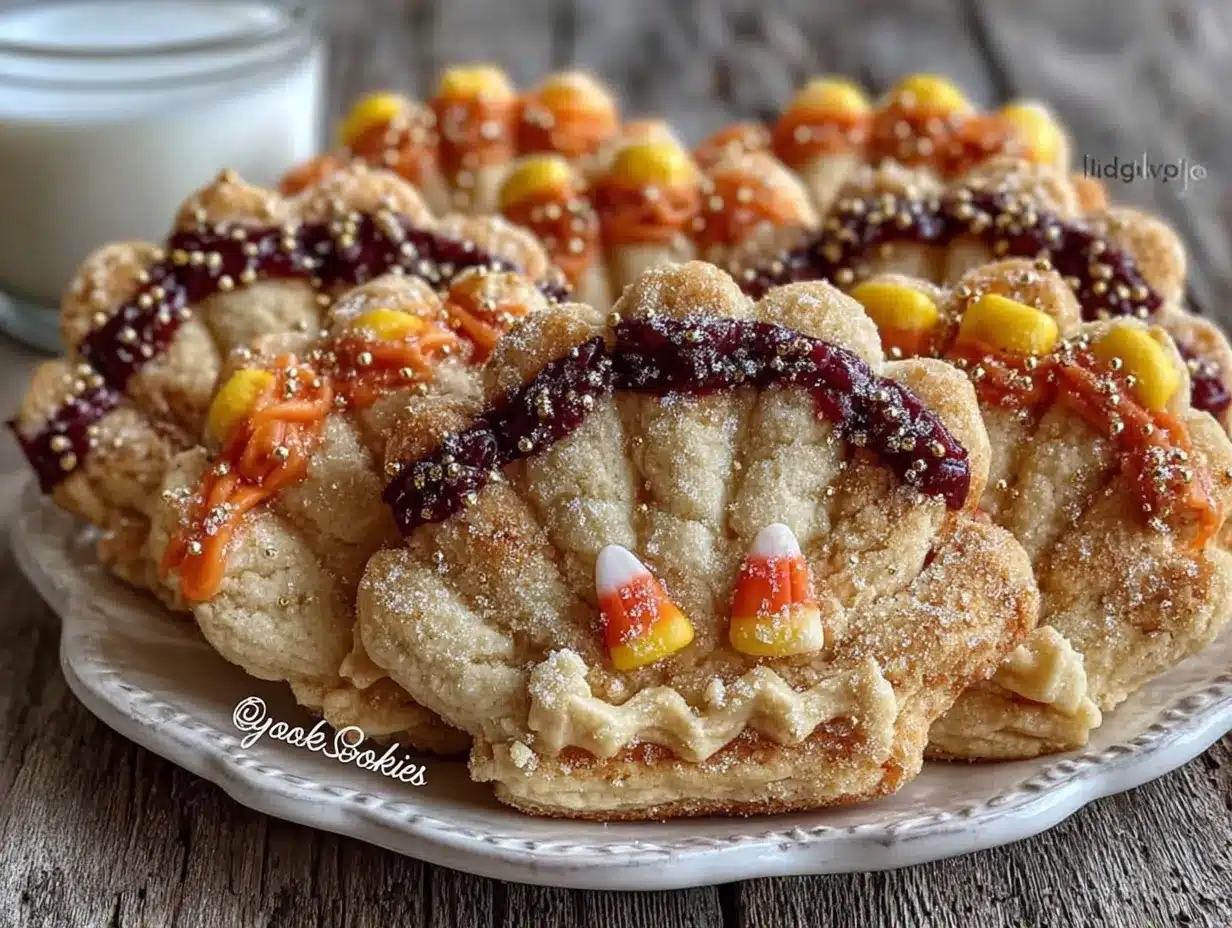
This method is broken down into simple steps. Take your time with the dough—rushing leads to tough cookies. Let’s get started.
Step 1: Make the Dough
In a large mixing bowl, cream together the softened butter and granulated sugar with an electric mixer on medium speed until light and fluffy, about 3 minutes. Scrape down the sides of the bowl once or twice. Add the egg and vanilla extract, then beat until fully combined, about 1 minute. The mixture should look smooth and slightly glossy.
In a separate bowl, whisk together the flour, baking powder, and salt. Gradually add the dry ingredients to the wet mixture, mixing on low speed until just combined. Do not overmix—stop as soon as you no longer see streaks of flour. The dough will be soft and slightly sticky, which is perfect.
Step 2: Chill the Dough
Divide the dough into two equal portions, flatten each into a disc about 1 inch thick, and wrap tightly in plastic wrap. Refrigerate for at least 2 hours, or overnight. This step is non-negotiable. Chilled dough is much easier to roll out and cut, and it helps the cookies keep their shape while baking. If you’re in a hurry, you can pop the discs in the freezer for 30 minutes, but don’t skip the chill.
Step 3: Trace and Cut Your Handprints
Preheat your oven to 350°F (175°C). Line two baking sheets with parchment paper. On a lightly floured surface, roll out one disc of dough to about ¼-inch thickness. Use a small, sharp knife or pizza cutter to cut around your hand—yes, your actual hand. Place your hand flat on the dough, fingers slightly spread, and trace around it with the knife, leaving about ¼ inch of space around your fingers. Carefully lift the hand-shaped dough onto a prepared baking sheet, spacing them about 2 inches apart.
Pro tip: If the dough starts to stick, slide a thin spatula under it before lifting. Also, don’t worry if the fingers are a little uneven—that’s part of the charm. Each cookie will be unique. Repeat with the remaining dough. You should get about 8-10 cookies depending on hand size.
Step 4: Bake the Cookies
Bake for 10-12 minutes, or until the edges are just barely golden brown. The centers will look slightly underdone—that’s fine. They’ll continue to set as they cool. Let the cookies cool on the baking sheet for 5 minutes, then transfer to a wire rack to cool completely. Do not try to decorate warm cookies, or the icing will melt right off.
Step 5: Make and Apply the Royal Icing
In a small bowl, whisk together the powdered sugar, meringue powder, and water until smooth. The icing should be thick enough to hold a ribbon on the surface for a few seconds. If it’s too thin, add more powdered sugar; if too thick, add water a teaspoon at a time. Transfer the icing to a piping bag or a zip-top bag with a tiny corner snipped off.
Pipe a border around each cookie, then flood the center with more icing, using a toothpick to spread it into the corners. While the icing is still wet, decorate! For the feathers, press candy corn into the “fingers” of the handprint. For the turkey’s face, place two mini chocolate chips for eyes, an orange sprinkle for the beak, and a small dot of red gel icing for the wattle. Let the icing set completely, about 2 hours at room temperature.
Cooking Tips & Techniques
I’ve made a lot of mistakes with these cookies, so you don’t have to. Here’s what I’ve learned the hard way:
- Don’t Skip the Chill: I once tried to rush the process and rolled out warm dough. It stuck to everything—the counter, the rolling pin, my hands. The cookies spread into weird blobs in the oven. Chilling the dough solidifies the butter, which prevents spreading and keeps those finger shapes intact.
- Use a Light Touch with Flour: When rolling out the dough, use just enough flour to prevent sticking. Too much flour makes the cookies tough and dry. I keep a small bowl of flour nearby and dust the surface lightly between rolls.
- Watch the Bake Time: Ovens vary, so start checking at 10 minutes. You want the edges to be just golden. Overbaked sugar cookies are crunchy and lose that tender texture. I’ve pulled out a tray at 11 minutes and another at 12—it depends on your oven’s mood.
- Multitask Efficiently: While the first batch bakes, roll and cut the second batch. While they cool, make the icing. This keeps the whole process moving without feeling overwhelming. I usually put on a podcast or a holiday playlist to keep the energy up.
- Fix Cracks with “Dough Glue”: If your handprint cracks at the wrist or between fingers, just press a tiny piece of dough into the crack and smooth it over. It bakes together seamlessly. No one will ever know.
Variations & Adaptations
One of the best things about this recipe is how flexible it is. You can change almost everything and still end up with something delicious.
- Gluten-Free Version: Substitute the all-purpose flour with a 1:1 gluten-free baking flour blend. I’ve used Bob’s Red Mill and King Arthur with great results. Add 1 teaspoon of xanthan gum if your blend doesn’t already contain it. The dough will be a bit more fragile, so handle it gently.
- Vegan Option: Replace the butter with vegan butter (I like Miyoko’s), the egg with a flax egg (1 tablespoon ground flaxseed + 3 tablespoons water, let sit for 5 minutes), and use a vegan royal icing made with aquafaba instead of meringue powder. The cookies will be slightly less rich but still very tasty.
- Spiced Up: Add 1 teaspoon of cinnamon, ½ teaspoon of nutmeg, and ¼ teaspoon of cloves to the dry ingredients. This gives the cookies a warm, chai-like flavor that screams “autumn.” I did this on a whim last year and it was a huge hit.
- Chocolate Handprints: Replace ¼ cup of the flour with unsweetened cocoa powder. You’ll get a dark chocolate cookie that looks amazing with white icing and colorful sprinkles. It’s a fun twist for chocolate lovers.
- No-Icing Option: If you’re short on time or patience, skip the icing entirely. Before baking, sprinkle the handprint cookies with cinnamon sugar or colored sanding sugar. Bake as directed, and you’ll have a simpler, just-as-cute cookie. I’ve done this for school bake sales and they disappear just as fast.
Serving & Storage Suggestions
These cookies are best served at room temperature, which is perfect for Thanksgiving gatherings. Arrange them on a platter with the “fingers” pointing outward for a cute, festive display. They pair beautifully with a hot cup of apple cider, a pumpkin spice latte, or even a glass of cold milk.
For storage, place the decorated cookies in an airtight container, layering them between sheets of parchment paper. They will stay fresh at room temperature for up to 1 week. Do not refrigerate them—the icing can become sticky and the cookies can dry out. If you need to store them longer, you can freeze the undecorated cookies for up to 3 months. Just wrap them tightly in plastic wrap and then foil. When you’re ready to serve, thaw them at room temperature, then decorate as usual. The flavors actually develop nicely after a day or two, so these are a great make-ahead treat.
One thing I love is that the royal icing hardens completely, so you can stack these cookies without ruining the decorations. That makes them perfect for shipping to far-away family members or bringing to a Friendsgiving potluck. Pro tip: If you’re transporting them, place a piece of wax paper between each cookie to prevent any sticking.
Nutritional Information & Benefits
Let’s be real—these are cookies, not health food. But knowing what’s in them can help you enjoy them mindfully. Per cookie (based on 10 cookies, with royal icing and candy corn decorations): approximately 320 calories, 14g fat, 45g carbohydrates, 3g protein, and 25g sugar. The butter provides a good source of vitamin A, and the egg adds a small amount of protein and choline.
If you’re looking to lighten them up, you can reduce the sugar in the dough to ¾ cup and use a simple powdered sugar glaze instead of royal icing. You can also skip the candy corn and use dried cranberries or chopped nuts for a more natural decoration. From a wellness perspective, I think the real benefit here is the joy of making something with your hands and sharing it with people you love. That counts for something, right?
Allergen note: This recipe contains wheat, dairy, and eggs. For a nut-free version, double-check your candy corn and sprinkles for nut contamination. The gluten-free and vegan variations above are great alternatives for those with dietary restrictions.
Conclusion
These Easy Turkey Hand Sugar Cookies have become a non-negotiable part of my Thanksgiving tradition. They’re silly, they’re personal, and they taste exactly like the holidays should—warm, sweet, and full of laughter. I love that every single cookie is different, shaped by the hand that made it. It’s a beautiful, messy reminder that perfection isn’t the point; connection is. Whether you’re making these with your kids, your friends, or just for yourself on a quiet Tuesday night, I hope they bring you the same joy they’ve brought me.
I’d love to hear how your cookies turn out! Leave a comment below with your favorite decoration idea, or share a photo of your handprint creations. And if you try a fun variation, let me know—I’m always looking for new ways to shake things up. Until next time, happy baking, and may your kitchen be filled with the smell of butter and sugar.
Frequently Asked Questions
Can I use store-bought sugar cookie dough for this recipe?
Absolutely. If you’re short on time, a tube of refrigerated sugar cookie dough works just fine. Just roll it out to ¼-inch thickness and follow the same handprint cutting instructions. The cookies might spread a little more, so keep an eye on them in the oven.
How do I prevent the handprint cookies from breaking?
The most fragile part is the “wrist” area between the palm and the fingers. To prevent breakage, make sure the dough is well-chilled before cutting and baking. When transferring the cut dough to the baking sheet, use a thin spatula and support the entire shape. If a cookie does break, you can “glue” it back together with a little royal icing after baking.
Can I make the dough ahead of time?
Yes! The dough can be refrigerated for up to 3 days or frozen for up to 3 months. If freezing, wrap the discs tightly in plastic wrap and then foil. Thaw overnight in the refrigerator before rolling and cutting.
What if I don’t have meringue powder for the royal icing?
You can make a simple glaze instead by whisking together 1 cup of powdered sugar with 2-3 tablespoons of milk or water. It won’t harden as firmly as royal icing, so the decorations might smudge slightly, but it will still taste delicious. Alternatively, you can skip the icing altogether and just sprinkle the cookies with colored sugar before baking.
How do I get the candy corn to stay on the icing?
Press the candy corn into the wet icing immediately after flooding the cookie. The icing acts as a glue. Once the icing sets (about 2 hours), the candy corn will be firmly attached. If you’re in a hurry, you can use a tiny dab of extra icing as adhesive for any pieces that feel loose.
Pin This Recipe!

Easy Turkey Hand Cookies: Best Thanksgiving Treat

These Easy Turkey Hand Sugar Cookies are a fun, personal, and delicious Thanksgiving treat made without special cookie cutters. Using your actual handprint as a template, these soft, buttery sugar cookies are decorated with royal icing and candy corn to create adorable turkey silhouettes.
- Prep Time: 30 minutes
- Cook Time: 12 minutes
- Total Time: 2 hours 42 minutes (includes chilling and setting time)
- Yield: 8-10 servings 1x
- Category: Dessert
- Cuisine: American
Ingredients
- 1 cup (2 sticks) unsalted butter, softened
- 1 cup (200g) granulated sugar
- 1 large egg, room temperature
- 2 teaspoons vanilla extract
- 2 ½ cups (312g) all-purpose flour
- 1 teaspoon baking powder
- ½ teaspoon fine sea salt
- For the Royal Icing: 2 cups powdered sugar, 2 tablespoons meringue powder, 3-4 tablespoons water
- For Decorating: candy corn, mini chocolate chips, orange sprinkles, red gel icing
Instructions
- In a large mixing bowl, cream together the softened butter and granulated sugar with an electric mixer on medium speed until light and fluffy, about 3 minutes. Scrape down the sides of the bowl once or twice.
- Add the egg and vanilla extract, then beat until fully combined, about 1 minute. The mixture should look smooth and slightly glossy.
- In a separate bowl, whisk together the flour, baking powder, and salt. Gradually add the dry ingredients to the wet mixture, mixing on low speed until just combined. Do not overmix.
- Divide the dough into two equal portions, flatten each into a disc about 1 inch thick, and wrap tightly in plastic wrap. Refrigerate for at least 2 hours, or overnight.
- Preheat your oven to 350°F (175°C). Line two baking sheets with parchment paper.
- On a lightly floured surface, roll out one disc of dough to about ¼-inch thickness. Place your hand flat on the dough, fingers slightly spread, and trace around it with a sharp knife or pizza cutter, leaving about ¼ inch of space around your fingers.
- Carefully lift the hand-shaped dough onto a prepared baking sheet, spacing them about 2 inches apart. Repeat with the remaining dough. You should get about 8-10 cookies.
- Bake for 10-12 minutes, or until the edges are just barely golden brown. Let the cookies cool on the baking sheet for 5 minutes, then transfer to a wire rack to cool completely.
- In a small bowl, whisk together the powdered sugar, meringue powder, and water until smooth. Transfer the icing to a piping bag or a zip-top bag with a tiny corner snipped off.
- Pipe a border around each cookie, then flood the center with more icing, using a toothpick to spread it into the corners. While the icing is still wet, press candy corn into the ‘fingers’ for feathers, place two mini chocolate chips for eyes, an orange sprinkle for the beak, and a small dot of red gel icing for the wattle.
- Let the icing set completely, about 2 hours at room temperature.
Notes
Chilling the dough is essential to prevent spreading. Use a light touch with flour when rolling. For a vegan version, use vegan butter, a flax egg, and aquafaba-based royal icing. For gluten-free, use a 1:1 gluten-free flour blend with xanthan gum. Cookies can be stored in an airtight container at room temperature for up to 1 week. Undecorated cookies can be frozen for up to 3 months.
Nutrition
- Serving Size: 1 cookie
- Calories: 320
- Sugar: 25
- Sodium: 180
- Fat: 14
- Saturated Fat: 8
- Carbohydrates: 45
- Fiber: 1
- Protein: 3
Keywords: turkey cookies, handprint cookies, Thanksgiving cookies, sugar cookies, easy Thanksgiving treat, no cookie cutter cookies



