Love this? Save it for later!
Share the inspiration with your friends
I was supposed to be making a classic New York cheesecake for a neighborhood potluck. A proper one, the kind that bakes low and slow in a water bath and demands your full attention for hours. I had the cream cheese softening, the springform pan greased, and a very specific vision in my head. Then my three-year-old decided it was the perfect moment to “help” by handing me the wrong bag of sugar from the pantry—the one with the cranberries I’d bought for a sauce I never got around to making. I was already late, the baby was crying, and honestly, I just stood there staring at those ruby-red berries thinking, “Well, this isn’t going to be what I planned.”
In a moment of pure, tired desperation, I grabbed a 9×13 pan instead. I figured I’d make a simple shortbread crust, pour a no-fuss cheesecake filling over it, and swirl in those cranberries with some orange zest I had sitting on the counter. No water bath, no fussing, no springform pan drama. What came out of the oven was nothing like the tall, stately cheesecake I’d intended to make. It was better. These bars had a buttery, sturdy crust, a creamy, tangy filling that didn’t crack, and these gorgeous pockets of tart-sweet cranberry throughout. The orange zest brightened everything up so it didn’t feel heavy. My neighbor, a retired pastry chef, took one bite and asked for the recipe before I even told her the story. Maybe you’ve been there—the kitchen chaos that accidentally leads to something you’ll make on purpose for years to come. That’s this bar for me. It’s the happy accident that became a family staple.
Why You’ll Love This Recipe
Let’s be real—most cheesecake recipes are a project. They require planning, patience, and a certain level of kitchen confidence that can be hard to muster on a Tuesday night. These Cranberry Orange Cheesecake Bars are the exact opposite. They deliver all the creamy, decadent satisfaction of a full cheesecake without any of the stress. I’ve tested this recipe more times than I can count, tweaking the crust-to-filling ratio and the perfect amount of orange zest to make sure it works every single time, even for beginner bakers.
- Quick & Easy: With just 20 minutes of active prep time, these bars come together faster than you can preheat the oven. No water bath, no fussy techniques.
- Simple Ingredients: You likely have most of these items in your fridge and pantry right now. No need for a special trip to a gourmet grocery store.
- Perfect for Family Gatherings: These bars are a showstopper for holiday dinners, potlucks, or a special weekend treat that feels fancy without the work.
- Crowd-Pleaser: The combination of tart cranberries and sweet, creamy cheesecake is a guaranteed hit. Kids love the bar format, and adults appreciate the sophisticated flavor.
- Unbelievably Delicious: The texture is what gets me every time. A firm, sandy shortbread crust, a velvety smooth cheesecake layer, and those jammy, jewel-toned cranberries on top.
What makes this recipe different from the hundreds of other cheesecake bar recipes out there? It’s the technique. Instead of just mixing the cranberries into the batter (which can make the whole thing turn a sad, grayish-pink), we swirl a quick homemade cranberry-orange sauce on top. This keeps the cheesecake layer pristine and white, while the cranberries create beautiful, distinct ribbons of flavor. It’s a small detail that makes a huge difference in both looks and taste. This isn’t just another dessert—it’s the kind that makes you close your eyes after the first bite, the kind your family will request for every single celebration from now on.
What Ingredients You Will Need
This recipe uses simple, honest ingredients to create something truly special. The beauty of it is that everything is a pantry or fridge staple, and the flavors are pure, bright, and comforting. I’ve tested this with a few different brands and want to share what works best so you get perfect results the first time.
For the Shortbread Crust
- 1 ½ cups (190g) all-purpose flour – Spoon and level your flour for the best texture. Too much flour makes the crust dense.
- ½ cup (100g) granulated sugar – Just enough sweetness to balance the tart cranberries.
- ½ cup (1 stick, 113g) unsalted butter, cold and cut into small cubes – Cold butter is key for a flaky, not greasy, crust. I prefer using a good quality European-style butter like Plugrà for a richer flavor, but any unsalted butter works.
- ¼ teaspoon salt – Enhances all the flavors.
For the Cranberry Orange Sauce
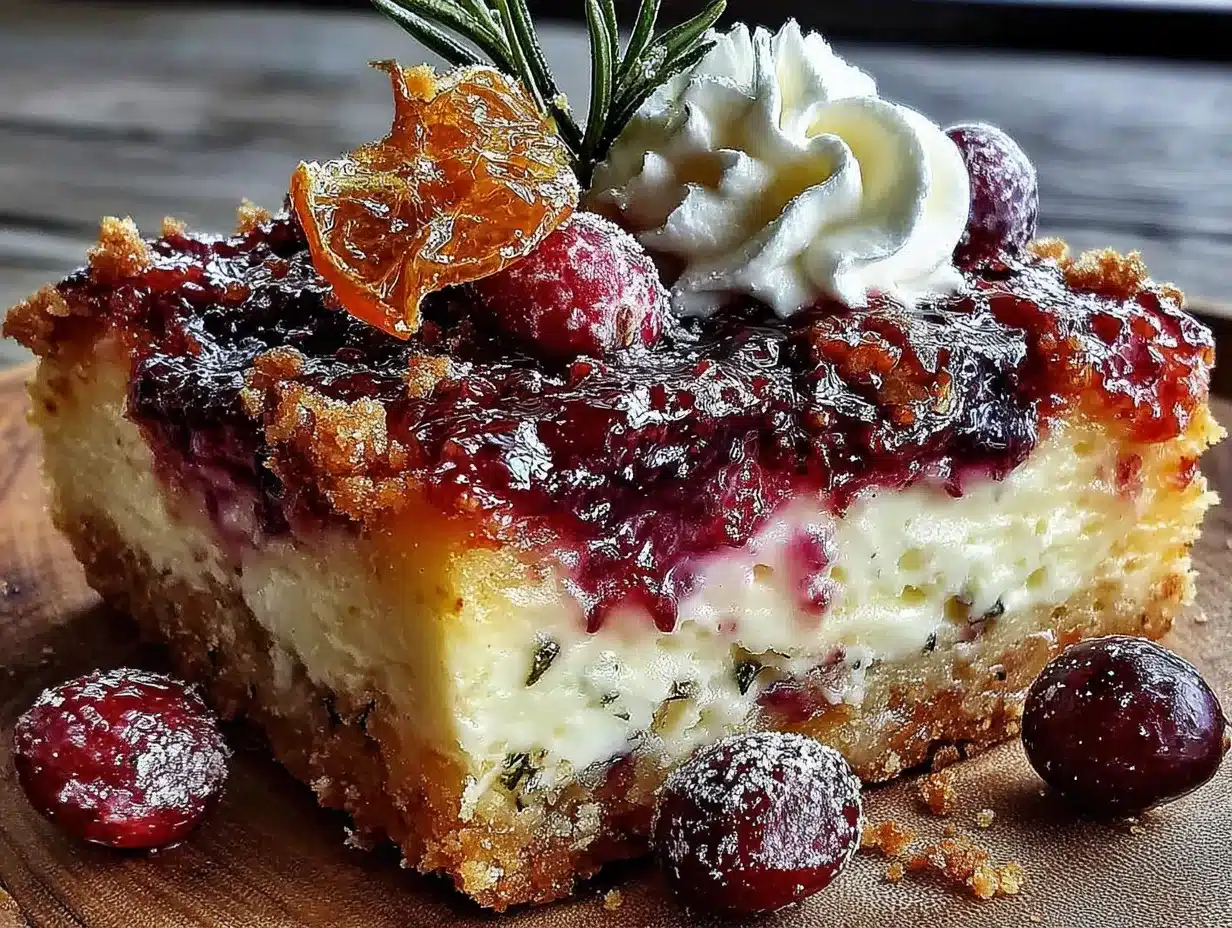
- 2 cups (200g) fresh or frozen cranberries – If using frozen, do not thaw them first. They’ll cook down perfectly from frozen.
- ½ cup (100g) granulated sugar – You can adjust this up or down depending on how sweet or tart you like your cranberry sauce.
- ¼ cup (60ml) water – Helps the cranberries break down and creates the perfect saucy consistency.
- Zest of 1 large orange – This is non-negotiable for that bright, sunny flavor. Use a microplane for the finest zest.
- 2 tablespoons freshly squeezed orange juice – Use the orange you just zested!
For the Cheesecake Filling
- 16 ounces (452g) full-fat cream cheese, softened to room temperature – This is crucial. Cold cream cheese will give you a lumpy filling. I recommend Philadelphia brand for its consistent, smooth texture. Let it sit on the counter for at least an hour.
- ¾ cup (150g) granulated sugar – Sweetens the filling perfectly without being cloying.
- 2 large eggs, at room temperature – Room temperature eggs emulsify into the batter much better than cold ones, creating a silkier texture.
- 1 teaspoon vanilla extract – Pure vanilla extract makes a difference here. Avoid imitation if you can.
- 1 tablespoon all-purpose flour – This is my secret ingredient! It helps stabilize the cheesecake and prevents cracking as it bakes.
- ½ cup (120ml) sour cream, at room temperature – Adds incredible tang and a velvety mouthfeel. Full-fat is best for the creamiest results.
Substitution Guidance: For a gluten-free version, you can substitute the all-purpose flour in the crust with a 1:1 gluten-free baking flour blend. The crust will be a bit more crumbly but just as delicious. You can also use a dairy-free cream cheese and sour cream alternative, but the texture will be slightly less rich.
Equipment Needed
You don’t need a fancy kitchen to make these bars. Most of these tools are things you probably already own. Let me walk you through what you’ll need and a few of my favorite budget-friendly picks.
- 9×13-inch baking pan – This is the perfect size for a generous batch of bars. A metal pan is ideal for even baking. If you only have a glass pan, just be aware that it might take a few minutes longer to bake.
- Parchment paper – A total lifesaver. It creates a sling that lets you lift the entire block of bars out of the pan for clean, easy slicing. Don’t skip this!
- Electric hand mixer or stand mixer – You need a mixer to get the cream cheese filling perfectly smooth and fluffy. A hand mixer works great and is more affordable. I’ve been using the same $20 model for years.
- Medium saucepan – For making the cranberry sauce. Any small pot will do.
- Large mixing bowls – One for the crust, one for the filling.
- Pastry cutter or fork – To cut the cold butter into the flour for the crust. You can also just use your fingertips, but a pastry cutter is faster and keeps the butter cold.
- Microplane or fine grater – For zesting that orange. A regular box grater will work in a pinch, but a microplane gives you the finest zest without any bitter white pith.
- Sharp knife – For slicing clean bars. A chef’s knife works better than a serrated knife here.
Maintenance Tip: If you use a metal pan, avoid using abrasive scrubbers on it to keep the non-stick surface (if it has one) in good shape. Just a good soak and a soft sponge will do the trick.
Preparation Method
Alright, let’s get to the fun part! I’ve broken this down into simple, foolproof steps. Follow along, and you’ll have a pan of gorgeous bars in no time. Trust me on the timing—it’s all designed to keep you moving efficiently.
Step 1: Prep Your Pan and Oven (5 minutes)
Preheat your oven to 350°F (175°C). Line your 9×13-inch baking pan with a long sheet of parchment paper, leaving about 2 inches of overhang on the two long sides. This is your “sling” for lifting the finished bars out. Lightly spray the parchment with non-stick cooking spray or rub it with a little butter. This step takes two minutes but saves you so much frustration later.
Step 2: Make the Shortbread Crust (10 minutes)
In a large bowl, whisk together the 1 ½ cups all-purpose flour, ½ cup sugar, and ¼ teaspoon salt. Add the cold, cubed butter. Use a pastry cutter or your fingertips to work the butter into the flour mixture until it looks like coarse, damp sand with some pea-sized butter pieces remaining. Don’t overwork it—those little butter bits are what make the crust tender. Press this mixture firmly and evenly into the bottom of your prepared pan. I like to use the bottom of a flat measuring cup to really pack it down. Bake the crust for 15 minutes, until it’s just lightly golden around the edges. Set it on a wire rack to cool while you make the filling.
Step 3: Make the Cranberry Orange Sauce (10 minutes)
While the crust bakes, combine the 2 cups cranberries, ½ cup sugar, ¼ cup water, orange zest, and orange juice in a medium saucepan. Bring it to a simmer over medium heat, stirring occasionally. Let it cook for 5-7 minutes, until the cranberries have burst and the mixture has thickened slightly. It will continue to thicken as it cools. Don’t boil it too hard or it will become too syrupy. Remove it from the heat and let it cool while you make the cheesecake filling.
Step 4: Make the Cheesecake Filling (10 minutes)
In a large mixing bowl, beat the softened cream cheese with an electric mixer on medium speed until it’s smooth and completely lump-free—about 2 minutes. Scrape down the sides and the bottom of the bowl with a spatula. Add the ¾ cup sugar and beat until combined. Add the eggs one at a time, beating on low speed just until incorporated after each addition. Overmixing at this stage adds too much air and can cause cracks. Beat in the vanilla extract and the 1 tablespoon of flour until just combined. Finally, fold in the sour cream by hand with a spatula until the batter is smooth and uniform. The batter should be thick, creamy, and silky.
Step 5: Assemble and Bake (1 hour 10 minutes)
Pour the cheesecake filling over the pre-baked crust and spread it into an even layer. Drop spoonfuls of the cooled cranberry sauce over the top of the filling. Use a butter knife or a skewer to gently swirl the cranberry sauce into the cheesecake. Don’t over-swirl—you want distinct ribbons of red and white. Bake at 350°F (175°C) for 45-50 minutes. The edges should be set and slightly puffed, but the center should still have a slight jiggle when you gently shake the pan. This is the sign of a perfectly baked, creamy cheesecake. If the center is completely firm, it’s overbaked.
Step 6: Cool and Chill (4+ hours)
Place the pan on a wire rack and let the bars cool completely at room temperature—about 1 hour. This is important to prevent condensation. Then, cover the pan with plastic wrap or foil and refrigerate for at least 4 hours, but preferably overnight. This is the hardest part! The chilling time is what sets the bars so you can slice them cleanly. Once fully chilled, use the parchment sling to lift the entire block out of the pan. Place it on a cutting board and use a sharp knife to slice into squares. Wipe the knife clean between cuts for the neatest edges.
Cooking Tips & Techniques
I’ve made this recipe more times than I can count, and I’ve definitely made my share of mistakes along the way. Here are the tips I wish someone had told me from the start.
Don’t Overmix the Filling. This is probably the most common mistake. When you beat the eggs into the cream cheese, do it on low speed and only until they disappear into the batter. Overmixing incorporates too much air, which expands during baking and then collapses, causing those dreaded cracks. I learned this the hard way when I made a cheesecake that looked like a map of the San Andreas Fault.
Room Temperature Ingredients Are Not a Suggestion. I know it’s tempting to use cold cream cheese and eggs straight from the fridge, but it really does make a difference. Cold cream cheese creates a lumpy batter, and cold eggs can cause the batter to curdle. Take the time to let everything sit on the counter for at least an hour. Set a timer if you have to—I do!
How to Avoid a Soggy Crust. Pre-baking the crust for 15 minutes is essential. It gives the shortbread a head start so it stays crisp and firm, even under the moist cheesecake filling. Don’t skip this step, and don’t underbake it. A pale crust will be a sad, soggy crust.
Timing and Multitasking. The best way to tackle this recipe is to make the cranberry sauce while the crust is pre-baking. That way, you’re using your oven time efficiently. Then, while the sauce cools, you can make the filling. It all flows together beautifully if you plan ahead.
The Jiggle Test. Don’t rely solely on a toothpick to test doneness. A toothpick will come out clean even when the center is still underbaked. Instead, gently shake the pan. The edges should be set, but the center should wobble like Jell-O. It will continue to set as it cools.
Variations & Adaptations
One of the best things about this recipe is how adaptable it is. I love playing around with different flavors, and I’ve tried a few variations that turned out wonderfully. Here are some ideas to make it your own.
- Citrus Swap: Not an orange fan? No problem! Swap the orange zest and juice for lemon or lime. A lemon-cranberry cheesecake bar is incredibly bright and refreshing, especially in the spring.
- Berry Medley: Instead of just cranberries, use a mix of frozen berries—blueberries, raspberries, and blackberries. The sauce will be a deep, gorgeous purple, and the flavor will be more complex.
- Spiced Version: Add ½ teaspoon of cinnamon and ¼ teaspoon of nutmeg to the cranberry sauce as it cooks. This makes it taste like a warm, cozy holiday dessert. You can also add a pinch of ground ginger to the crust for an extra layer of warmth.
- Gluten-Free Adaptation: As I mentioned, use a 1:1 gluten-free baking flour blend in the crust. I’ve tried this with a few different brands, and King Arthur’s Measure for Measure works beautifully. The crust will be a bit more delicate, so be gentle when pressing it into the pan.
- White Chocolate Drizzle: For an extra touch of indulgence, melt ½ cup of white chocolate chips with a teaspoon of coconut oil and drizzle it over the chilled bars. The sweet white chocolate is a perfect match for the tart cranberries.
I once made a version with a gingersnap crust instead of shortbread, and it was incredible. The spicy ginger cookies paired beautifully with the orange and cranberry. It’s a great option if you’re feeling adventurous!
Serving & Storage Suggestions
These bars are incredibly versatile when it comes to serving. They’re delicious on their own, but a few simple additions can make them feel even more special.
Serving: I like to serve these bars chilled, straight from the fridge. The texture is firm and creamy, and the flavors are most vibrant when cold. For a prettier presentation, let them sit at room temperature for about 10 minutes before slicing. This softens the cream cheese just enough for a perfect, clean cut. A light dusting of powdered sugar right before serving adds a beautiful, snowy finish. They’re wonderful on a dessert board alongside fresh berries and a cup of hot coffee or a glass of cold milk.
Storage: Store any leftover bars in an airtight container in the refrigerator. They will keep perfectly for up to 5 days. I find that the flavors actually meld together and get even better on the second or third day. The crust stays firm, and the cheesecake stays creamy.
Freezing: These bars freeze like a dream! Once they are fully chilled and sliced, place the individual bars on a baking sheet lined with parchment paper and freeze for about an hour, or until solid. Then, transfer the frozen bars to a freezer-safe bag or container, separating layers with parchment paper. They will keep for up to 3 months. To thaw, simply transfer a bar to the refrigerator overnight, or let it sit at room temperature for about 20 minutes. This is my favorite trick for having a homemade dessert ready to go at a moment’s notice.
Reheating: I don’t recommend reheating these bars. They are meant to be served cold or at room temperature. The texture of the cheesecake can become grainy if heated.
Nutritional Information & Benefits
While this is definitely a treat, I believe in enjoying food without guilt. Knowing what’s in your food helps you make informed choices, and I want to share a quick overview. Please note that these are estimates and will vary based on specific ingredients and serving sizes.
| Nutrient | Amount Per Serving (1 bar) |
|---|---|
| Calories | ~350-400 |
| Fat | ~22g |
| Saturated Fat | ~13g |
| Carbohydrates | ~38g |
| Sugar | ~28g |
| Protein | ~5g |
Health Benefits: The real star here is the cranberry. Cranberries are packed with antioxidants and vitamin C, which are great for your immune system. The orange zest provides a little extra vitamin C and adds fiber. The cream cheese and sour cream offer calcium and protein. Is it a health food? No. But it’s a dessert made with real, wholesome ingredients that you can feel good about sharing with your family.
Dietary Considerations: This recipe contains gluten (from the flour), dairy (from the butter, cream cheese, and sour cream), and eggs. As mentioned, you can make it gluten-free with a simple flour swap. It is not suitable for a vegan or dairy-free diet without significant substitutions.
Potential Allergens: Wheat, dairy, eggs.
Conclusion
These Cranberry Orange Cheesecake Bars are more than just a recipe—they’re a testament to the fact that sometimes the best things in life come from happy accidents. They’re the dessert you can whip up on a busy Wednesday and have everyone at the table asking for seconds. They’re the dish you’ll bring to every holiday gathering and watch disappear in minutes. The combination of the buttery shortbread, the tangy-sweet cranberry swirl, and the velvety cheesecake is just so perfectly balanced.
I truly hope you give these a try. Don’t be afraid to make them your own—swap in your favorite berries, add a pinch of spice, or drizzle them with chocolate. The best recipes are the ones that get passed around and adapted. I’d love to hear how they turn out for you! Did you make a fun variation? Did your family love them as much as mine does? Drop a comment below and share your experience. Your feedback and ideas are what make this community so special. Happy baking, friends!
Frequently Asked Questions
Can I use a different pan size?
Yes, you can use a 9×9-inch square pan, but the bars will be much thicker and will need a longer bake time—likely 55-65 minutes. Keep an eye on the center jiggle. A 9×13 pan is ideal for the perfect bar-to-crust ratio.
Why did my cheesecake filling crack?
Cracks usually happen from overmixing the batter (too much air) or overbaking. Make sure your cream cheese is truly room temperature, mix on low speed after adding the eggs, and pull the bars out of the oven when the center still has a slight wobble. A water bath isn’t needed for this recipe, but those two tips are crucial.
Can I use store-bought cranberry sauce instead of making my own?
You can, but I really don’t recommend it. Homemade cranberry sauce has a brighter, fresher flavor and a better consistency for swirling. Canned sauce is often too jellied and sweet. The homemade version takes only 10 minutes and makes a huge difference in the final taste.
How do I get clean, neat slices?
Patience is key! The bars must be fully chilled—at least 4 hours, but overnight is best. Use a long, sharp chef’s knife and wipe the blade clean with a damp paper towel between each cut. This prevents the cranberry swirl from smearing across the white cheesecake.
Can I make these bars ahead of time for a party?
Absolutely! In fact, I recommend it. These bars taste even better after a day or two in the fridge, as the flavors have time to meld. You can make them up to 2 days in advance and keep them covered in the refrigerator. They are the perfect make-ahead dessert for stress-free entertaining.
Pin This Recipe!
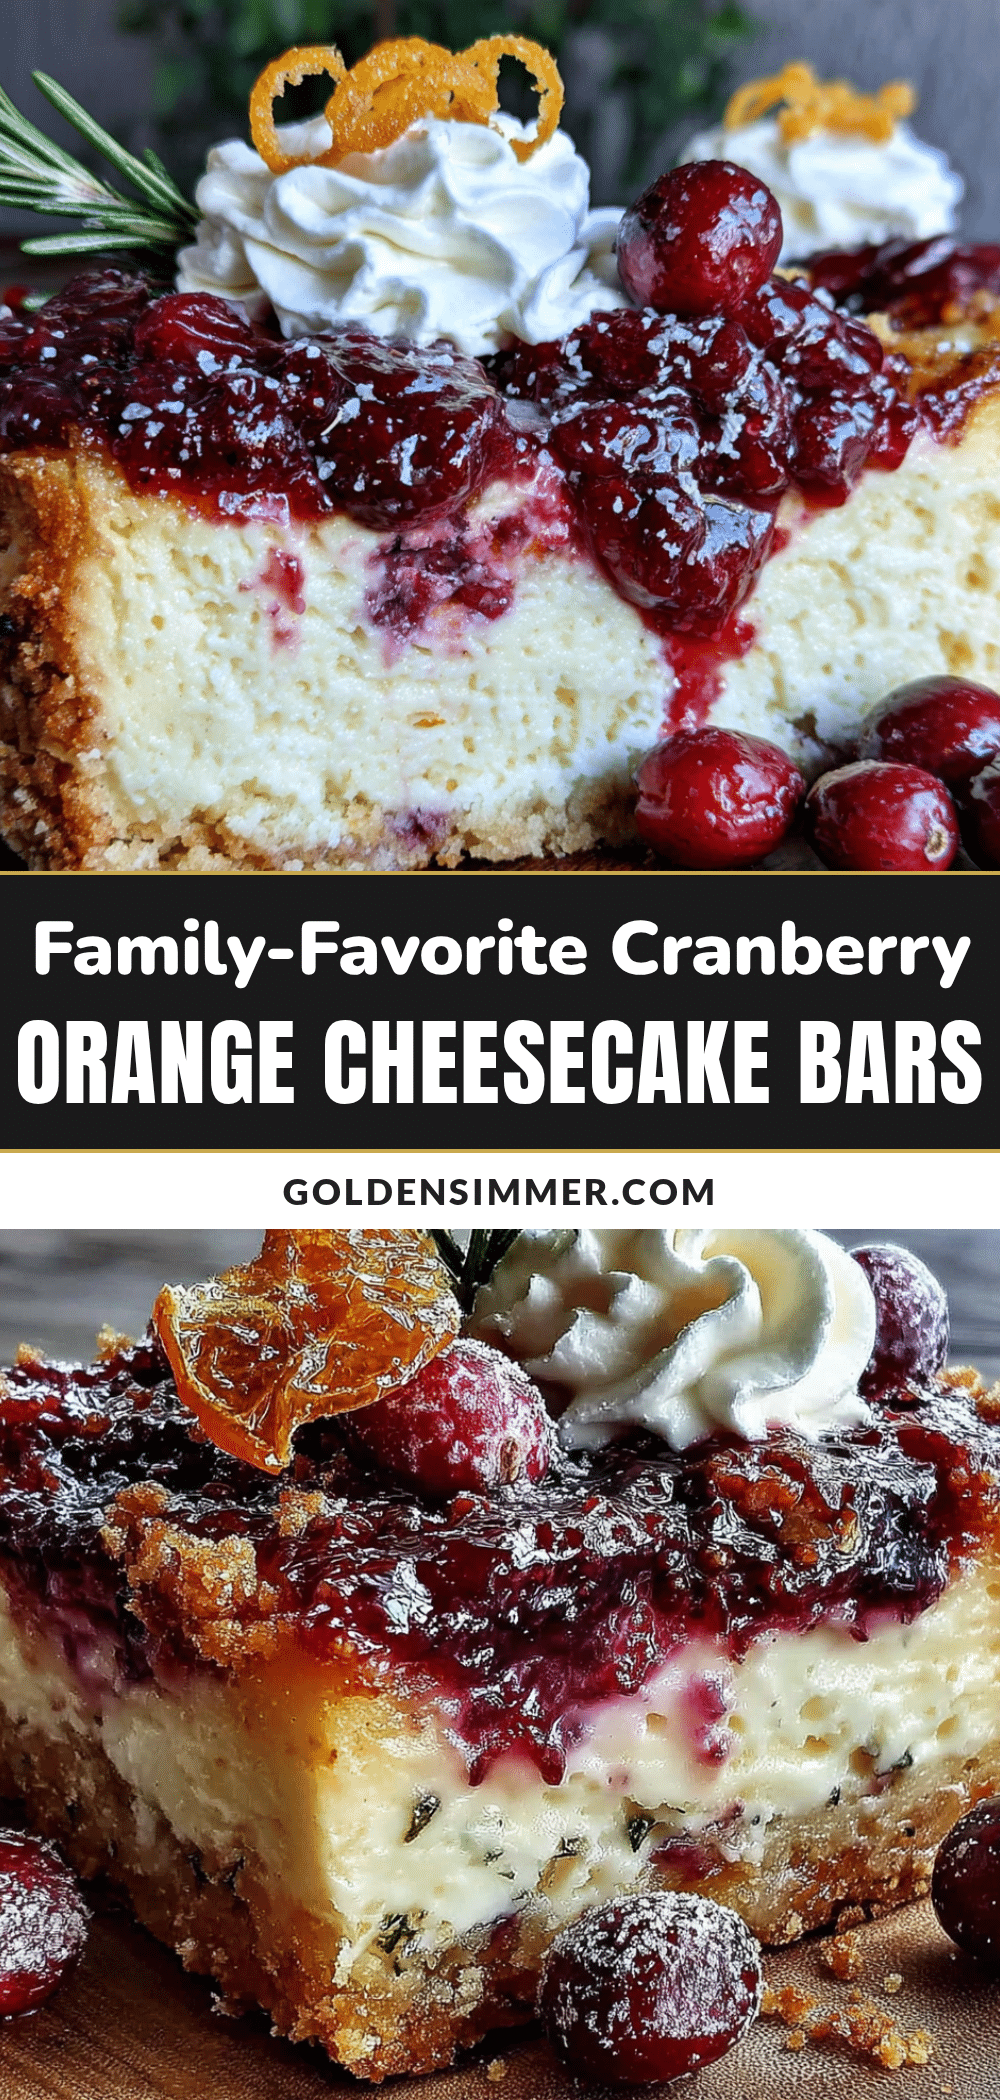
Family-Favorite Cranberry Orange Cheesecake Bars: Easy 20-Min Prep
These Cranberry Orange Cheesecake Bars deliver all the creamy, decadent satisfaction of a full cheesecake without any of the stress. With a buttery shortbread crust, a velvety smooth cheesecake layer, and gorgeous ribbons of tart-sweet cranberry sauce, they’re the perfect easy dessert for any occasion.
- Prep Time: 20 minutes
- Cook Time: 50 minutes
- Total Time: 5 hours 10 minutes (including chilling)
- Yield: 12 servings 1x
- Category: Dessert
- Cuisine: American
Ingredients
- 1 ½ cups (190g) all-purpose flour
- ½ cup (100g) granulated sugar
- ½ cup (1 stick, 113g) unsalted butter, cold and cut into small cubes
- ¼ teaspoon salt
- 2 cups (200g) fresh or frozen cranberries
- ½ cup (100g) granulated sugar
- ¼ cup (60ml) water
- Zest of 1 large orange
- 2 tablespoons freshly squeezed orange juice
- 16 ounces (452g) full-fat cream cheese, softened to room temperature
- ¾ cup (150g) granulated sugar
- 2 large eggs, at room temperature
- 1 teaspoon vanilla extract
- 1 tablespoon all-purpose flour
- ½ cup (120ml) sour cream, at room temperature
Instructions
- Preheat your oven to 350°F (175°C). Line a 9×13-inch baking pan with parchment paper, leaving about 2 inches of overhang on the two long sides. Lightly spray the parchment with non-stick cooking spray or rub with butter.
- In a large bowl, whisk together 1 ½ cups all-purpose flour, ½ cup sugar, and ¼ teaspoon salt. Add the cold, cubed butter. Use a pastry cutter or your fingertips to work the butter into the flour mixture until it looks like coarse, damp sand with some pea-sized butter pieces remaining. Press this mixture firmly and evenly into the bottom of the prepared pan. Bake for 15 minutes, until just lightly golden around the edges. Set on a wire rack to cool.
- While the crust bakes, combine 2 cups cranberries, ½ cup sugar, ¼ cup water, orange zest, and orange juice in a medium saucepan. Bring to a simmer over medium heat, stirring occasionally. Cook for 5-7 minutes, until the cranberries have burst and the mixture has thickened slightly. Remove from heat and let cool.
- In a large mixing bowl, beat the softened cream cheese with an electric mixer on medium speed until smooth and lump-free, about 2 minutes. Scrape down the sides and bottom of the bowl. Add ¾ cup sugar and beat until combined. Add the eggs one at a time, beating on low speed just until incorporated after each addition. Beat in the vanilla extract and 1 tablespoon flour until just combined. Fold in the sour cream by hand with a spatula until smooth.
- Pour the cheesecake filling over the pre-baked crust and spread into an even layer. Drop spoonfuls of the cooled cranberry sauce over the top. Use a butter knife or skewer to gently swirl the cranberry sauce into the cheesecake, creating distinct ribbons.
- Bake at 350°F (175°C) for 45-50 minutes. The edges should be set and slightly puffed, but the center should still have a slight jiggle when gently shaken.
- Place the pan on a wire rack and let cool completely at room temperature, about 1 hour. Then cover with plastic wrap or foil and refrigerate for at least 4 hours, preferably overnight.
- Once fully chilled, use the parchment sling to lift the entire block out of the pan. Place on a cutting board and slice into squares with a sharp knife, wiping the knife clean between cuts.
Notes
Don’t overmix the filling to avoid cracks. Room temperature ingredients are essential. Pre-bake the crust to prevent sogginess. Use the jiggle test for doneness. Chill thoroughly before slicing for clean cuts.
Nutrition
- Serving Size: 1 bar
- Calories: 375
- Sugar: 28
- Sodium: 200
- Fat: 22
- Saturated Fat: 13
- Carbohydrates: 38
- Fiber: 1
- Protein: 5
Keywords: cranberry orange cheesecake bars, easy cheesecake bars, holiday dessert, potluck dessert, no water bath cheesecake