Love this? Save it for later!
Share the inspiration with your friends
“You know that feeling when a simple craving sneaks up on you at the worst possible moment?” That was me one sweltering July afternoon, standing in my almost-empty freezer and realizing I had zero frozen treats to combat the heat. Honestly, I wasn’t expecting much since I had only a handful of ingredients: canned coconut milk, some frozen berries, and a few pantry staples. But the idea hit me like a flash—why not make layered popsicles that celebrate summer with a splash of red, white, and blue? I grabbed my trusty blender, got a little messy (because, well, who closes the lids properly the first time?), and started layering flavors that felt fresh, light, and dairy-free.
What came out was far from the typical popsicle you find in the grocery aisle. The creamy coconut base gave a silky texture that made each bite feel like a tiny tropical vacation. The vibrant layers of berry and coconut created a visual treat that made me smile every time I opened the freezer. It wasn’t just about the look though—the balance of tartness from the berries and the mellow sweetness of coconut made this recipe a hit with everyone who tried it, even my skeptical neighbor who swore off “fancy frozen snacks.”
Maybe you’ve been there too—the desperate need for something cool, refreshing, and a bit patriotic to celebrate those sunny days outdoors. This recipe stayed with me because it’s easy enough to whip up on a whim, and it’s flexible if you want to swap berries or tweak the sweetness. Let me tell you, the first time I saw my kids’ eyes light up at those red, white, and blue layers, I knew this would become a summer staple. So, grab your blender and popsicle molds, and let’s make these fresh dairy-free coconut popsicles that bring a splash of color and flavor to your sunny days!
Why You’ll Love This Recipe
After several trials under the blazing summer sun, this Fresh Dairy-Free Coconut Popsicles recipe has proven to be a winner in my kitchen. Here’s why it’s worth your attention:
- Quick & Easy: The whole process takes about 15 minutes of hands-on time, with just a bit of freezing wait—ideal for last-minute summer treats.
- Simple Ingredients: No need for fancy stuff—just coconut milk, simple fruits, and natural sweeteners that you likely have on hand.
- Perfect for Summer Parties: These popsicles are great for backyard barbecues, 4th of July celebrations, or any sunny afternoon chill session.
- Crowd-Pleaser: Kids love the colorful stripes, and adults appreciate the fresh, dairy-free twist that feels lighter than traditional ice creams.
- Unbelievably Delicious: The creamy coconut combined with fruity layers makes for a smooth and refreshing bite every time.
This isn’t just any popsicle recipe. What sets it apart is the way the coconut cream creates a luscious, dairy-free “white” layer that’s not too sweet or heavy. Plus, the berry layers are thoughtfully balanced—not too tart or sugary, just naturally bright and fresh. Honestly, it’s like the dessert version of a cool ocean breeze on a hot day. Whether you’re a seasoned popsicle pro or a first-timer, this recipe strikes the perfect balance between fun and fuss-free.
What Ingredients You Will Need
This recipe uses simple, wholesome ingredients to deliver bold flavor and satisfying texture without the fuss. Most are pantry or freezer staples, and swapping ingredients is a breeze if you want to customize.
- Coconut Milk: 2 cups (480 ml) full-fat canned coconut milk, well shaken—this gives the creamy white layer its rich texture. I prefer Native Forest brand for its natural flavor and thickness.
- Maple Syrup: 3 tablespoons (45 ml) pure maple syrup, for gentle sweetness. You can substitute agave nectar or honey if you’re not strictly vegan.
- Vanilla Extract: 1 teaspoon (5 ml) pure vanilla extract, to deepen the coconut flavor.
- Frozen Strawberries: 1 cup (150 g), thawed slightly and puréed—this forms the bright red layer. Fresh berries work too but frozen is more convenient.
- Frozen Blueberries: 1 cup (150 g), thawed and blended for the blue layer. Using frozen helps keep the popsicles cold longer.
- Lemon Juice: 1 tablespoon (15 ml), freshly squeezed—for a subtle tartness in the berry layers.
- Optional: A pinch of sea salt to balance sweetness.
Substitution Tips: Use almond milk or oat milk if coconut milk isn’t your thing (though the texture will be less creamy). For a lower sugar option, reduce the maple syrup or swap with a sugar-free syrup like monk fruit.
Equipment Needed
- Blender or Food Processor: Essential for creating smooth berry purees and mixing the coconut base. A standard blender like a Ninja or Vitamix works great, but a good-quality food processor can do the trick too.
- Popsicle Molds: You’ll need molds that hold about 3-4 ounces (90-120 ml) each. Silicone molds are easier for unmolding, but plastic ones with sticks work just fine.
- Mixing Bowls: For prepping and layering the different mixtures.
- Measuring Cups and Spoons: For accuracy, especially when balancing sweetness and acidity.
Pro Tip: If you don’t have popsicle molds, small paper cups with wooden sticks will do in a pinch (just be careful when unmolding). Also, a sharp knife helps slice any thick frozen fruit chunks before blending.
Preparation Method
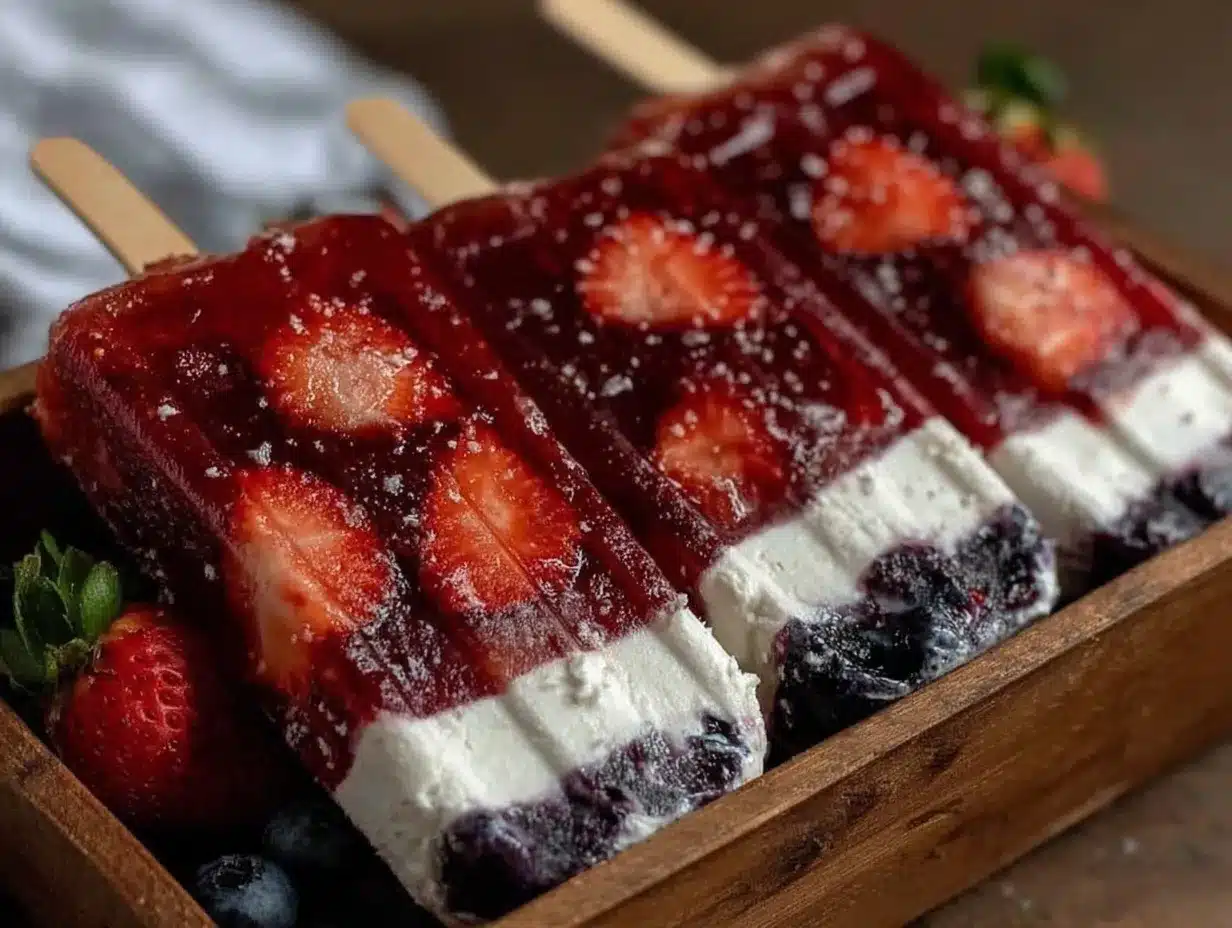
- Prepare the Coconut Layer: In a mixing bowl, whisk together 2 cups (480 ml) full-fat canned coconut milk, 3 tablespoons (45 ml) maple syrup, and 1 teaspoon (5 ml) vanilla extract until smooth and slightly thickened. Set aside.
- Make the Red Layer: Place 1 cup (150 g) frozen strawberries in your blender. Add 1 tablespoon (15 ml) lemon juice and a pinch of sea salt. Blend until completely smooth. Taste and add 1 teaspoon (5 ml) maple syrup if you prefer it sweeter. Pour a spoonful (about 2-3 tablespoons / 30-45 ml) of this mixture into each popsicle mold to create the red base. Freeze for about 30-40 minutes until firm but not rock hard.
- Add the White Layer: Once the red layer is firm, spoon in the coconut milk mixture, filling each mold about one-third full. Freeze again for 30-40 minutes until set.
- Prepare the Blue Layer: Blend 1 cup (150 g) frozen blueberries with 1 tablespoon (15 ml) lemon juice and a pinch of salt until smooth. Sweeten with 1-2 teaspoons (5-10 ml) maple syrup if needed. Pour the blue mixture over the coconut layer in the molds. Insert popsicle sticks and freeze for a minimum of 4 hours, preferably overnight.
- Unmold and Serve: To release the popsicles, run warm water briefly over the mold’s outside. Gently pull on the sticks, and enjoy your fresh, dairy-free treat!
Note: Be patient with the freezing times between layers—this helps keep those iconic stripes clean and distinct. If you’re in a hurry, you can speed up freezing by placing molds in the coldest part of your freezer or using a metal tray underneath.
Cooking Tips & Techniques
One trick I learned early on: layering popsicles without mixing colors requires letting each layer partially freeze until firm but still slightly soft on top. If you pour the next layer too early, the colors blend and you lose that festive red-white-blue look.
Also, blending the berries well is key. Sometimes, frozen fruit chunks cause uneven texture or popsicle sticks to shift awkwardly. Running the blend a little longer or straining the puree can help, but honestly, a few tiny berry seeds never hurt anyone.
Keep in mind that popsicles taste best after fully freezing overnight. If you try to eat them too soon, they can be mushy or drip too fast. I’ve learned to plan ahead, making them the night before a picnic or party.
If your coconut milk separates (which sometimes happens), just whisk it vigorously before using. The creamier, the better. Using full-fat canned coconut milk is non-negotiable here — it’s what gives that dreamy texture.
Variations & Adaptations
- Flavor Swaps: Swap strawberries for raspberries or cherries, and blueberries for blackberries or purple grapes to change up the berry profile.
- Dairy-Free Yogurt Layer: For a tangier white layer, mix coconut yogurt with a bit of maple syrup instead of coconut milk. Adds probiotic benefits too.
- Added Texture: Toss in finely chopped mint leaves or shredded coconut between layers for a fresh twist and a little crunch.
- Lower Sugar: Reduce maple syrup or replace with stevia drops, adjusting to taste.
- Alcohol Infused: For adults only, add a splash of rum or vodka to the berry layers for a boozy treat (freeze times may vary).
I once made a batch with a splash of lime zest in the coconut layer, and it gave a zippy brightness that was surprisingly addictive. You might want to try that if you’re feeling adventurous.
Serving & Storage Suggestions
These popsicles are best served straight from the freezer, on a warm day when you want a refreshing, light treat. They look fantastic on a platter garnished with fresh berries and mint leaves, perfect for summer gatherings or holiday parties.
To store, keep them in an airtight container or wrapped tightly in plastic wrap to avoid freezer burn or absorbing other odors. They stay fresh for up to 2 weeks, though honestly, they rarely last that long in my house!
Reheat gently by running warm water around the mold to loosen before serving. If you want a softer texture, leave out for 5 minutes at room temperature.
Over time, the flavors meld subtly, making them even tastier after a day or two. Though, fair warning—waiting that long is tough when everyone’s reaching for one!
Nutritional Information & Benefits
Each popsicle (about 3.5 oz / 100 g) roughly contains:
| Calories | 90-110 kcal |
|---|---|
| Fat | 7-9 g (mostly from coconut milk, rich in medium-chain triglycerides) |
| Carbohydrates | 8-10 g (natural sugars from fruit and maple syrup) |
| Protein | 1-2 g |
The key health benefit here is the use of coconut milk, which provides healthy fats that can support energy and satiety. The berries add antioxidants and vitamins (hello, vitamin C and fiber!). This recipe is naturally gluten-free, dairy-free, and vegan, making it a friendly choice for many dietary needs.
From a wellness perspective, these popsicles offer a clean, natural alternative to store-bought treats packed with artificial colors and preservatives. I appreciate this recipe because it’s a guilt-free way to enjoy a bit of indulgence on a hot day.
Conclusion
Fresh Dairy-Free Coconut Popsicles with Red, White & Blue Layers are a simple, delightful way to celebrate summer with a treat that’s both beautiful and tasty. Whether you’re cooling off after a sunny day or looking for an easy dessert to impress guests, this recipe fits the bill perfectly.
I love how customizable and forgiving it is—you can swap fruits, adjust sweetness, or even sneak in some fun flavors without stress. Honestly, it’s one of those recipes that makes me feel a little proud every time I serve it, even if I accidentally drip a bit on the counter (which happens more than I’d like to admit).
Give this recipe a try, and I’d love to hear how you make it your own—drop a comment below or share your favorite fruit combos. Let’s keep the summer vibes rolling, one colorful popsicle at a time!
FAQs About Fresh Dairy-Free Coconut Popsicles
Can I use fresh fruit instead of frozen for the berry layers?
Yes, fresh fruit works well but you might need to add a few ice cubes or chill the puree to keep the popsicles cold and firm.
How long do these popsicles need to freeze?
Each layer needs about 30-40 minutes to firm up before adding the next. The final freeze should be at least 4 hours, preferably overnight.
What if I don’t have popsicle molds?
You can use small paper cups or silicone muffin cups and insert wooden sticks once partially frozen.
Are these popsicles suitable for kids?
Absolutely! They’re naturally sweetened and dairy-free, making them a great treat for kids and adults alike.
Can I prepare these popsicles in advance?
Yes, they keep well for up to 2 weeks in the freezer when stored properly in an airtight container.
Pin This Recipe!
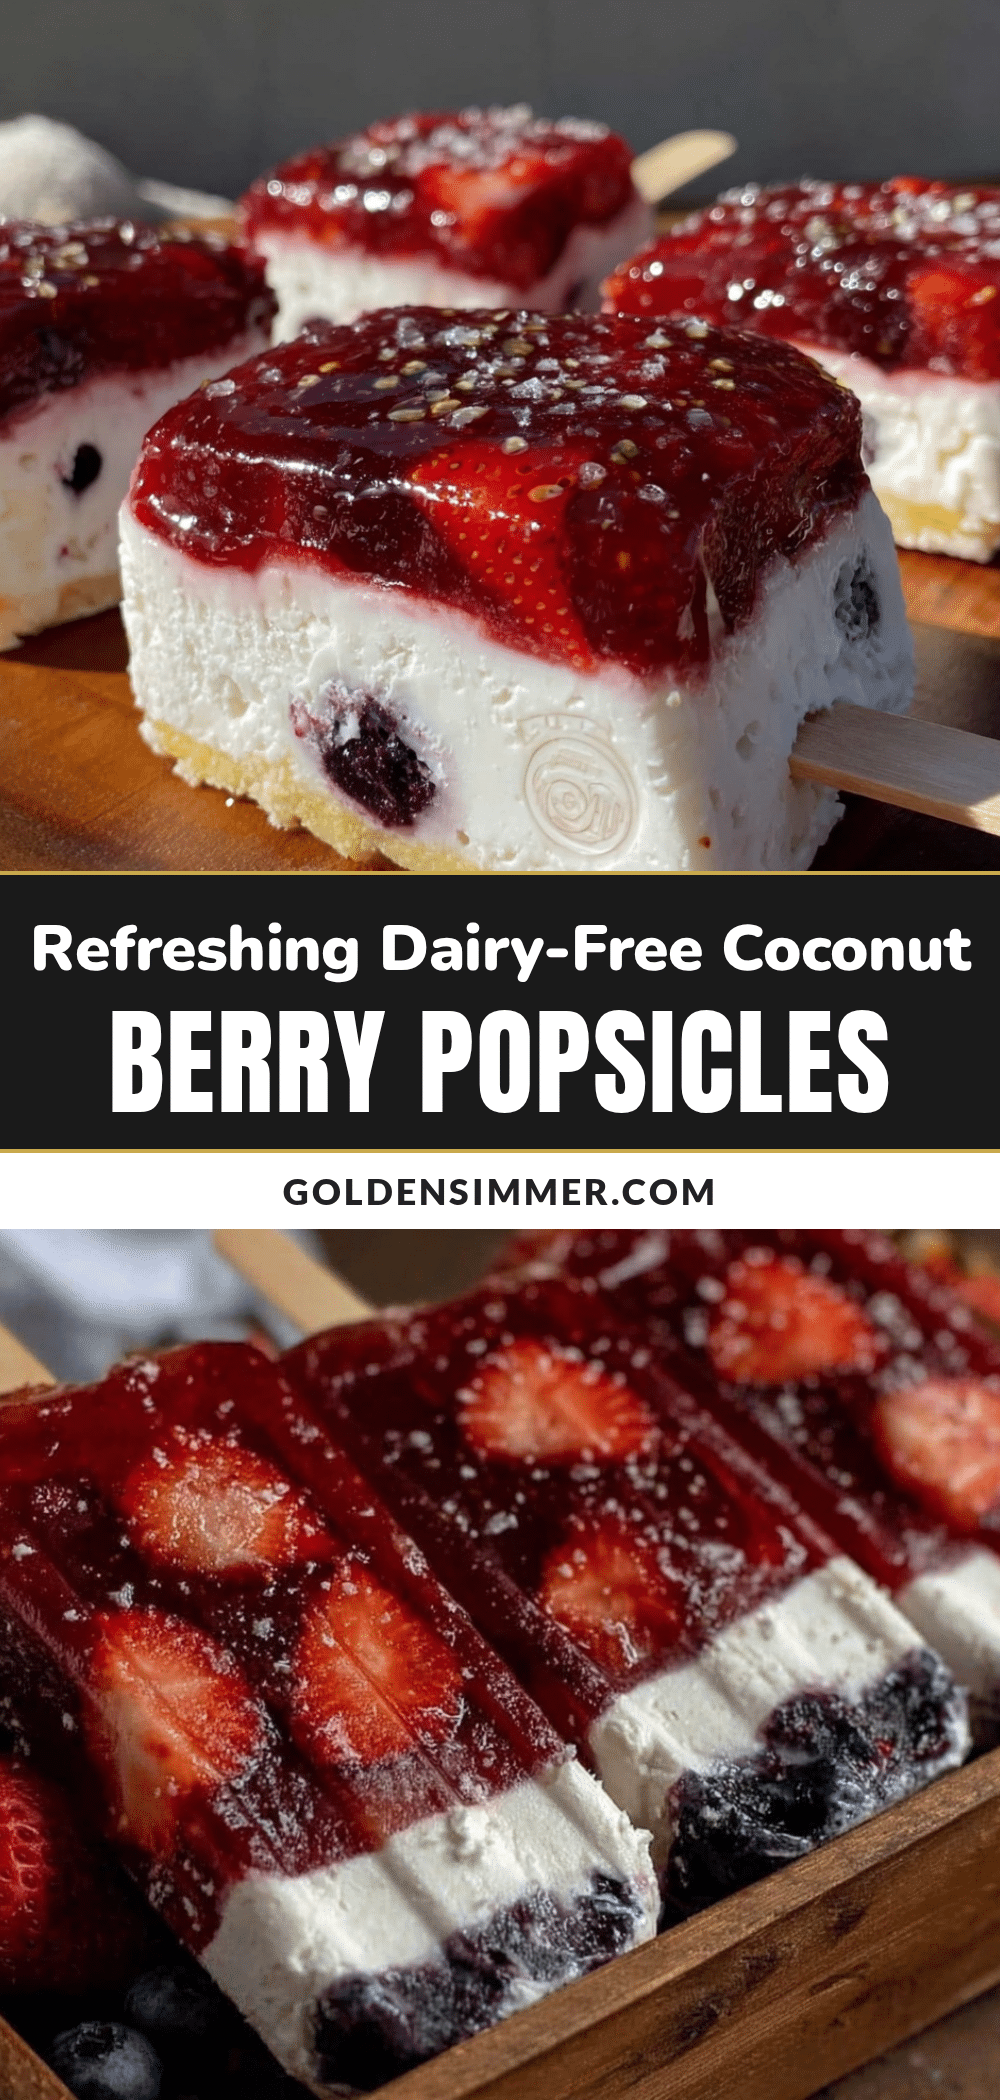
Fresh Dairy-Free Coconut Popsicles Recipe Easy Patriotic Red White Blue Treats
These fresh dairy-free coconut popsicles feature vibrant red, white, and blue layers made from creamy coconut milk and fresh berries. They are quick, easy, and perfect for summer parties or a refreshing treat on a hot day.
- Prep Time: 15 minutes
- Cook Time: 5 hours
- Total Time: 5 hours 15 minutes
- Yield: 6-8 popsicles (3-4 oz each) 1x
- Category: Dessert
- Cuisine: American
Ingredients
- 2 cups (480 ml) full-fat canned coconut milk, well shaken
- 3 tablespoons (45 ml) pure maple syrup
- 1 teaspoon (5 ml) pure vanilla extract
- 1 cup (150 g) frozen strawberries, thawed slightly and puréed
- 1 cup (150 g) frozen blueberries, thawed and blended
- 1 tablespoon (15 ml) freshly squeezed lemon juice
- Pinch of sea salt (optional)
Instructions
- In a mixing bowl, whisk together 2 cups (480 ml) full-fat canned coconut milk, 3 tablespoons (45 ml) maple syrup, and 1 teaspoon (5 ml) vanilla extract until smooth and slightly thickened. Set aside.
- Place 1 cup (150 g) frozen strawberries in your blender. Add 1 tablespoon (15 ml) lemon juice and a pinch of sea salt. Blend until completely smooth. Taste and add 1 teaspoon (5 ml) maple syrup if you prefer it sweeter. Pour about 2-3 tablespoons (30-45 ml) of this mixture into each popsicle mold to create the red base. Freeze for about 30-40 minutes until firm but not rock hard.
- Once the red layer is firm, spoon in the coconut milk mixture, filling each mold about one-third full. Freeze again for 30-40 minutes until set.
- Blend 1 cup (150 g) frozen blueberries with 1 tablespoon (15 ml) lemon juice and a pinch of salt until smooth. Sweeten with 1-2 teaspoons (5-10 ml) maple syrup if needed. Pour the blue mixture over the coconut layer in the molds. Insert popsicle sticks and freeze for a minimum of 4 hours, preferably overnight.
- To release the popsicles, run warm water briefly over the mold’s outside. Gently pull on the sticks, and enjoy your fresh, dairy-free treat!
Notes
Be patient with freezing times between layers to keep colors distinct. Use full-fat canned coconut milk for best creamy texture. If coconut milk separates, whisk vigorously before use. You can speed up freezing by placing molds in the coldest part of the freezer or using a metal tray underneath. If you don’t have popsicle molds, small paper cups with wooden sticks work as a substitute.
Nutrition
- Serving Size: One popsicle (about
- Calories: 90110
- Sugar: 68
- Sodium: 2040
- Fat: 79
- Saturated Fat: 67
- Carbohydrates: 810
- Fiber: 12
- Protein: 12
Keywords: dairy-free, coconut popsicles, summer treats, patriotic dessert, red white blue, vegan, gluten-free, frozen dessert



