Love this? Save it for later!
Share the inspiration with your friends
There used to be a tiny, creaky-floored chocolate shop on a side street in Portland called “The Cocoa Pod.” It was the kind of place where the air smelled like a hug—warm, sweet, and a little bit spicy. They made a drinking chocolate that was so thick and rich, you could stand your spoon up in it. When they closed their doors in 2018—the landlord raised the rent, the owner moved back to Vermont—I honestly felt a little pang of grief. I mean, where else was I supposed to get that perfect, soul-warming cup of cocoa? After about a dozen tries—and some truly gritty, lumpy failures—I finally cracked the code. This Homemade Hot Cocoa Mix in a Jar is my love letter to that little shop. It’s the exact mix of rich chocolate, a whisper of warmth, and that creamy texture that makes you close your eyes on the first sip.
I remember the Tuesday afternoon I finally got it right. I had cocoa powder *everywhere*—on the counter, on my favorite sweater, probably in my hair. My friend Sarah walked in, took one look at the mess, and said, “You know, you could just buy the stuff in the box.” But she didn’t get it. This wasn’t about convenience. This was about chasing a memory. And you know that feeling when you take a bite or a sip of something and it just *transports* you? That’s what this mix does. It’s not just a drink; it’s a little moment of peace in a mug. Maybe you’ve been there—searching for a taste from a favorite café or a long-gone bakery. This recipe is for you, too. It’s the one I now make for every holiday gift exchange, and honestly, it’s the gift people actually fight over. Let me tell you, there is nothing quite like handing a friend a pretty jar of this mix and saying, “Here. This is for your next quiet night in.”
Why You’ll Love This Recipe
This isn’t just another hot cocoa mix. I’ve tested this recipe more times than I care to count, and it’s been approved by everyone from my picky nephew to my neighbor who swears she doesn’t like sweets. Here’s why it’s a total game-changer:
- Incredibly Easy: It takes about 10 minutes to throw together. Seriously. No cooking, no complicated steps—just measuring, shaking, and pouring into a jar.
- Simple, Real Ingredients: No weird preservatives, no mystery powders. You probably have most of these in your pantry right now.
- The Perfect DIY Gift: This is the ultimate hostess gift, teacher gift, or “thinking of you” present. It’s personal, beautiful, and everyone loves it.
- Customizable for Everyone: I’ll show you how to make it dairy-free, extra dark, or with a little peppermint kick. It’s a crowd-pleaser, no matter the crowd.
- Unbelievably Rich & Creamy: The secret is a pinch of salt and a specific kind of cocoa powder. It’s not watery or weak. It’s the kind of cocoa that feels like a hug in a mug.
What makes this recipe different from all the other mixes out there is that it’s not just sweet—it’s balanced. I use a blend of semi-sweet and milk chocolate to get that deep, complex flavor without it being cloying. And the texture? It’s silky smooth every single time because we’re using a tiny trick to keep the powder from clumping. This isn’t just another version of hot cocoa. It’s the one that makes you wonder why you ever bought the pre-made stuff. It’s comfort in a jar, and it’s perfect for impressing your guests at your next holiday gathering without any stress.
What Ingredients You Will Need
This recipe uses simple, wholesome ingredients to deliver that rich, cozy flavor without any fuss. Most of these are pantry staples, which makes this a great last-minute gift idea. Let’s break down what you need and why each one matters.
The Dry Mix Base
- 2 cups (240g) powdered sugar: This gives the mix its sweetness and helps create a smooth, velvety texture. I prefer organic powdered sugar as it tends to have a cleaner flavor, but any brand works fine.
- 1 ½ cups (180g) unsweetened cocoa powder: This is the star of the show. I strongly recommend using a high-quality Dutch-processed cocoa powder like Guittard or Valrhona. It has a richer, less acidic flavor than natural cocoa powder, which makes for a deeper, more luxurious cocoa. Trust me on this one—it makes a huge difference.
- 1 ½ cups (180g) granulated sugar: The extra sugar balances the bitterness of the cocoa. You can reduce this by a quarter cup if you prefer a darker, more intense cocoa.
- 1 cup (120g) dry milk powder: This is what makes your cocoa creamy and decadent. I use whole milk powder for the best texture, but you can use non-fat if you’re watching calories. For a dairy-free version, use an equal amount of coconut milk powder or powdered oat milk. (Note: Coconut milk powder gives a slight coconut flavor, which is actually delicious with chocolate.)
- ¼ cup (30g) cornstarch: This is my secret ingredient! It acts as a stabilizer, preventing the cocoa from separating and giving it that thick, luxurious mouthfeel. Don’t skip it.
- ½ teaspoon fine sea salt: Salt is crucial in chocolate. It doesn’t make it salty; it makes the chocolate taste more chocolaty. It balances the sweetness and deepens the flavor. I use fine sea salt because it dissolves easily.
Optional Add-Ins for the Jar
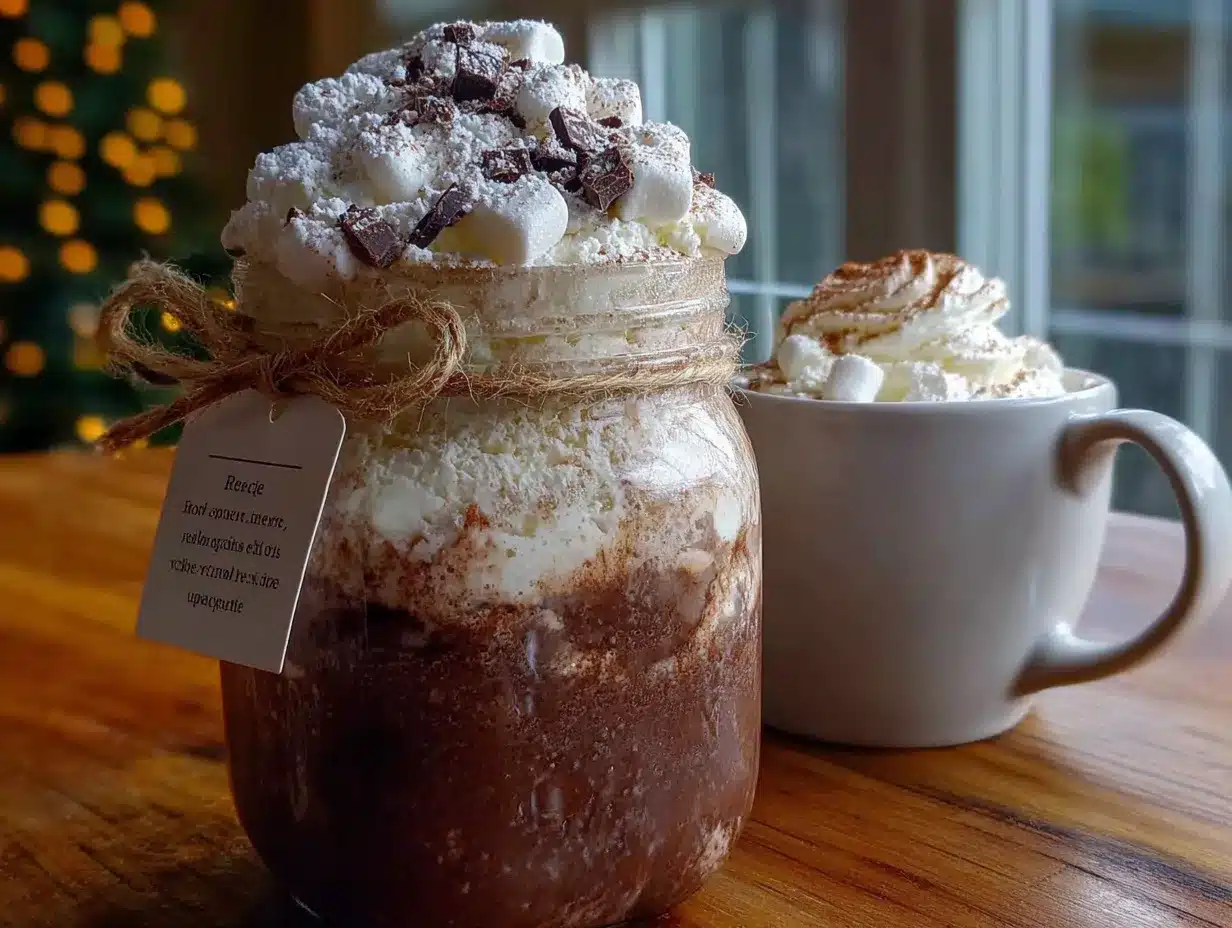
- Mini marshmallows or chocolate shavings: These are for layering in the jar for visual appeal. They’re purely decorative but make the gift look so much more festive.
- 1 teaspoon vanilla bean powder (optional): If you want a subtle vanilla note, you can mix this into the dry ingredients. It adds a lovely, almost floral undertone.
Ingredient Selection Tip: When you’re buying cocoa powder, look for one that’s a deep, dark brown color and smells intensely chocolatey. If it smells flat or dusty, it’s old. Fresh cocoa powder is essential for the best flavor. Also, if you’re using a high-quality Dutch-processed cocoa, you might find the mix is a bit darker in color—that’s a good thing!
Equipment Needed
You don’t need a professional kitchen to make this. Here’s what you’ll need:
- A large mixing bowl: Any bowl will do, but a wide one makes it easier to whisk everything together without making a mess.
- A fine-mesh sieve or sifter: This is non-negotiable. You absolutely must sift the cocoa powder and powdered sugar together. They tend to clump, and nobody wants a lumpy hot cocoa. I learned this the hard way after my first batch looked like a science experiment gone wrong.
- A whisk: A good, sturdy whisk is your best friend here. It helps incorporate the cornstarch and salt evenly.
- Quart-sized mason jars (24-ounce or 32-ounce): These are perfect for gifting. I love using the wide-mouth jars because they’re easier to fill and scoop from. You can also use decorative jars with tight-fitting lids.
- A funnel (optional but helpful): A small funnel makes pouring the mix into the jar mess-free. I have a little stainless steel one that I use for everything.
- Gift tags and ribbon: For that final, beautiful presentation. A simple piece of twine and a handwritten tag makes it feel so special.
If you don’t have a sieve, you can use a fine-mesh strainer. It’s a bit more work, but it gets the job done. And honestly, a whisk is better than a spoon for this—it breaks up any tiny lumps much better.
Preparation Method
This is the fun part! It’s simple, but paying attention to a few key details will make all the difference. Follow these steps, and you’ll have a perfect mix every time.
- Sift the dry ingredients (5 minutes): In your large mixing bowl, place the fine-mesh sieve. Add the powdered sugar, unsweetened cocoa powder, and cornstarch. Gently tap the sieve to sift everything into the bowl. Don’t rush this step. If you see any lumps, press them through with the back of a spoon. Sifting aerates the powders and removes any clumps, which is the secret to a smooth final drink. I once skipped this step because I was in a hurry, and my cocoa came out with little white lumps of cornstarch. Not cute.
- Whisk in the remaining ingredients (3 minutes): Add the granulated sugar, dry milk powder, and fine sea salt to the sifted mixture. Use your whisk to combine everything thoroughly. Whisk for at least a full minute—you want the color to be uniform and no streaks of white or brown. The mixture should look like a smooth, dark brown sand. If you’re adding vanilla bean powder, whisk it in now.
- Assemble the jar (5 minutes): Using your funnel, carefully pour the dry mix into your clean, dry mason jar. Tap the jar gently on the counter to settle the mix. If you want to make it look extra pretty, you can layer the mix. For example, fill the jar halfway, add a layer of mini marshmallows, then fill the rest of the way with the mix, and top with more marshmallows and a few chocolate shavings. This creates a beautiful visual effect that makes the gift feel extra special.
- Seal and decorate (2 minutes): Screw the lid on tightly. Attach a gift tag with the following instructions written on it: “To make: Add 1/3 cup of this mix to a mug. Pour in 8 ounces of hot milk (dairy or non-dairy). Stir well until fully dissolved. Enjoy!” I also like to add a little ribbon or a piece of festive twine around the lid. It’s a small touch that makes a big impression.
- Store or gift: If you’re giving it as a gift, you’re done! If you’re making it for yourself, store the jar in a cool, dark place (like your pantry) for up to 6 months. The cornstarch helps prevent clumping, but it’s still a good idea to give the jar a shake before you use it, just in case.
Troubleshooting Tip: If you find that your mix has hardened or clumped after a few weeks, don’t panic. It’s still perfectly fine to use. Just break up the clumps with a fork or give the jar a good shake. This usually happens if the mix was exposed to a bit of humidity. Storing it in an airtight container is key.
Cooking Tips & Techniques
After making this mix more times than I can count, I’ve picked up a few tricks that I wish I’d known from the start. Here are my best tips for success:
- The Milk Matters: The instructions on the jar say to use hot milk, not water. This is crucial. Water makes the cocoa taste thin and flat. Whole milk gives the creamiest result, but oat milk or a barista-style almond milk also work beautifully. The fat in the milk helps carry the chocolate flavor. I’ve also used half-and-half for an extra-decadent treat—it’s like drinking a melted chocolate bar.
- Don’t Boil the Milk: When you’re heating the milk, heat it until it’s steaming and little bubbles form around the edge of the pan. Do not let it come to a full boil. Boiling milk can scorch it, which gives it a slightly burnt, unpleasant taste. I usually heat mine in a small saucepan over medium heat for about 3-4 minutes.
- Whisk, Don’t Just Stir: When you add the mix to the hot milk, use a small whisk or a fork to combine it. A spoon can leave little dry pockets of powder at the bottom of the mug. Whisking ensures everything is fully incorporated and creates a slightly frothy top, just like from a fancy café.
- Scale It Up: This recipe fills one 24-ounce jar perfectly. If you’re making gifts for a lot of people, you can easily double or triple the batch. Just whisk everything together in a very large bowl. I’ve made a quadruple batch for a holiday cookie exchange before, and it worked like a charm.
- The Salt is Not a Mistake: I know it sounds weird to put salt in a sweet drink, but please don’t skip it. That tiny pinch is what makes the chocolate taste deep and complex instead of just sweet. It’s the same principle as salted caramel—the salt makes the sweet taste sweeter.
Variations & Adaptations
One of the best things about this recipe is how easily you can change it up. Here are a few of my favorite variations:
- Peppermint Hot Cocoa: Crush a few peppermint candies or add ½ teaspoon of peppermint extract to the dry mix (whisk it in well). Layer the jar with crushed candy canes for a festive look. This is my go-to for Christmas gifts.
- Spicy Mexican Hot Chocolate: Add 1 teaspoon of ground cinnamon, ¼ teaspoon of cayenne pepper, and a pinch of nutmeg to the dry mix. The warmth of the spices pairs so well with the deep chocolate flavor. It’s a cozy, unexpected twist that always gets compliments.
- Dark Chocolate Lover’s Mix: Use only dark cocoa powder (like black cocoa or extra-Dutch processed) and reduce the granulated sugar to 1 cup. This results in a super intense, almost bittersweet cocoa that adults adore. I made this for a friend who claims to “hate sweets,” and she asked for the recipe.
- Dairy-Free & Vegan: Simply swap the dry milk powder for an equal amount of coconut milk powder or a powdered oat milk creamer. Use a dairy-free chocolate for the shavings if you’re adding them. The coconut milk version has a subtle tropical note that’s surprisingly delicious with the chocolate.
- Mocha Mix: Add 2 tablespoons of instant espresso powder or instant coffee granules to the dry mix. This gives the cocoa a lovely coffee kick that’s perfect for an afternoon pick-me-up. I love this version on a lazy Sunday morning.
I’ve tried all of these variations at one point or another, and my personal favorite is the Spicy Mexican Hot Chocolate. It’s a little unexpected, and it makes the whole kitchen smell incredible.
Serving & Storage Suggestions
This mix is incredibly versatile. Here’s how to serve it and store it for the best results.
Serving: The cocoa is best served piping hot in a cozy mug. I love to top it with a giant dollop of homemade whipped cream and a sprinkle of cinnamon or cocoa powder. For a fun presentation at a party, set up a “hot cocoa bar” with the mix, different types of milk (oat, almond, whole), and a variety of toppings like marshmallows, chocolate shavings, crushed peppermint, and caramel sauce. Your guests will love customizing their own cups. The flavors actually meld together beautifully after the mix sits in the jar for a week or two, so if you can, make it a little bit ahead of time.
Storage: Keep the sealed jar in a cool, dark, dry place, like your pantry or a cupboard. It will stay fresh for up to 6 months. Do not refrigerate it, as the moisture from the fridge can cause the mix to clump. If you’re giving it as a gift, remind the recipient to store it in a cool place. I once left a jar on my sunny kitchen counter, and after a few weeks, it had turned into a solid block. It was still usable—I just had to break it up with a fork—but it wasn’t as pretty.
Reheating: If your cocoa gets cold (which rarely happens in my house!), you can reheat it gently in the microwave for 20-30 seconds, or pour it back into a saucepan and warm it over low heat. Give it a good stir before drinking.
Nutritional Information & Benefits
While this is definitely a treat, there are a few surprising benefits to this homemade version. Per serving (1/3 cup of mix prepared with 8 oz of whole milk), the approximate nutritional values are:
- Calories: ~320
- Fat: 12g
- Carbohydrates: 52g
- Protein: 10g
- Sugar: 44g
Health Benefits: Cocoa powder is actually rich in antioxidants called flavonoids, which are known to support heart health and reduce inflammation. By making it yourself, you’re avoiding the artificial flavors, hydrogenated oils, and excessive preservatives found in many store-bought mixes. You also have complete control over the sweetness level. Using high-quality cocoa powder means you’re getting more of those beneficial compounds. Plus, the milk provides calcium and vitamin D. It’s a feel-good indulgence that you don’t have to feel guilty about.
Dietary Considerations: This recipe can easily be made dairy-free (as noted in the variations) and can be made lower in sugar by using a sugar substitute like monk fruit or allulose in place of the granulated sugar. Be aware that it contains dairy in the milk powder form, so it’s not suitable for those with a dairy allergy unless you use the dairy-free version.
Conclusion
So there you have it—my little jar of nostalgia, perfected after many messy attempts. This Homemade Hot Cocoa Mix in a Jar is more than just a recipe; it’s a way to share a cozy moment with someone you care about. It’s for those chilly evenings when you need a warm hug in a mug, and it’s the perfect, thoughtful gift that shows you put in the effort. I love that I can whip up a batch in ten minutes and have a gift ready for a last-minute party or a friend who’s having a tough week.
I really hope you give this a try. Don’t be afraid to tweak the spices or the type of chocolate to make it your own. That’s the beauty of a simple mix like this—it’s a blank canvas for your favorite flavors. When you make a cup and take that first sip, and the world gets a little bit quieter and warmer, you’ll know exactly why I keep coming back to this recipe. Now go on, grab a jar and make some magic. And if you do, I’d love to hear about it! Drop a comment below and tell me who you’re gifting it to, or share your own favorite twist on the recipe. Happy gifting, friends!
Frequently Asked Questions
Can I use hot water instead of milk with this mix?
You can, but I really don’t recommend it. The mix is designed to be used with milk for a rich, creamy texture. Using water will result in a much thinner, less flavorful drink. If you’re out of milk, try using a splash of heavy cream or a non-dairy creamer in your water to add some richness back.
How long does the homemade hot cocoa mix last?
When stored in a sealed, airtight jar in a cool, dark place, the mix will stay fresh for up to 6 months. The cornstarch helps prevent clumping, but it’s always a good idea to give the jar a shake before you use it to make sure everything is loose.
Can I make this mix sugar-free?
Absolutely! You can substitute the powdered sugar and granulated sugar with a 1:1 sugar substitute like monk fruit sweetener or allulose. Just be aware that the texture might be slightly different, and the mix may be a bit less sweet, so you can adjust to your taste. I’ve made a keto-friendly version using allulose and it turned out great!
Why did my hot cocoa mix turn into a hard block?
This usually happens if the mix is exposed to moisture or high humidity. To prevent this, make sure your jar is completely dry before you fill it. Also, avoid storing the jar in the refrigerator or in a damp area like near the stove or sink. If it does harden, just break it up with a fork—it’s still perfectly safe to use.
Can I double this recipe to make more jars at once?
Yes, you can easily double, triple, or even quadruple this recipe! Just make sure you have a very large bowl to whisk everything together. The key is to sift the cocoa powder and powdered sugar in batches so you don’t overwhelm your sieve. I often make a big batch around the holidays and store the extra mix in a large airtight container, then fill the jars as needed.
Pin This Recipe!
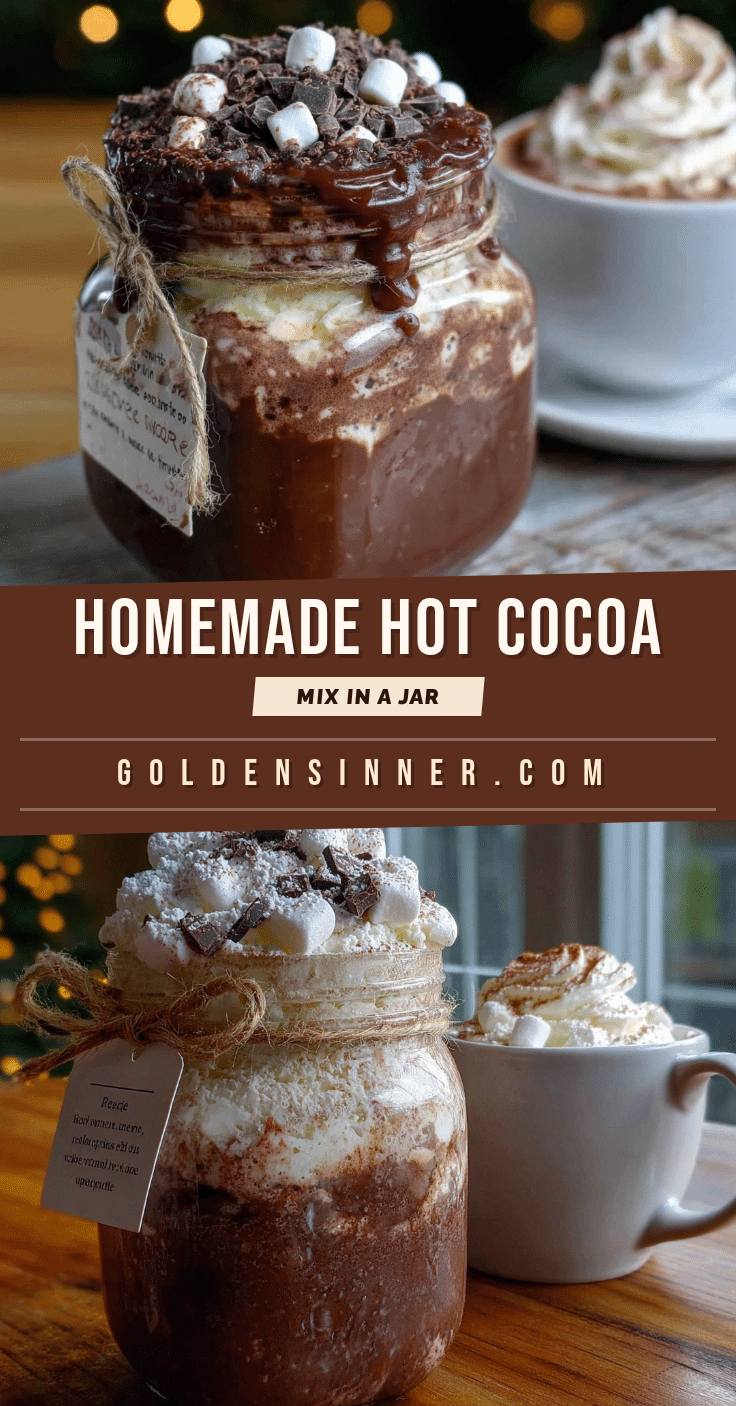
Homemade Hot Cocoa Mix in a Jar: Easy DIY Gift
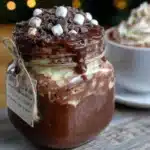
This Homemade Hot Cocoa Mix in a Jar is a love letter to a tiny chocolate shop in Portland. It’s the exact mix of rich chocolate, a whisper of warmth, and that creamy texture that makes you close your eyes on the first sip.
- Prep Time: 10 minutes
- Cook Time: 0 minutes
- Total Time: 10 minutes
- Yield: 1 jar (24-ounce), about 8 servings 1x
- Category: Beverage
- Cuisine: American
Ingredients
- 2 cups (240g) powdered sugar
- 1 ½ cups (180g) unsweetened cocoa powder (Dutch-processed recommended)
- 1 ½ cups (180g) granulated sugar
- 1 cup (120g) dry milk powder (whole milk powder recommended)
- ¼ cup (30g) cornstarch
- ½ teaspoon fine sea salt
- Mini marshmallows or chocolate shavings (optional, for layering)
- 1 teaspoon vanilla bean powder (optional)
Instructions
- Sift the dry ingredients (5 minutes): In your large mixing bowl, place the fine-mesh sieve. Add the powdered sugar, unsweetened cocoa powder, and cornstarch. Gently tap the sieve to sift everything into the bowl. Don’t rush this step. If you see any lumps, press them through with the back of a spoon.
- Whisk in the remaining ingredients (3 minutes): Add the granulated sugar, dry milk powder, and fine sea salt to the sifted mixture. Use your whisk to combine everything thoroughly. Whisk for at least a full minute—you want the color to be uniform and no streaks of white or brown. If you’re adding vanilla bean powder, whisk it in now.
- Assemble the jar (5 minutes): Using your funnel, carefully pour the dry mix into your clean, dry mason jar. Tap the jar gently on the counter to settle the mix. If you want to make it look extra pretty, you can layer the mix. For example, fill the jar halfway, add a layer of mini marshmallows, then fill the rest of the way with the mix, and top with more marshmallows and a few chocolate shavings.
- Seal and decorate (2 minutes): Screw the lid on tightly. Attach a gift tag with the following instructions written on it: “To make: Add 1/3 cup of this mix to a mug. Pour in 8 ounces of hot milk (dairy or non-dairy). Stir well until fully dissolved. Enjoy!” I also like to add a little ribbon or a piece of festive twine around the lid.
- Store or gift: If you’re giving it as a gift, you’re done! If you’re making it for yourself, store the jar in a cool, dark place (like your pantry) for up to 6 months. The cornstarch helps prevent clumping, but it’s still a good idea to give the jar a shake before you use it, just in case.
Notes
The mix is designed to be used with milk for a rich, creamy texture. Using water will result in a much thinner, less flavorful drink. If the mix hardens or clumps after a few weeks, break it up with a fork or give the jar a good shake. Storing it in an airtight container is key. The mix will stay fresh for up to 6 months when stored in a sealed, airtight jar in a cool, dark place.
Nutrition
- Serving Size: 1/3 cup of mix prepa
- Calories: 320
- Sugar: 44
- Sodium: 200
- Fat: 12
- Saturated Fat: 7
- Carbohydrates: 52
- Fiber: 3
- Protein: 10
Keywords: hot cocoa mix, DIY gift, homemade hot chocolate, jar gift, easy holiday gift, hot cocoa mix in a jar