Love this? Save it for later!
Share the inspiration with your friends
It was 11:47 PM on a random Wednesday in late September, and I had an overwhelming need to make something that tasted like autumn but looked like mischief. I didn’t have the energy for rolling out individual cookies or dealing with multiple batches—honestly, my kitchen was a disaster zone from dinner—but I had a box of cream cheese that needed using and a bag of candy corn I’d bought on impulse. That’s when the idea hit me: what if I took everything I loved about a soft sugar cookie and just… baked it in a pan? No chilling dough, no rolling pins, no fussing over perfectly round shapes. Just pure, buttery cookie bar goodness topped with the kind of frosting that makes you close your eyes for a second.
I’ll be honest—I wasn’t sure it would work. I mean, sugar cookies are finicky little things sometimes. Too much flour and they’re dry, not enough and they spread into a sad puddle. But that late-night desperation pushed me forward. I threw together the dough, pressed it into my favorite 9×13 pan, and crossed my fingers harder than I’d like to admit. Twenty-five minutes later, the edges were perfectly golden and the center was soft and pillowy. I let it cool on the counter while I whipped up a simple buttercream, adding a splash of vanilla and a pinch of salt because balance is everything.
When I finally cut into those bars the next morning, I knew I’d stumbled onto something special. The texture was exactly what I wanted—firm enough to hold together but tender enough to melt in your mouth. And the frosting? Let me tell you, that thick layer of creamy vanilla buttercream turned these into something almost dangerous. Maybe you’ve been there—that moment when a late-night experiment turns into a recipe you know you’ll make every single year from now on. These Halloween sugar cookie bars are that recipe for me. They’re the kind of treat that makes you wonder why you ever bothered with individual cookies in the first place.
Why You’ll Love This Recipe
I’ve tested this recipe six times over the past month—yes, six—because I wanted to make absolutely sure it was perfect before sharing it with you. And honestly? Each batch got better as I figured out the little tricks that make these bars truly special. Here’s why I think you’re going to fall for them too:
- Quick & Easy : From start to finish, these come together in about 35 minutes. No chilling, no rolling, no cutting individual shapes. Just mix, press, bake, and frost.
- Simple Ingredients : You probably have everything in your pantry right now. Butter, sugar, eggs, flour, vanilla—the usual suspects. No fancy extracts or hard-to-find specialty items.
- Perfect for Halloween Parties : These bars are basically a blank canvas for your spooky decorating ideas. Orange frosting, candy eyes, sprinkles—go wild.
- Crowd-Pleaser : I brought a batch to my neighbor’s Halloween gathering last weekend, and I watched three different people go back for seconds. Kids love them, adults love them, everyone loves them.
- Unbelievably Delicious : The texture is what gets me every time. That soft, almost cloud-like center with the slightly crisp edges, topped with a thick layer of silky buttercream. It’s next-level comfort food disguised as a festive treat.
What makes these different from every other sugar cookie bar recipe out there? It’s the cream cheese in the dough. I know, I know—cream cheese in sugar cookies sounds weird. But trust me on this one. It adds a subtle tanginess that balances the sweetness and gives the bars an incredibly tender crumb. Plus, the frosting technique I use—whipping the butter for a full five minutes before adding the powdered sugar—creates a texture that’s light, fluffy, and absolutely dreamy.
This recipe isn’t just good—it’s the kind that makes you close your eyes after the first bite. It’s Halloween comfort food reimagined: faster, easier, but with the same soul-soothing satisfaction as those cookies your grandma used to make. Perfect for impressing party guests without any stress, or turning a simple Tuesday night into something memorable.
What Ingredients You Will Need
This recipe uses simple, wholesome ingredients to deliver bold flavor and satisfying texture without any fuss. Most of these are pantry staples, which means you can whip up a batch whenever the Halloween craving strikes.
For the Cookie Bars
- 1 cup (2 sticks) unsalted butter, softened (I prefer Kerrygold for its rich flavor, but any good-quality butter works)
- 4 ounces cream cheese, softened (full-fat is best here—low-fat changes the texture)
- 1 ½ cups granulated sugar
- 1 large egg, room temperature
- 2 teaspoons vanilla extract (use pure vanilla, not imitation, for the best flavor)
- 3 cups all-purpose flour (spoon and level—don’t scoop directly from the bag)
- ½ teaspoon baking powder
- ½ teaspoon salt
For the Vanilla Buttercream Frosting
- 1 cup (2 sticks) unsalted butter, softened
- 4 cups powdered sugar, sifted (sifting prevents lumps—trust me on this)
- 2 teaspoons vanilla extract
- 3-4 tablespoons heavy cream (or whole milk if that’s what you have)
- Pinch of salt (this is non-negotiable—it balances the sweetness)
For Decoration
- Orange gel food coloring (I use Wilton’s—it gives a vibrant color without changing the consistency)
- Halloween sprinkles (go wild with ghosts, pumpkins, and bats)
- Candy eyes (optional, but so fun for a spooky look)
A few ingredient notes before we get started. For the cream cheese, make sure it’s truly softened—leave it on the counter for at least an hour. Cold cream cheese will leave lumps in your dough, and nobody wants that. If you’re in a pinch, you can microwave it for 10-15 seconds, but watch it carefully. For the flour, I recommend Gold Medal or King Arthur—they have consistent protein content that gives reliable results. And please, please use room temperature eggs. Cold eggs can seize up the butter and cream cheese mixture, leaving you with a dense dough instead of a light, tender one.
If you’re looking to make substitutions, here’s what I’ve tested: For a dairy-free version, use vegan butter and dairy-free cream cheese. I’ve had good luck with Miyoko’s brand. For a gluten-free option, swap the all-purpose flour with a 1:1 gluten-free baking flour—I like Bob’s Red Mill. The texture will be slightly more crumbly, but still delicious.
Equipment Needed
You don’t need a fancy kitchen to make these bars. Here’s what you’ll actually use:
- 9×13-inch baking pan (metal pans give the best browning—glass works but may need a few extra minutes)
- Electric hand mixer or stand mixer (you can do this by hand, but your arm will thank you for the mixer)
- Parchment paper (non-negotiable—it makes lifting the bars out so much easier)
- Large mixing bowls (one for wet ingredients, one for dry)
- Rubber spatula (for scraping down the bowl and spreading the dough)
- Cooling rack (speeds up the cooling process significantly)
- Offset spatula (for spreading the frosting evenly—a butter knife works too, but the offset spatula makes it look professional)
- Measuring cups and spoons
I’ve made these bars with both my KitchenAid stand mixer and a cheap hand mixer I bought at a garage sale. Both worked perfectly, so don’t stress if you don’t have fancy equipment. The one thing I wouldn’t skip is the parchment paper—leaving an overhang on two sides makes lifting the entire block of bars out of the pan a breeze. I learned that lesson the hard way after struggling to get the first batch out without breaking them.
Preparation Method
- Preheat your oven to 350°F (175°C). Line your 9×13-inch pan with parchment paper, leaving a 2-inch overhang on the long sides. This creates handles for lifting the bars out later.
- Cream the butter and cream cheese together. In a large bowl, beat the softened butter and cream cheese on medium speed for 2-3 minutes until smooth and fluffy. Scrape down the sides of the bowl with a rubber spatula. This step is crucial—if there are lumps of cream cheese, they’ll show up as weird pockets in your baked bars.
- Add the sugar. Gradually add the granulated sugar while beating on medium speed. Continue beating for another 2 minutes until the mixture is light and airy. You’ll notice it getting paler in color—that’s a good sign.
- Incorporate the egg and vanilla. Add the room temperature egg and vanilla extract. Beat on low speed until just combined. Don’t overmix here—you don’t want to incorporate too much air at this stage.
- Mix the dry ingredients. In a separate bowl, whisk together the flour, baking powder, and salt. This ensures the baking powder is evenly distributed throughout the flour.
- Combine wet and dry. Gradually add the flour mixture to the wet ingredients, mixing on low speed until just combined. Stop as soon as you don’t see any more streaks of flour. Overmixing at this stage will develop gluten and make your bars tough.
- Press the dough into the pan. The dough will be thick and slightly sticky—that’s perfect. Transfer it to your prepared pan and press it into an even layer. I use a piece of parchment paper on top of the dough to press it down without sticking to my fingers. Make sure it reaches all the corners evenly.
- Bake for 22-25 minutes. The edges should be lightly golden and the center should look set but still soft. A toothpick inserted in the center should come out with a few moist crumbs—not wet batter. Every oven runs differently, so start checking at 20 minutes. My convection oven takes exactly 23 minutes.
- Cool completely. Place the pan on a wire rack and let the bars cool for at least 1 hour. I know it’s tempting to frost them while they’re warm, but the frosting will melt into a sad puddle if you do. Patience here pays off.
- Make the frosting. While the bars are cooling, beat the softened butter on medium-high speed for 5 minutes. Yes, five full minutes. This is the secret to the fluffiest frosting you’ve ever had. The butter should look pale, almost white, and very airy.
- Add the powdered sugar. Reduce the mixer speed to low and gradually add the sifted powdered sugar, about 1 cup at a time. After each addition, increase the speed to medium and beat until incorporated. Scrape down the sides as needed.
- Finish the frosting. Add the vanilla extract, salt, and 3 tablespoons of heavy cream. Beat on medium-high speed for another 2-3 minutes until the frosting is light, fluffy, and spreadable. If it’s too thick, add the remaining tablespoon of cream. If it’s too thin, add a bit more powdered sugar.
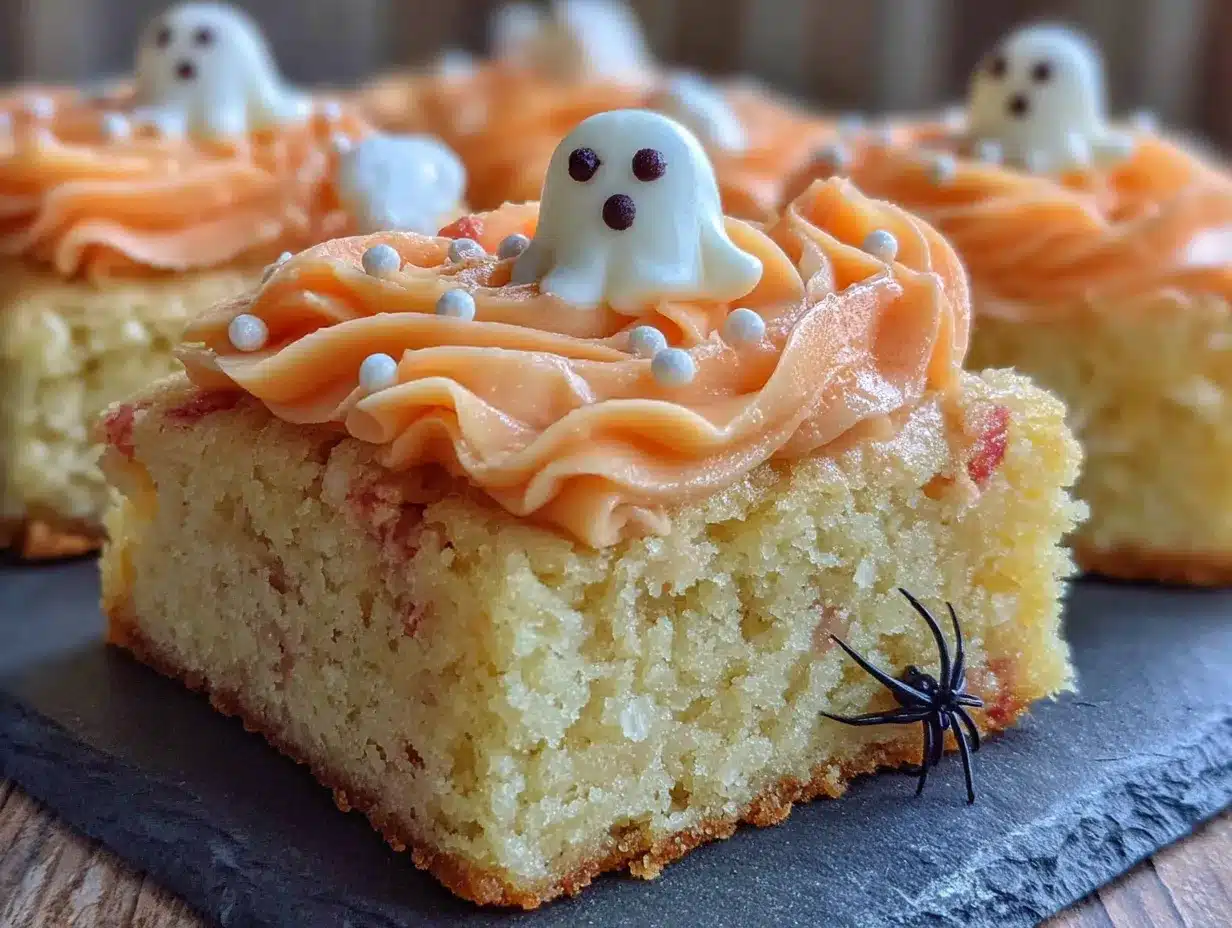
- Color and frost. Divide the frosting in half. Color one half with orange gel food coloring, leaving the other half white. Spread the orange frosting evenly over the cooled bars using your offset spatula. Add dollops of white frosting on top and swirl them together with a toothpick for a marbled effect—or just go full orange for a classic Halloween look.
- Decorate and cut. Add your Halloween sprinkles and candy eyes while the frosting is still soft. Let the frosting set for about 30 minutes before cutting into squares. I cut 24 bars—6 rows by 4 rows—for the perfect serving size.
Cooking Tips & Techniques
After six batches of testing, I’ve learned a few things that make the difference between good bars and unforgettable ones. First, the butter and cream cheese must be properly softened. I’m talking leave-them-on-the-counter-for-an-hour softened. Cold ingredients won’t cream properly, and you’ll end up with a dense, heavy dough. If you forget to take them out ahead of time, cut the butter into small cubes and let them sit for 15 minutes—it’s not perfect, but it helps.
The biggest mistake I made on my first batch was overbaking. I was so worried about the center being raw that I left them in for 28 minutes. The edges came out almost crunchy, and the bars were dry by the next day. Pull them out when the edges are just barely golden and the center looks slightly underdone. They’ll continue baking from the residual heat as they cool. Trust the jiggle, as my grandmother used to say.
For the frosting, here’s something I learned the hard way: sift your powdered sugar. I know it seems like an extra step, but unsifted powdered sugar creates lumpy frosting that no amount of beating can fix. Also, don’t skip the five-minute butter whipping step. I know it feels excessive, but that’s what creates the light, airy texture that makes this frosting so special. I once tried to shortcut it to two minutes, and the frosting was noticeably denser.
One more thing—let the bars cool completely before frosting. I’m talking fully room temperature, not just warm. On my third batch, I got impatient and frosted them while they were still slightly warm. The frosting melted into the bars, creating a weird greasy layer instead of that beautiful thick topping. Learn from my mistakes, friends.
Variations & Adaptations
One of the things I love about these Halloween sugar cookie bars is how easily they adapt to different tastes and dietary needs. Here are some variations I’ve tried and loved:
- Chocolate Swirl Bars : After pressing the dough into the pan, dollop ¼ cup of melted chocolate on top and swirl it through with a knife. The chocolate ribbons through the baked bars are absolutely gorgeous and add a rich depth of flavor.
- Pumpkin Spice Version : Add 1 teaspoon of pumpkin pie spice to the flour mixture and replace ¼ cup of the granulated sugar with brown sugar. The warm spices make these taste like autumn in bar form.
- Gluten-Free Adaptation : Substitute the all-purpose flour with a 1:1 gluten-free baking blend. I’ve tested this with Bob’s Red Mill, and while the texture is slightly more tender and crumbly, they’re still absolutely delicious. Add an extra tablespoon of cream cheese to help with binding.
- Vegan Version : Use vegan butter (I like Miyoko’s), vegan cream cheese, and a flax egg (1 tablespoon ground flaxseed mixed with 3 tablespoons water). The texture won’t be quite as tender, but the flavor is still spot-on.
- Different Frosting Flavors : Swap the vanilla extract in the frosting for 1 teaspoon of almond extract for a completely different flavor profile. Or add ½ cup of cocoa powder (sifted) to make chocolate frosting. For a cream cheese frosting variation, replace half the butter with cream cheese—just beat it for the full five minutes.
My personal favorite variation came from a happy accident. I was out of vanilla extract and used maple extract instead. The maple frosting paired with the buttery cookie bars tasted like a stack of pancakes in the best possible way. I’ve made that version three times since.
Serving & Storage Suggestions
These bars are best served at room temperature—the texture is softest and the frosting is most luscious when they’re not straight from the fridge. If you’re serving them at a party, I recommend cutting them and arranging them on a platter about an hour before guests arrive. The colors pop beautifully against a white or black serving dish.
For the perfect Halloween presentation, try arranging the bars on a cake stand with a few fake spider webs draped around the base. The contrast between the cheerful orange frosting and the spooky decorations is just perfect. I also love serving these alongside a warm mug of apple cider or a tall glass of cold milk.
Storage-wise, these bars are surprisingly forgiving. Keep them in an airtight container at room temperature for up to 3 days. If your kitchen runs warm, you can refrigerate them—just let them sit at room temperature for 20 minutes before serving to soften the frosting. For longer storage, freeze the unfrosted bars for up to 3 months. Wrap them tightly in plastic wrap, then aluminum foil, and thaw overnight in the refrigerator. Make the frosting fresh when you’re ready to serve.
One thing I’ve noticed: these bars actually taste better on the second day. The flavors meld together overnight, and the texture becomes even more tender. So if you’re planning for a Halloween party, making them a day ahead is actually a smart move. Just don’t add the sprinkles until right before serving, or they’ll bleed their color into the frosting.
Nutritional Information & Benefits
Let’s be real—these are a treat, not a health food. But knowing what’s in them helps you enjoy them mindfully. Per bar (based on 24 servings), here’s the breakdown:
- Calories: 285
- Total Fat: 16g
- Saturated Fat: 10g
- Carbohydrates: 34g
- Sugar: 24g
- Protein: 3g
- Sodium: 95mg
On the bright side, the cream cheese adds a small amount of calcium and protein, and the butter provides vitamin A. The real benefit here is emotional—there’s something genuinely comforting about biting into a soft, frosted cookie bar that reminds you of childhood Halloweens. And honestly, a little joy is good for your mental health.
If you’re watching your sugar intake, you can reduce the sugar in the dough to 1 cup without affecting the texture too much. For the frosting, try using a sugar substitute like Swerve confectioners’ sugar—it works surprisingly well, though the texture is slightly less creamy.
These bars contain dairy, gluten, and eggs, so they’re not suitable for those with allergies to those ingredients without the substitutions I mentioned earlier.
Conclusion
These Halloween sugar cookie bars have become my official go-to for every fall gathering, and I have a feeling they’ll become yours too. They’re everything you want in a Halloween treat—festive, delicious, and so much easier than making individual cookies. The soft, buttery base with that cloud-like cream cheese frosting is a combination that just works.
I love that this recipe lets you be creative with the decorations. Some years I go all out with candy eyes and spider rings, other years I keep it simple with just orange frosting and black sprinkles. Either way, they disappear fast. I’ve had friends ask me for the recipe at every single party I’ve brought them to, and that’s always the best compliment.
So go ahead—give these a try. Customize them however you like, make a mess in your kitchen, and enjoy every single bite. And when you do, I’d love to hear about it. Drop a comment below and tell me how they turned out, what decorations you used, or if you came up with a variation I haven’t tried yet. Happy Halloween, friends—may your bars be soft, your frosting be fluffy, and your candy bowl stay full.
Frequently Asked Questions
Can I make these Halloween sugar cookie bars ahead of time?
Absolutely! In fact, they taste even better the next day. Bake the bars, cool them completely, and store them unfrosted in an airtight container at room temperature. Make the frosting and decorate them the day you plan to serve them. If you need to make them further ahead, freeze the unfrosted bars for up to 3 months.
Why did my cookie bars turn out dry?
The most common culprit is overbaking. Remember to pull them out when the edges are just golden and the center still looks slightly soft. Another possibility is overmeasuring the flour—always spoon it into your measuring cup and level it off, rather than scooping directly from the bag.
Can I use a different pan size?
You can use a 9×9-inch pan for thicker bars, but you’ll need to increase the baking time by 5-7 minutes. For a half-sheet pan (13×18 inches), the bars will be much thinner and will bake in about 15-17 minutes. Just keep an eye on them and adjust accordingly.
How do I get clean cuts on my cookie bars?
Use a sharp knife and wipe it clean between each cut. For the cleanest edges, chill the frosted bars in the refrigerator for 30 minutes before cutting. This firms up the frosting so it doesn’t drag or smear.
My frosting turned out too runny—what went wrong?
This usually happens when the butter was too soft or you added too much cream. Fix it by beating in more sifted powdered sugar, one tablespoon at a time, until it reaches the right consistency. Also, make sure your butter is softened but not melted—if it’s greasy or shiny, it’s too warm.
Pin This Recipe!
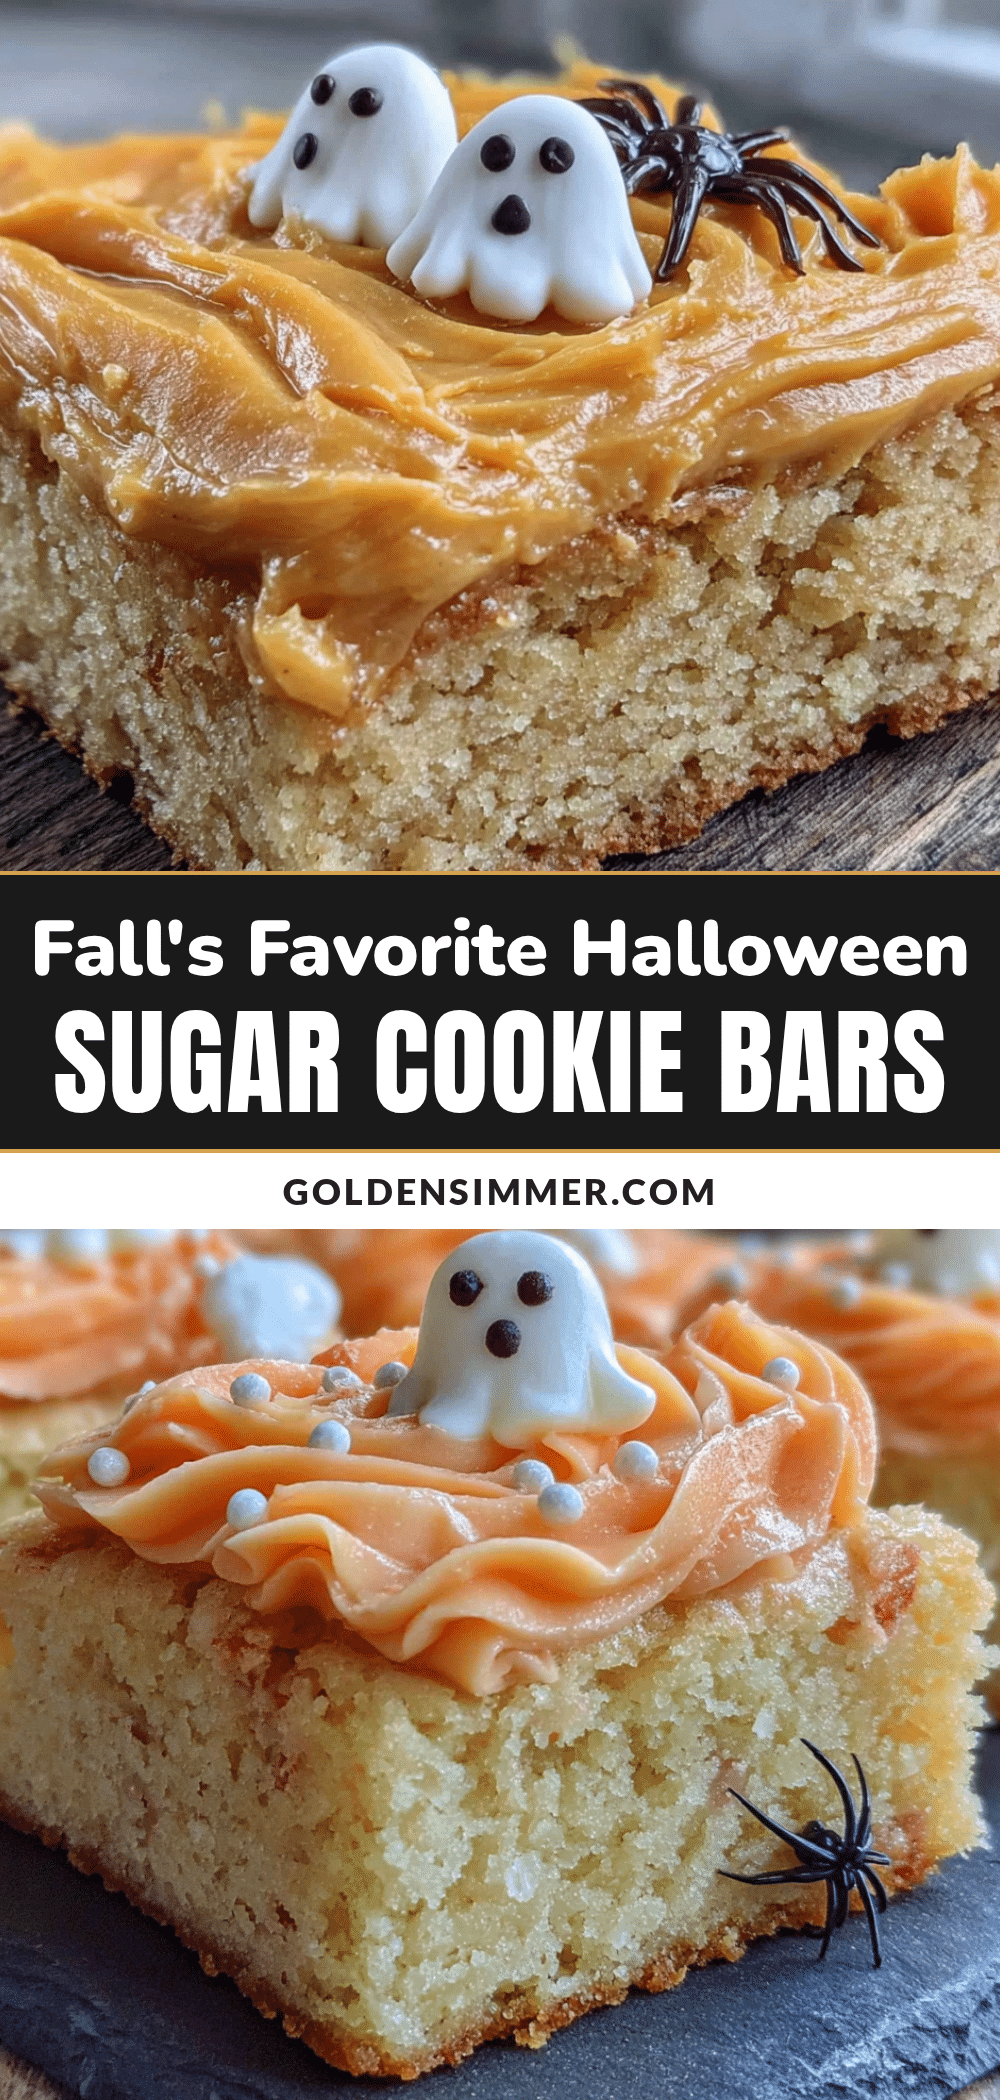
Perfect Fall Halloween Sugar Cookie Bars Recipe
These soft, buttery sugar cookie bars are topped with a creamy vanilla buttercream and decorated for Halloween. They come together in about 35 minutes with no rolling or chilling, making them the perfect easy treat for fall parties.
- Prep Time: 10 minutes
- Cook Time: 25 minutes
- Total Time: 35 minutes
- Yield: 24 servings 1x
- Category: Dessert
- Cuisine: American
Ingredients
- 1 cup (2 sticks) unsalted butter, softened
- 4 ounces cream cheese, softened
- 1 ½ cups granulated sugar
- 1 large egg, room temperature
- 2 teaspoons vanilla extract
- 3 cups all-purpose flour
- ½ teaspoon baking powder
- ½ teaspoon salt
- 1 cup (2 sticks) unsalted butter, softened (for frosting)
- 4 cups powdered sugar, sifted
- 2 teaspoons vanilla extract (for frosting)
- 3–4 tablespoons heavy cream
- Pinch of salt (for frosting)
- Orange gel food coloring
- Halloween sprinkles
- Candy eyes (optional)
Instructions
- Preheat your oven to 350°F (175°C). Line your 9×13-inch pan with parchment paper, leaving a 2-inch overhang on the long sides.
- In a large bowl, beat the softened butter and cream cheese on medium speed for 2-3 minutes until smooth and fluffy. Scrape down the sides.
- Gradually add the granulated sugar while beating on medium speed. Continue beating for another 2 minutes until light and airy.
- Add the room temperature egg and vanilla extract. Beat on low speed until just combined.
- In a separate bowl, whisk together the flour, baking powder, and salt.
- Gradually add the flour mixture to the wet ingredients, mixing on low speed until just combined.
- Transfer the dough to the prepared pan and press it into an even layer.
- Bake for 22-25 minutes, until edges are lightly golden and center is set but still soft. Cool completely on a wire rack.
- For the frosting, beat the softened butter on medium-high speed for 5 minutes until pale and fluffy.
- Reduce speed to low and gradually add the sifted powdered sugar, about 1 cup at a time, beating well after each addition.
- Add the vanilla extract, salt, and 3 tablespoons of heavy cream. Beat on medium-high speed for 2-3 minutes until light and fluffy. Add more cream if needed.
- Divide the frosting in half. Color one half with orange gel food coloring.
- Spread the orange frosting evenly over the cooled bars. Add dollops of white frosting and swirl with a toothpick if desired.
- Add Halloween sprinkles and candy eyes while the frosting is still soft. Let set for 30 minutes before cutting into 24 squares.
Notes
Make sure butter and cream cheese are properly softened for best texture. Do not overbake; pull bars out when edges are just golden and center looks slightly underdone. Sift powdered sugar to avoid lumps in frosting. Bars taste even better the next day. Store in an airtight container at room temperature for up to 3 days, or refrigerate for longer storage. Unfrosted bars can be frozen for up to 3 months.
Nutrition
- Serving Size: 1 bar
- Calories: 285
- Sugar: 24
- Sodium: 95
- Fat: 16
- Saturated Fat: 10
- Carbohydrates: 34
- Protein: 3
Keywords: Halloween sugar cookie bars, easy sugar cookie bars, fall dessert, Halloween treats, cream cheese sugar cookies



