Love this? Save it for later!
Share the inspiration with your friends
The neighborhood block party was in less than two hours and I still hadn’t baked a thing. Everyone else was turning up with multi-layered pies, fancy macarons, and those complicated charcuterie boards that look like art galleries. Meanwhile, I had nothing but a cracked mixing bowl, half a bottle of red food coloring, and a vague memory that my friend’s daughter had mentioned loving red velvet cake last month. Honestly, panic set in fast—how was I supposed to whip something up that could hold its own against all that culinary fireworks? But, you know how it goes, sometimes the best ideas come from the chaos.
So, I grabbed what little I had and threw together what I now call the Perfect Red Velvet Flag Cake with Cream Cheese Frosting. The layers—rich, velvety, and tinted that iconic deep red—came together faster than I expected. The frosting? Lusciously creamy with just the right tang to balance the cake’s sweetness. Sure, I made a mess with the food coloring (that darn bowl was a challenge), but in the end, this cake stole the show. Maybe you’ve been there, scrambling last minute, wondering if simple can really win. Let me tell you, this recipe has stuck with me ever since, not just because it saved the day but because it’s downright delicious and surprisingly easy. It’s the kind of dessert that makes you smile sheepishly and say, “Yep, I made this with barely any time.”
Why You’ll Love This Recipe
After countless trials and a few kitchen mishaps, this Perfect Red Velvet Flag Cake with Cream Cheese Frosting has become my go-to for celebrations, especially when time’s tight but expectations are high. I’ve tested it with friends, family, and even a few culinary skeptics, and it keeps winning hearts—and plates.
- Quick & Easy: Ready to enjoy in under 1 hour, it’s perfect for those moments when you’re pressed for time but still want to impress.
- Simple Ingredients: Nothing fancy required—most are pantry staples you probably already have. No last-minute runs to specialty stores.
- Perfect for Celebrations: Whether it’s a birthday, holiday, or a neighborhood block party like mine, this cake shines as the centerpiece.
- Crowd-Pleaser: Kids, adults, picky eaters—you name it. Everyone loves that classic red velvet flavor paired with fluffy cream cheese frosting.
- Unbelievably Delicious: The texture is tender but moist, with that subtle cocoa undertone and just the right balance of sweetness and tang.
This isn’t just another red velvet cake. The secret lies in the slightly adapted layering technique that creates a flag pattern—making it visually stunning without extra fuss. Plus, the cream cheese frosting is whipped to a silky perfection, not too dense or overly sweet. Honestly, it’s comfort food with a little flair, and it never fails to get compliments. If you want a recipe that feels special but won’t have you sweating in the kitchen, this one’s for you.
What Ingredients You Will Need
This recipe uses simple, wholesome ingredients to create a bold flavor and satisfying texture without any fuss. Most of these are pantry staples, and substitutions are easy if you need them.
- For the Cake Batter:
- All-purpose flour – 2 ½ cups (315g), sifted for lightness
- Granulated sugar – 1 ½ cups (300g)
- Unsweetened cocoa powder – 2 tablespoons (15g), for that subtle chocolate depth
- Baking soda – 1 teaspoon (5g)
- Salt – ½ teaspoon (3g)
- Buttermilk – 1 cup (240ml), room temperature (or make your own with milk and lemon juice)
- Vegetable oil – 1 cup (240ml), adds moistness without heaviness
- Large eggs – 2, room temperature (helps with even mixing)
- Red food coloring – 2 tablespoons (30ml), I recommend gel-based for vibrant color without extra liquid
- Vanilla extract – 1 teaspoon (5ml)
- Distilled white vinegar – 1 teaspoon (5ml), reacts with baking soda for lift
- For the Cream Cheese Frosting:
- Cream cheese – 8 ounces (225g), softened (I prefer Philadelphia brand for smooth texture)
- Unsalted butter – ½ cup (115g), softened
- Powdered sugar – 4 cups (480g), sifted to prevent lumps
- Vanilla extract – 1 teaspoon (5ml)
- Pinch of salt (balances sweetness)
If you’re short on buttermilk, just mix 1 tablespoon lemon juice with milk and let it sit for 5 minutes. For a dairy-free take, swap buttermilk with almond or oat milk plus vinegar, and use dairy-free cream cheese and butter alternatives. Also, if you want a gluten-free version, almond flour can work, but the texture will be a bit different—still tasty, though!
Equipment Needed
- Two 9-inch (23 cm) round cake pans – essential for even layers. If you don’t have two, bake layers one at a time.
- Mixing bowls – one large for batter, one for frosting.
- Electric mixer or stand mixer – helps whip the frosting to that perfect creaminess. Hand mixers can work but take a bit longer.
- Measuring cups and spoons – accuracy matters for baking, especially with leavening agents.
- Rubber spatula – for folding ingredients gently without overmixing.
- Cooling racks – to let your cakes cool properly before frosting.
- Offset spatula or butter knife – for smooth, even frosting application.
I’ve tried making this cake with disposable aluminum pans at a pinch, and it works okay, but the layers come out best with sturdy, non-stick pans. A simple tip: line your pans with parchment paper circles to prevent sticking and make removal a breeze. Nothing worse than a cake that breaks when you try to lift it out!
Preparation Method
- Preheat your oven to 350°F (175°C). Grease and flour two 9-inch round cake pans, then line the bottoms with parchment paper circles. This ensures your layers come out cleanly. (Time: 10 minutes)
- Mix dry ingredients: In a large bowl, sift together the flour, cocoa powder, baking soda, and salt. Set aside.
- Combine wet ingredients: In another bowl, whisk the sugar and vegetable oil until combined. Add eggs one at a time, mixing well after each. Stir in the buttermilk, red food coloring, vanilla extract, and vinegar. The batter will look vivid and slightly thin.
- Blend wet and dry: Gradually add the dry ingredients into the wet mixture, folding gently with a spatula. Be careful not to overmix; just combine until no streaks remain. The batter should be smooth and pourable with a rich red hue.
- Pour and bake: Divide the batter evenly between the two pans. Tap the pans gently on the counter to release any air bubbles. Bake for 25-30 minutes, or until a toothpick inserted into the center comes out clean. (Pro tip: check around 25 minutes to avoid overbaking.)
- Cool the cakes: Let the cakes cool in the pans for 10 minutes, then turn out onto cooling racks. Peel off the parchment and let them cool completely—this prevents frosting from melting.
- Make the cream cheese frosting: Beat the softened cream cheese and butter together until creamy and smooth, about 3-4 minutes. Gradually add powdered sugar, one cup at a time, mixing on low speed to avoid a sugar cloud. Add vanilla and salt, then beat at medium speed until light and fluffy.
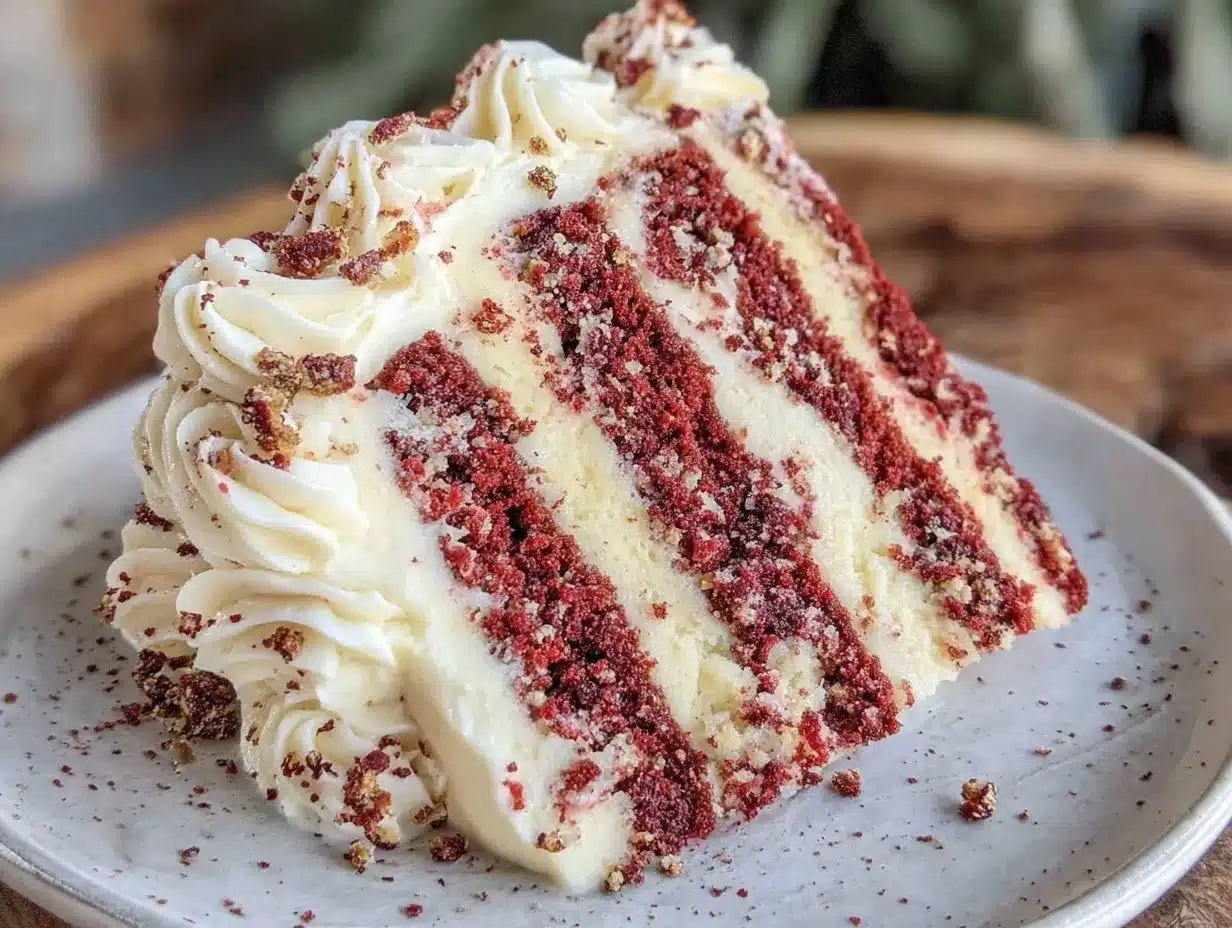
- Assemble the flag layers: Here’s the fun part—slice each cake layer horizontally into three thin layers (six layers total). Arrange them alternately with the frosting in between, using the frosting to create the stripes of the flag pattern. Use extra frosting to cover the sides and top smoothly. If you want, you can add small edible stars or candies to mimic the flag’s stars.
- Chill and serve: Refrigerate the assembled cake for at least 30 minutes before slicing. This helps the frosting set and makes cutting neat slices easier.
Remember, baking times can vary slightly depending on your oven. If the cake edges start browning too quickly, tent with foil. Also, slicing the cake layers takes a steady hand—using a serrated knife helps a lot. I usually mark the layers with a toothpick to keep them even.
Cooking Tips & Techniques
Getting this Perfect Red Velvet Flag Cake just right is about a few key details, and I’ve learned the hard way with some early kitchen slip-ups.
- Don’t skip sifting: It might seem like an extra step, but sifting flour and cocoa powder prevents lumps and keeps the batter airy.
- Room temperature ingredients matter: Eggs and buttermilk at room temp mix more evenly, giving you a smoother batter and better rise.
- Mix gently: Overmixing can toughen the cake. Fold in dry ingredients carefully to keep the crumb tender.
- Use gel food coloring: Liquid coloring adds extra moisture, which can affect texture. Gel or paste versions give that vivid red without watering down the batter.
- Keep an eye on baking time: Overbaking dries the cake, underbaking makes it gummy. Test with a toothpick starting at 25 minutes.
- Frosting consistency: If your cream cheese frosting feels too soft, chill it for 15 minutes before frosting to make spreading easier.
I’ve had my share of cakes that cracked or crumbled when I rushed slicing or piling on frosting, so patience is key. Also, multitasking helps—while the cakes bake, whip up your frosting so everything’s ready for assembly without waiting. Trust me, your future self will thank you for not trying to do everything at once!
Variations & Adaptations
This red velvet cake is versatile, and I’ve played around with different spins depending on mood and occasion.
- Seasonal twist: In warmer months, add fresh raspberries or strawberries between the layers for a fruity surprise that pairs beautifully with cream cheese.
- Chocolate flag: Swap half the cocoa powder with melted dark chocolate for a richer, fudgier cake.
- Vegan adaptation: Use flax eggs (1 tablespoon flaxseed meal + 3 tablespoons water per egg), dairy-free cream cheese and butter substitutes, and plant-based milk with vinegar instead of buttermilk.
- Spice it up: Add a teaspoon of cinnamon or a pinch of cayenne for a subtle warmth that complements the cocoa and cream cheese.
- Alternative frostings: For a lighter touch, try whipped coconut cream or a mascarpone-based frosting with vanilla and lemon zest.
One time, I swapped the traditional cream cheese frosting for a mascarpone version with a hint of orange zest—turned out surprisingly fresh and delightful! Feel free to experiment and make this recipe your own. The flag design works well with any firm frosting that holds its shape.
Serving & Storage Suggestions
This Perfect Red Velvet Flag Cake is best served slightly chilled or at room temperature. The frosting softens nicely as it warms up, releasing that creamy tangy goodness with every bite. For presentation, slice it cleanly with a warm serrated knife and arrange on a simple white platter to really make the red and white pop.
Pair it with a cup of black coffee or a glass of cold milk to balance the richness. If you’re serving at a party, consider small dessert plates and forks—this cake looks impressive but is easy to eat.
To store, keep the cake covered in the refrigerator for up to 4 days. If you want to freeze it, wrap tightly in plastic wrap and foil, then thaw overnight in the fridge before serving. Flavors mellow and deepen when chilled overnight, so if you can make it a day ahead, even better.
Just a heads-up: the frosting can firm up a bit in the fridge, so let slices sit out 10 minutes before digging in for the best texture.
Nutritional Information & Benefits
Per serving (based on 12 slices), this cake offers approximately:
| Calories | 350-400 kcal |
|---|---|
| Fat | 18-22g (mostly from butter and cream cheese) |
| Carbohydrates | 45-50g (includes sugar and flour) |
| Protein | 4-5g (from eggs and cream cheese) |
Key ingredients like cocoa powder provide antioxidants, and cream cheese adds calcium and protein. Using buttermilk contributes a slight probiotic benefit and tenderness. While this isn’t a low-calorie dessert, it’s a satisfying treat when enjoyed in moderation. For gluten-free or dairy-free adaptations, consider ingredient swaps mentioned earlier to suit dietary needs or preferences.
Conclusion
The Perfect Red Velvet Flag Cake with Cream Cheese Frosting is proof that sometimes the simplest recipes, whipped up under a little pressure, become your most beloved staples. Its vibrant color, tender crumb, and luscious frosting make it a standout for any occasion—whether rushed or planned. I love this cake because it’s approachable, forgiving, and always makes people smile.
Feel free to tweak the layers, frosting, or even the flag pattern to make it truly yours. If you try this recipe, I’d love to hear how your cake turns out—drop a comment or share your favorite variations! Remember, baking doesn’t have to be complicated to be unforgettable.
FAQs
Can I make the cake layers ahead of time?
Absolutely! You can bake the layers a day in advance, wrap them tightly in plastic wrap, and keep them refrigerated until ready to assemble.
What if I don’t have buttermilk?
Mix 1 tablespoon of lemon juice or vinegar with 1 cup of milk and let it sit for 5 minutes. This homemade buttermilk substitute works perfectly.
How do I prevent the red color from fading?
Use gel food coloring instead of liquid to get the richest color with less moisture. Also, avoid overbaking to maintain vibrant layers.
Can I use a different frosting?
Yes! Buttercream, mascarpone frosting, or whipped coconut cream are great alternatives. Just make sure the frosting is firm enough to hold the flag design.
How do I slice the cake layers evenly?
A serrated knife and a steady hand are your best friends. You can also use cake levelers or dental floss for cleaner cuts if you have them.
Pin This Recipe!
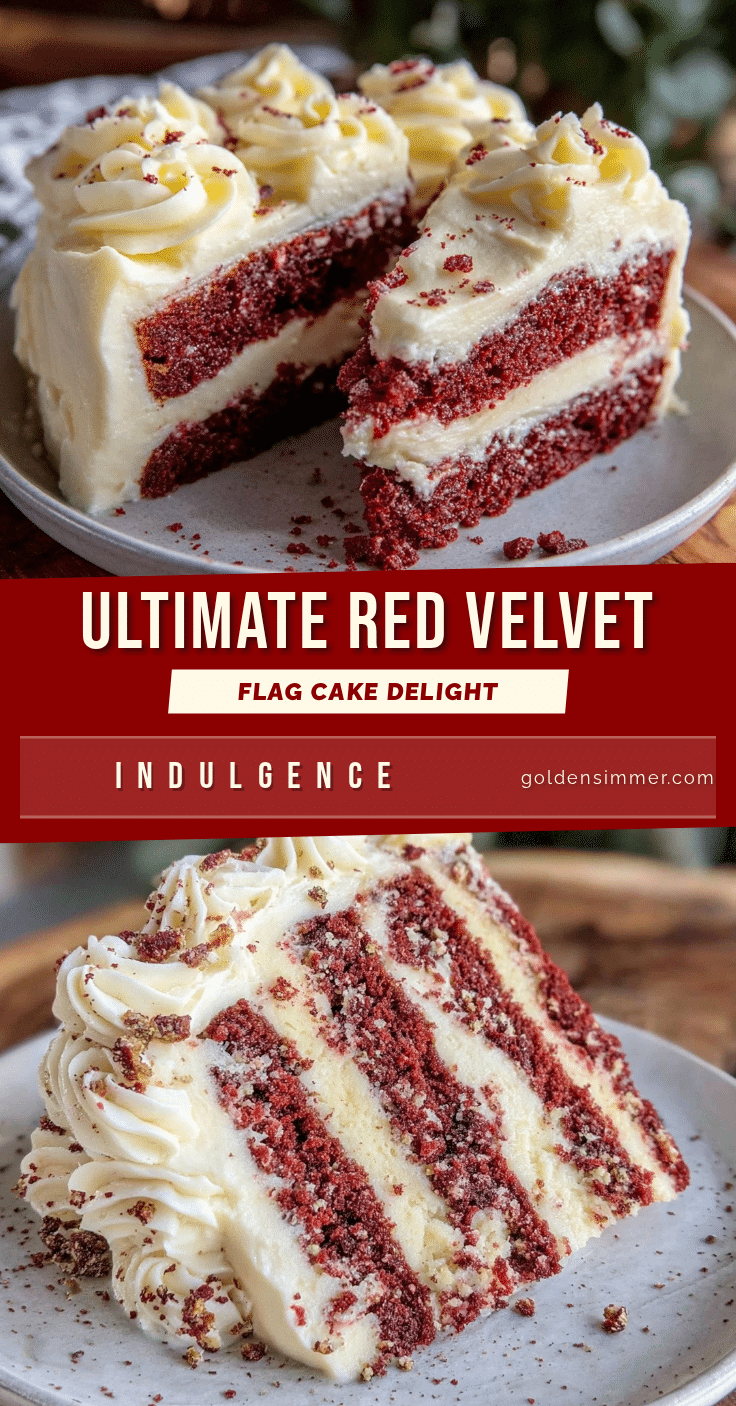
Perfect Red Velvet Flag Cake Recipe with Cream Cheese Frosting
A quick and easy red velvet cake with a visually stunning flag pattern, layered with silky cream cheese frosting. Perfect for celebrations and last-minute baking.
- Prep Time: 20 minutes
- Cook Time: 30 minutes
- Total Time: 50 minutes
- Yield: 12 servings 1x
- Category: Dessert
- Cuisine: American
Ingredients
- 2 ½ cups (315g) all-purpose flour, sifted
- 1 ½ cups (300g) granulated sugar
- 2 tablespoons (15g) unsweetened cocoa powder
- 1 teaspoon (5g) baking soda
- ½ teaspoon (3g) salt
- 1 cup (240ml) buttermilk, room temperature (or homemade with milk and lemon juice)
- 1 cup (240ml) vegetable oil
- 2 large eggs, room temperature
- 2 tablespoons (30ml) red food coloring (gel-based recommended)
- 1 teaspoon (5ml) vanilla extract
- 1 teaspoon (5ml) distilled white vinegar
- 8 ounces (225g) cream cheese, softened
- ½ cup (115g) unsalted butter, softened
- 4 cups (480g) powdered sugar, sifted
- 1 teaspoon (5ml) vanilla extract (for frosting)
- Pinch of salt (for frosting)
Instructions
- Preheat oven to 350°F (175°C). Grease and flour two 9-inch round cake pans and line bottoms with parchment paper circles.
- In a large bowl, sift together flour, cocoa powder, baking soda, and salt. Set aside.
- In another bowl, whisk sugar and vegetable oil until combined. Add eggs one at a time, mixing well after each.
- Stir in buttermilk, red food coloring, vanilla extract, and vinegar. Batter will be vivid and slightly thin.
- Gradually fold dry ingredients into wet mixture with a spatula until just combined and smooth.
- Divide batter evenly between pans. Tap pans gently to release air bubbles.
- Bake 25-30 minutes or until toothpick inserted in center comes out clean. Check at 25 minutes to avoid overbaking.
- Cool cakes in pans for 10 minutes, then turn out onto cooling racks. Remove parchment and cool completely.
- Beat cream cheese and butter until smooth and creamy (3-4 minutes). Gradually add powdered sugar, mixing on low speed to avoid dust clouds.
- Add vanilla and salt to frosting, beat at medium speed until light and fluffy.
- Slice each cake layer horizontally into three thin layers (six layers total).
- Arrange layers alternately with frosting in between to create flag stripes. Use extra frosting to cover sides and top smoothly.
- Optionally, decorate with small edible stars or candies to mimic flag stars.
- Refrigerate assembled cake for at least 30 minutes before slicing for easier, neat cuts.
Notes
Use gel food coloring for vibrant color without extra moisture. Sift dry ingredients to prevent lumps. Room temperature eggs and buttermilk improve batter texture. Avoid overmixing to keep cake tender. Chill frosting if too soft before spreading. Use parchment paper in pans for easy removal. Refrigerate cake before slicing for clean cuts.
Nutrition
- Serving Size: 1 slice (1/12 of cak
- Calories: 375
- Sugar: 35
- Sodium: 250
- Fat: 20
- Saturated Fat: 8
- Carbohydrates: 48
- Fiber: 1
- Protein: 5
Keywords: red velvet cake, cream cheese frosting, flag cake, easy cake recipe, celebration cake, layered cake, quick dessert



