Love this? Save it for later!
Share the inspiration with your friends
Introduction
It was 11:17 PM on a slow Monday, and the craving hit me like a lightning bolt: crunchy, tangy pickles with a punch of garlic and fresh dill. I didn’t have the hours—or the patience—it usually takes to make the “real” canned pickles. But I did have a jar of small cucumbers, a handful of garlic cloves, and a crazy idea to make quick garlic dill refrigerator pickles ready in just 24 hours. The kitchen was dim, the fridge half-empty, and honestly, I forgot to buy fresh dill at the store earlier that day. So, I grabbed whatever dill sprigs I had frozen in a little baggie from last summer. It wasn’t perfect, but it was perfect enough.
There’s something about making pickles late at night, the quiet hum of the fridge keeping time, that loosens the rules. I mean, who knew that these speedy refrigerator pickles could pack such a satisfying crunch and flavor punch without the long wait? Maybe you’ve been there—staring at your fridge, dreaming of that salty, garlicky crunch but lacking the patience or the right timing. That’s where this recipe comes in. It’s a little rebellious, a little experimental, but it’s stuck around because it’s just that good.
So, let me tell you why this recipe isn’t just a backup plan—it’s the one I reach for when I want pickles fast, fresh, and with a little bit of nighttime magic in the mix.
Why You’ll Love This Recipe
After countless trials and late-night pickle marathons, this quick garlic dill refrigerator pickles recipe became my absolute go-to. It’s not just about speed; it’s about flavor, texture, and that unbeatable homemade satisfaction. Here’s why it’s a winner:
- Quick & Easy: Ready to eat in just 24 hours, perfect for when you want pickles without the wait or the fuss.
- Simple Ingredients: Uses pantry staples like garlic, vinegar, and dill—no fancy or hard-to-find items required.
- Perfect for Snacks & Meals: These pickles brighten up sandwiches, burgers, salads, or just a crunchy snack straight from the jar.
- Crowd-Pleaser: Family and friends rave about the perfect balance of garlic punch and dill freshness.
- Unbelievably Delicious: The crisp cucumbers soak up the garlicky brine, making every bite pop with flavor and crunch.
- Unique Method: Unlike traditional canned pickles, these are no-heat, quick-soak refrigerator pickles that keep their snap and brightness.
This recipe isn’t just another pickle recipe—it’s the one that gets you through those moments when only a crunchy, garlicky bite will do. And honestly, it’s a little fun to make something so simple taste so much like magic.
What Ingredients You Will Need
This recipe uses fresh, everyday ingredients to create a bold, tangy flavor with a satisfying crunch. Most of these are pantry staples or easy to grab from your local market. Here’s what you’ll need:
- Small cucumbers (pickling cucumbers preferred): About 1.5 pounds (700 g), washed and sliced into spears or rounds depending on your preference.
- Fresh dill sprigs: Around 4-5 sprigs (if fresh isn’t available, frozen dill works well too).
- Garlic cloves: 4-5 large cloves, peeled and smashed for maximum flavor release.
- White vinegar: 1 cup (240 ml), the backbone of the brine for that sharp pickle tang.
- Water: 1 cup (240 ml), to balance the acidity for a milder bite.
- Kosher salt or pickling salt: 1 tablespoon, essential for crispness and flavor (I recommend Diamond Crystal for consistent texture).
- Granulated sugar: 1 teaspoon, to balance the vinegar’s acidity (optional but highly recommended).
- Black peppercorns: 1 teaspoon, whole for a subtle spice note.
- Red pepper flakes: 1/4 teaspoon (optional), for a little kick if you like it spicy.
You can swap the white vinegar with apple cider vinegar for a slightly fruitier flavor. If you want a low-sodium option, try reducing the salt slightly but keep in mind it may affect the crispness. The cucumbers should be firm and fresh—avoid any that feel soft or have blemishes.
Equipment Needed
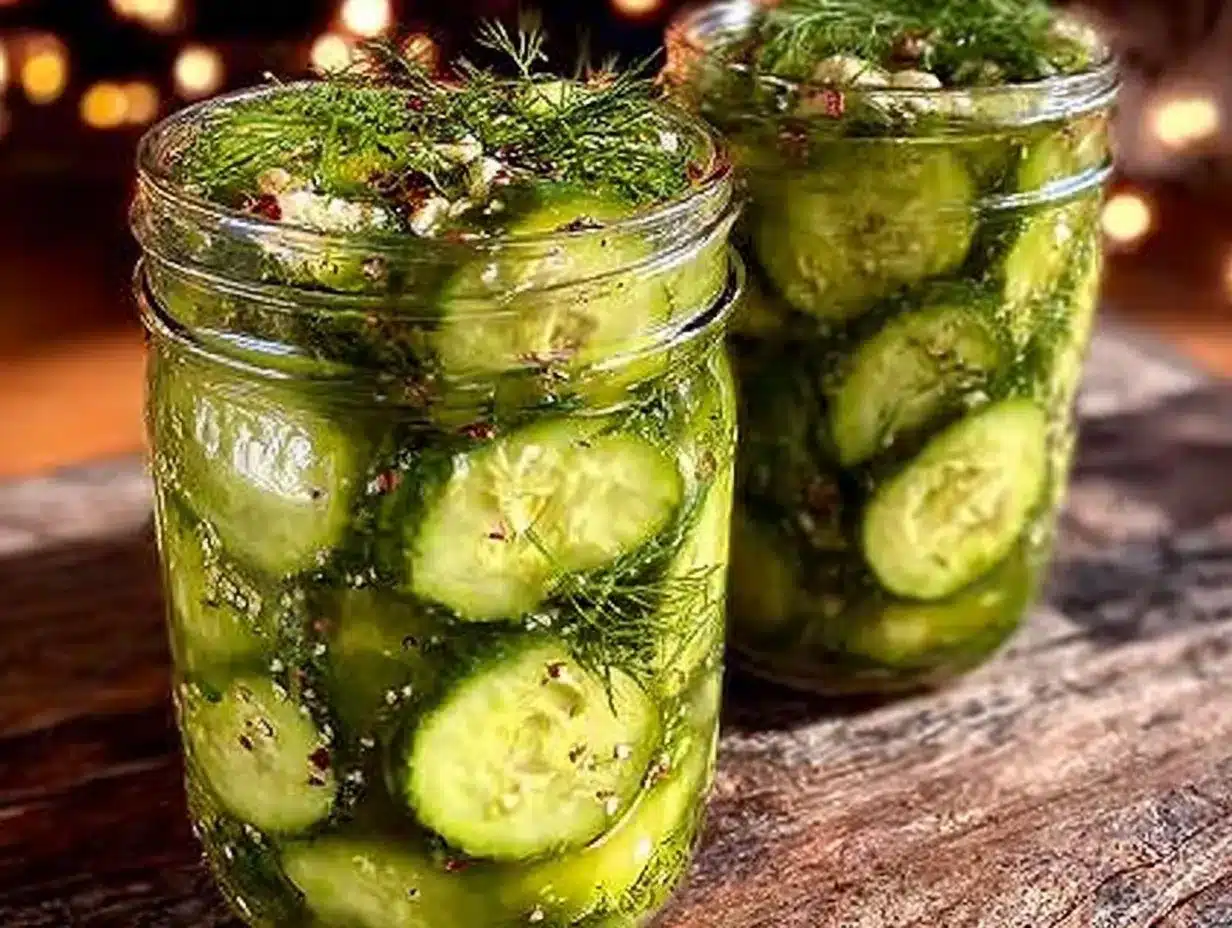
For this simple quick garlic dill refrigerator pickles recipe, you won’t need much gear, but a few tools make the process smoother:
- Quart-sized glass jar or any airtight container: Glass jars work best to preserve flavor and keep the pickles crisp. Mason jars are a classic choice, but any clean, food-safe container with a tight lid will do.
- Measuring cups and spoons: For precise brine ratios.
- Sharp knife and cutting board: For slicing cucumbers evenly—uniform slices pickle better and look prettier.
- Small saucepan: To warm the brine ingredients slightly, helping dissolve the salt and sugar more easily.
- Tongs or fork: Handy for packing cucumbers into the jar without bruising them.
If you don’t have a small saucepan, you can dissolve salt and sugar in warm water from your kettle. I’ve tried both methods—warming the brine on the stove feels more controlled, but the kettle trick works fine when you’re in a hurry. Just make sure the brine cools before pouring it over the cucumbers to keep them crisp.
Preparation Method
- Prepare the cucumbers: Wash about 1.5 pounds (700 g) of small cucumbers thoroughly. Slice them into spears about 3 inches long or into 1/4-inch thick rounds, depending on how you like your pickles. Uniform slices ensure even pickling. (Time: 10 minutes)
- Pack the jar: Place 4-5 fresh dill sprigs and 4-5 smashed garlic cloves into the bottom of a clean quart-sized glass jar. Add 1 teaspoon whole black peppercorns and, if you like heat, 1/4 teaspoon of red pepper flakes. Then, pack the cucumber slices tightly but without crushing them. (Time: 5 minutes)
- Make the brine: In a small saucepan, combine 1 cup (240 ml) white vinegar, 1 cup (240 ml) water, 1 tablespoon kosher salt, and 1 teaspoon granulated sugar. Warm gently over medium heat, stirring until the salt and sugar are fully dissolved—no need to boil. Remove from heat and let cool slightly. (Time: 5-7 minutes)
- Pour the brine: Carefully pour the warm (not hot) brine over the cucumbers in the jar, covering them completely. Leave about 1/2 inch of headspace at the top of the jar. Use a clean utensil to press cucumbers down if needed, ensuring they stay submerged. (Time: 3 minutes)
- Seal and refrigerate: Screw the lid on tightly and place the jar in the refrigerator. The pickles will be ready to enjoy in 24 hours but get even better after 48 hours. (Time: 1 minute)
- Enjoy: After 24 hours, try a pickle spear or two. They should be crisp, garlicky, and bright with dill flavor. Store refrigerated and consume within 2-3 weeks for best freshness.
Pro tip: If you find your pickles aren’t as crisp as you like, try soaking the cucumbers in ice water for an hour before slicing. Also, avoid adding the brine while it’s still hot, or the cucumbers can get mushy.
Cooking Tips & Techniques
Making quick refrigerator pickles might sound foolproof, but I’ve learned a few things the hard way that I want to share with you:
- Salt matters: Always use kosher or pickling salt. Table salt can cloud the brine and add off flavors. Diamond Crystal kosher salt is my personal favorite for pickling.
- Don’t boil the brine: Heating just enough to dissolve the salt and sugar is perfect. Boiling can soften the cucumbers prematurely, losing that crunch.
- Submerge cucumbers: Make sure all cucumber pieces stay under the brine to avoid mold or soft spots. Use a fermentation weight or clean stone if needed.
- Timing is key: While the pickles are technically ready in 24 hours, letting them sit 48 hours intensifies the flavor and crunch. Patience pays off here.
- Use fresh garlic and dill: Freshness makes a big difference. Frozen dill works but fresh sprigs give a brighter, more vibrant taste.
Honestly, I once rushed this recipe, skipping the salt dissolving step, and ended up with a briny mess. Lesson learned: take a few extra minutes warming the brine—it’s worth it.
Variations & Adaptations
This recipe is flexible and welcomes your personal tweaks. Here are some ways to make it your own:
- Spicy Kick: Add extra red pepper flakes or a sliced jalapeño to the jar for heat lovers.
- Herb Swap: Try substituting fresh tarragon, thyme, or rosemary for dill for a different herbal note.
- Low-Sodium Version: Reduce salt by half and increase refrigeration time slightly to compensate for flavor and crispness.
- Sweet & Spicy: Add a tablespoon of honey or maple syrup and a cinnamon stick for a sweet twist on classic dill pickles.
- Whole Pickles: Instead of slicing, pickle small whole cucumbers for a fun snack—just increase brining time to 48 hours.
Once, I tried adding mustard seeds and a splash of white wine vinegar instead of water—gave the pickles a subtle tang that was surprisingly good! Feel free to experiment; the fridge is forgiving.
Serving & Storage Suggestions
These quick garlic dill refrigerator pickles are best served cold, straight from the fridge. They’re fantastic on sandwiches, burgers, or as a tangy side to a charcuterie board. I love pairing them with a creamy smoked salmon spread or alongside a hearty crispy garlic chicken dish for a flavor contrast.
Store the pickles in the refrigerator with the lid tightly closed. They’ll keep fresh and crunchy for up to 3 weeks, but honestly, they rarely last that long in my kitchen! If you’re reheating a dish that includes these pickles, add them fresh after heating to keep their crunch intact.
Over time, the flavors meld deeper, so if you have patience, let them sit a couple of days. They get softer but more intensely garlicky and dill-forward. Just keep an eye on them for any signs of spoilage.
Nutritional Information & Benefits
One serving of these homemade garlic dill pickles (about 2 spears) is low in calories—roughly 10-15 calories—and provides a good source of antioxidants from the garlic and dill. The vinegar-based brine can support digestion and blood sugar regulation, making these pickles a tasty, health-promoting snack. They’re naturally gluten-free, low-carb, and keto-friendly, which makes them a smart choice for many diets.
Keep in mind, they do contain sodium from the salt, so if you’re watching your intake, enjoy in moderation. The fresh dill adds vitamin C and other micronutrients, while garlic supports immune health. So, you’re not just getting flavor—you’re giving your body a little boost, too.
Conclusion
Honestly, this quick garlic dill refrigerator pickles recipe hits all the right notes when you want crunchy, flavorful pickles fast without fussing with canning. I love how customizable it is—you can make it as simple or as spicy as you like. Plus, it’s a little kitchen hack that turns ordinary cucumbers into something special overnight. The next time you find yourself craving that perfect pickle crunch, remember this recipe. Try it, tweak it, and make it your own.
If you give it a whirl, I’d love to hear how your pickles turn out or what twists you add. Leave a comment or share your version—there’s nothing better than a community of pickle lovers sharing their best ideas. Happy pickling!
FAQs
How long do quick refrigerator pickles last in the fridge?
They stay fresh and crunchy for about 2 to 3 weeks when stored in an airtight jar in the refrigerator.
Can I use regular cucumbers instead of pickling cucumbers?
You can, but pickling cucumbers are firmer and less watery, which helps keep the pickles crisp. Regular cucumbers work but may yield softer results.
Do I need to boil these pickles like traditional canned pickles?
Nope! This recipe uses a quick brine poured over fresh cucumbers and refrigerates them—no boiling or canning required.
Can I make these pickles without garlic?
Yes, but garlic adds a lot of the signature flavor. You can omit it or substitute with shallots or onion slices for a milder flavor.
What can I use if I don’t have fresh dill?
Frozen dill works well, or you can experiment with dried dill, though fresh dill offers the best flavor. Other herbs like tarragon or thyme can also be interesting swaps.
Pin This Recipe!
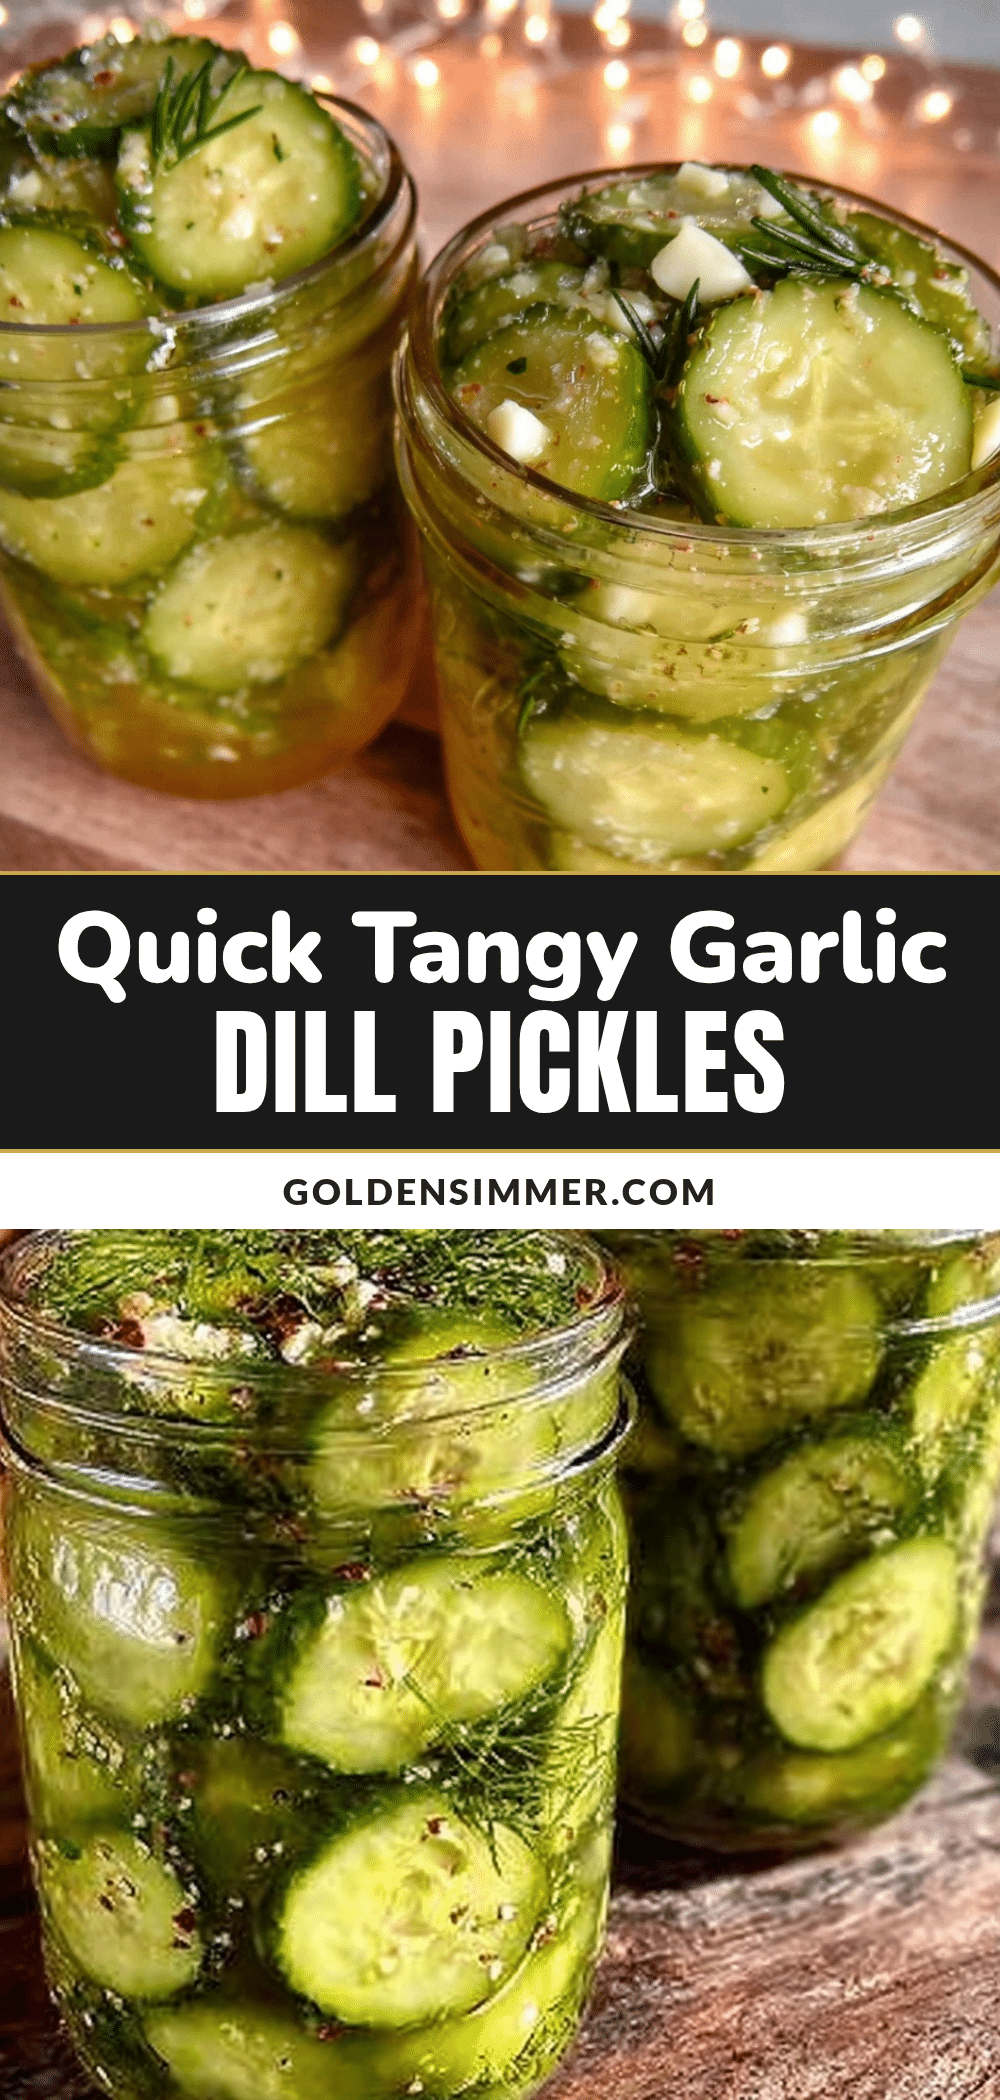
Quick Garlic Dill Refrigerator Pickles
A fast and easy recipe for crunchy, tangy garlic dill pickles ready in just 24 hours using a no-heat refrigerator method.
- Prep Time: 15 minutes
- Cook Time: 7 minutes
- Total Time: 24 hours 22 minutes
- Yield: About 1 quart jar (approximately 4 servings) 1x
- Category: Condiment
- Cuisine: American
Ingredients
- 1.5 pounds small cucumbers (pickling cucumbers preferred), washed and sliced into spears or rounds
- 4–5 fresh dill sprigs (frozen dill works as a substitute)
- 4–5 large garlic cloves, peeled and smashed
- 1 cup (240 ml) white vinegar
- 1 cup (240 ml) water
- 1 tablespoon kosher salt or pickling salt (Diamond Crystal recommended)
- 1 teaspoon granulated sugar (optional but recommended)
- 1 teaspoon whole black peppercorns
- 1/4 teaspoon red pepper flakes (optional)
Instructions
- Wash about 1.5 pounds (700 g) of small cucumbers thoroughly. Slice into spears about 3 inches long or into 1/4-inch thick rounds depending on preference.
- Place 4-5 fresh dill sprigs and 4-5 smashed garlic cloves into the bottom of a clean quart-sized glass jar. Add 1 teaspoon whole black peppercorns and, if desired, 1/4 teaspoon red pepper flakes. Pack cucumber slices tightly without crushing.
- In a small saucepan, combine 1 cup white vinegar, 1 cup water, 1 tablespoon kosher salt, and 1 teaspoon granulated sugar. Warm gently over medium heat, stirring until salt and sugar dissolve. Remove from heat and let cool slightly.
- Pour the warm (not hot) brine over the cucumbers in the jar, covering completely. Leave about 1/2 inch headspace. Press cucumbers down if needed to keep submerged.
- Seal the jar tightly and refrigerate. Pickles will be ready in 24 hours but improve after 48 hours.
- Enjoy pickles cold. Store refrigerated and consume within 2-3 weeks for best freshness.
Notes
Use kosher or pickling salt for best texture and flavor. Do not boil the brine; warm it just enough to dissolve salt and sugar. Ensure cucumbers stay submerged in brine to avoid spoilage. For extra crispness, soak cucumbers in ice water for an hour before slicing. Pickles improve in flavor and crunch after 48 hours but are ready at 24 hours.
Nutrition
- Serving Size: About 2 pickle spear
- Calories: 1015
- Sugar: 1
- Sodium: 400
- Carbohydrates: 2
- Fiber: 0.5
Keywords: quick pickles, refrigerator pickles, garlic dill pickles, easy pickles, homemade pickles, no-cook pickles, crunchy pickles



