Love this? Save it for later!
Share the inspiration with your friends
I was standing in line at the hardware store, of all places, holding a bag of lightbulbs and a new whisk I’d grabbed on a whim from the clearance rack. The man in front of me—an older gentleman with sawdust on his flannel shirt, the kind of guy you’d expect to be giving advice on fixing a leaky faucet, not baking—turned around and noticed my whisk. “Planning on making something spooky?” he asked, nodding toward it. I laughed and said I was just hoping to get through the week without ordering pizza again. That’s when he told me about the spiderweb brownies. He said his granddaughter calls them the “Halloween miracle” because they look like you spent hours piping intricate designs, but really, you just swirl a bag of Nutella around with a toothpick. I wasn’t expecting baking advice from a plumber-slash-carpenter, but there I was, in aisle three, listening to him describe exactly how to make these Quick Spiderweb Nutella Brownies. Honestly, I almost forgot the lightbulbs.
I went home that night and tried it. I mean, I had to. The concept was so simple it felt like a trick. You make a standard brownie batter—box mix or from scratch, he didn’t care—and then you dollop Nutella on top and drag a knife through it to make webs. That’s it. No piping bags, no steady hands, no stress. The first batch I made, I got a little overzealous with the swirling and ended up with brownie-Nutella tie-dye instead of webs. But even that mess was delicious. The second batch? That was the one. The webs actually looked like webs, and my kids thought I was some kind of kitchen wizard. Let me tell you, that feeling never gets old.
Maybe you’ve been there—scrolling through Pinterest looking for a Halloween treat that won’t make you cry in the kitchen at 10 PM. These spiderweb brownies are that recipe. They’re the kind of thing you can whip up after work, even when you’re tired, even when you’ve had a long day. They look impressive, they taste incredible, and the secret is just Nutella and a toothpick. That’s why this recipe stuck with me. Not because it’s fancy, but because it’s honest. It’s a shortcut that actually works, and it makes you look like a hero.
Why You’ll Love This Recipe
Let’s be real for a second. Weeknight baking can feel like a chore. You’re tired, the kitchen is a mess, and the last thing you want is a project that requires a dozen dirty bowls. These Quick Spiderweb Nutella Brownies are the opposite of that. They’re the recipe you turn to when you need a win. I’ve tested this method at least a dozen times now—sometimes with boxed mix, sometimes with my favorite from-scratch recipe—and it works every single time. Here’s why this one’s a keeper:
- Quick & Easy: From start to finish, you’re looking at about 30 minutes. The spiderweb design takes less than 60 seconds to create. No piping bags, no special tips, no stress.
- Simple Ingredients: You probably already have everything in your pantry. Brownie mix (or flour, sugar, cocoa if you’re going from scratch), eggs, oil, and a jar of Nutella. That’s it.
- Perfect for Halloween: Whether it’s a school party, a work potluck, or just a fun treat for the kids before trick-or-treating, these brownies scream “Halloween” without screaming “I spent all day on this.”
- Crowd-Pleaser: I’ve brought these to three different gatherings now, and they disappear faster than anything else on the table. Kids love the web design, adults love the Nutella-chocolate combo.
- Unbelievably Delicious: The Nutella doesn’t just sit on top—it bakes into the brownie slightly, creating these pockets of creamy, hazelnutty goodness. The edges get a little crisp, the center stays fudgy, and the whole thing is just next-level comfort food.
What makes this recipe different from every other brownie recipe out there? It’s the technique. Swirling Nutella into brownie batter isn’t new, but doing it in a way that actually looks like a spiderweb—without any special tools—takes a tiny bit of know-how. I’ll walk you through exactly how to do it so your webs look like webs, not blobs. And honestly, even if they don’t come out perfect, they’ll still taste amazing. There’s no losing with Nutella and brownies.
This is the kind of recipe that makes you close your eyes after the first bite. It’s comfort food reimagined—faster, easier, but with the same soul-soothing satisfaction. Perfect for impressing Halloween guests without stress, or turning a regular Tuesday night into something a little more magical.
What Ingredients You Will Need
This recipe uses simple, everyday ingredients to deliver that rich, fudgy brownie texture with a gorgeous spiderweb finish. Most of these are pantry staples, and the one special ingredient—Nutella—is worth keeping on hand for moments just like this.
For the Brownie Base
- 1 box (18 oz) brownie mix – I prefer Duncan Hines Chewy Fudge or Ghirardelli Dark Chocolate for the best texture. (You can also use a homemade recipe if you have a favorite—just make sure it’s a fudgy style, not cakey.)
- Eggs – As called for on the box mix (usually 2 large eggs, room temperature)
- Vegetable oil – As called for on the box mix (usually 1/2 cup). You can substitute melted coconut oil or melted butter for a richer flavor.
- Water – As called for on the box mix (usually 1/4 cup). Coffee works beautifully here too—it deepens the chocolate flavor without making it taste like coffee.
For the Spiderweb Design
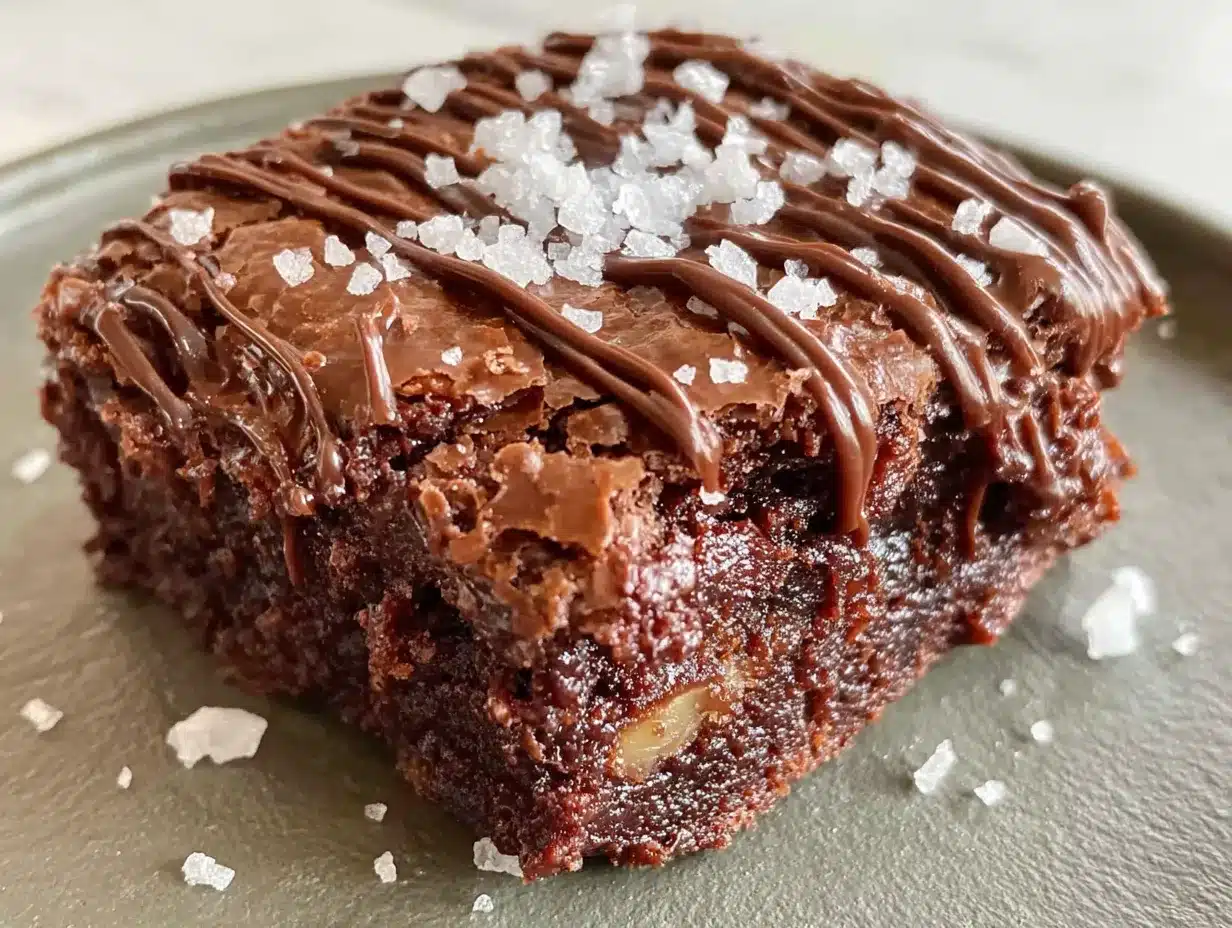
- 1/3 cup Nutella – This is the star of the show. Don’t substitute with another chocolate-hazelnut spread unless you have to; Nutella has the perfect consistency for swirling. If your Nutella is thick and stiff, microwave it for 10-15 seconds to loosen it up.
- 1 tablespoon powdered sugar – Optional, but I like to dust the finished brownies with a light sprinkle for that “spiderweb caught in moonlight” look. (Totally unnecessary, but pretty!)
Ingredient Selection Tips: When choosing your brownie mix, look for one that says “fudge” or “chewy” on the box. Cakey brownies don’t hold the swirl as well—the batter is too stiff and the web pattern gets lost. If you’re making brownies from scratch, use a recipe with a higher fat-to-flour ratio. My go-to is a 1:1 ratio of butter to cocoa powder with an extra egg yolk for chewiness.
Substitution Guidance: Need to make these gluten-free? Use a gluten-free brownie mix—most of them work perfectly with this technique. Dairy-free? Most box mixes are dairy-free on their own (check the label), and Nutella is dairy-free as well. Vegan? Use a vegan brownie mix and a flax egg (1 tablespoon flaxseed meal + 3 tablespoons water per egg). The swirl will still work beautifully.
One thing I’ve learned the hard way: don’t use a “low sugar” or “keto” brownie mix for this recipe. The batter consistency is usually off, and the Nutella swirl tends to sink rather than sit on top. Stick with the real stuff for best results.
Equipment Needed
You don’t need a fancy kitchen to pull off these spiderweb brownies. Here’s what you’ll need:
- 9×13-inch baking pan – This is the sweet spot for getting thick, fudgy brownies with enough surface area for the web design. An 8×8 pan works too, but your brownies will be much thicker and you’ll need to bake them longer.
- Mixing bowl – Any medium-sized bowl will do. I use a glass Pyrex bowl because it doesn’t hold onto odors.
- Whisk or spatula – For mixing the batter. A whisk works best to get rid of lumps, but a sturdy spatula is fine too.
- Piping bag or zip-top bag – For drizzling the Nutella. I use a quart-sized Ziploc bag with the corner snipped off. It’s cheaper than a piping bag and works just as well.
- Toothpick or skewer – This is your “spiderweb tool.” A wooden toothpick is perfect. A bamboo skewer works too, but it’s a bit thick—you’ll get wider lines.
- Parchment paper or non-stick spray – To line the pan. I’m a parchment paper evangelist—it makes lifting the brownies out so much easier.
- Cooling rack – Optional but helpful. If you don’t have one, just let the brownies cool in the pan.
Personal Experience: I tried using a butter knife to swirl the Nutella once because I couldn’t find a toothpick. Big mistake. The lines were too thick and the web looked more like a muddy mess. A toothpick is really the perfect tool—it’s thin enough to create delicate lines but sturdy enough to drag through the batter without breaking. If you’re out of toothpicks, the tines of a fork work in a pinch, but go slow.
Budget-Friendly Options: Don’t have a piping bag? A Ziploc bag is literally a dollar and works perfectly. No parchment paper? Grease the pan well with butter and dust it with cocoa powder instead of flour (flour leaves white streaks on the brownies). You don’t need anything fancy here—this recipe was literally designed for regular people with regular kitchens.
Preparation Method
This is where the magic happens. Follow these steps carefully, and you’ll have spiderweb brownies that look like they came from a bakery. (Spoiler: they didn’t. You made them in 30 minutes.)
Step 1: Preheat and Prep the Pan
Preheat your oven to 350°F (175°C). Line your 9×13-inch baking pan with parchment paper, leaving a little overhang on two sides—this creates “handles” for lifting the brownies out later. If you don’t have parchment, grease the pan thoroughly with butter or non-stick spray. Pro tip: spray the pan first, then press the parchment in—it sticks better and doesn’t slide around.
Step 2: Mix the Brownie Batter
In a medium mixing bowl, combine the brownie mix, eggs, oil, and water according to the package directions. Stir until just combined—about 40 strokes with a whisk. Don’t overmix! Overmixing develops gluten and makes brownies tough and cakey. You want a few small lumps remaining. The batter should be thick but pourable, like a milkshake that’s starting to melt.
Sensory cue: The batter should smell deeply chocolatey, with a slight sheen on top. If it looks dull or dry, add a tablespoon of water and mix gently.
Step 3: Pour the Batter
Pour the brownie batter into the prepared pan and spread it into an even layer using a spatula. Give the pan a gentle tap on the counter to release any air bubbles. Don’t obsess over making it perfectly flat—the Nutella swirl will cover any imperfections.
Step 4: Prepare the Nutella
Scoop the Nutella into a small piping bag or a zip-top bag. If using a zip-top bag, seal it, then snip off one tiny corner—about 1/8 inch wide. If your Nutella is stiff, microwave the bag for 10 seconds (no more!) to make it drizzling consistency. You want it to flow like warm honey, not like water. If it’s too runny, it’ll sink into the batter and disappear.
Step 5: Create the Spiderweb
This is the fun part. Pipe the Nutella in concentric circles over the brownie batter—start in the center and work your way out, leaving about 1 inch between each circle. Don’t worry if the lines aren’t perfect; the swirl will fix everything.
Now, take a toothpick and drag it from the center of the brownies outward toward the edge. Start at the center, drag through all the Nutella circles, and continue to the edge. Repeat this 6-8 times around the pan, spacing the drag marks evenly like spokes on a wheel. Then, drag the toothpick in the opposite direction—from the edge toward the center—in between each spoke. This creates the classic spiderweb pattern.
Troubleshooting tip: If your Nutella lines break or look messy, don’t panic. Just drag the toothpick through again and the pattern will come together. The key is to work quickly before the batter starts to set. You have about 2 minutes to complete the design once you start piping.
Step 6: Bake
Bake the brownies for 22-28 minutes, depending on your oven and how fudgy you like them. For gooey, fudgy brownies, pull them out at the 22-minute mark when the edges are set but the center still looks slightly underdone. For firmer brownies, bake until a toothpick inserted in the center comes out with a few moist crumbs (about 26-28 minutes).
Sensory cue: The kitchen should smell like a chocolate shop. The edges will start pulling away from the pan slightly when they’re done. Don’t overbake—brownies continue cooking in the hot pan for another 5 minutes after you pull them out.
Step 7: Cool and Serve
Let the brownies cool in the pan for at least 15 minutes. If you can wait that long. (I usually can’t.) Use the parchment handles to lift the whole block of brownies onto a cutting board. Slice into squares—I go for 12 big pieces or 24 smaller ones. Dust with powdered sugar if you’re feeling fancy.
Personal note: The first time I made these, I tried to slice them while they were still warm. Total disaster. The Nutella smear was real. Let them cool completely if you want clean edges. If you’re serving them warm (which I fully support), just warn people that the webs might be a little messy.
Cooking Tips & Techniques
I’ve made these brownies more times than I care to admit, and I’ve learned a few things the hard way. Here’s what I wish someone had told me:
The Toothpick Angle Matters
Hold the toothpick at a 45-degree angle when you drag it through the Nutella. If you hold it straight up and down, the lines are too thin and the web looks faint. If you hold it too flat, the lines are too thick and the pattern gets muddy. A 45-degree angle gives you clean, visible lines that look like actual spiderwebs.
Don’t Over-Swirl
I know it’s tempting to keep dragging the toothpick because the pattern looks so cool as it forms. Resist the urge. More than 8-10 drag marks, and the Nutella starts mixing into the batter completely, turning your brownies into a uniform chocolate-hazelnut mess. Three drags from center to edge, three from edge to center—that’s all you need.
Room Temperature Ingredients Matter
I learned this one the hard way when I used cold eggs straight from the fridge. The batter was stiff, the Nutella sank instead of swirling, and the whole thing was a disaster. Let your eggs sit on the counter for 15 minutes before you start. If you’re in a hurry, place them in a bowl of warm water for 5 minutes.
Timing Strategy
Here’s my weeknight game plan: Preheat the oven first. While it’s heating, line the pan and mix the batter. While the brownies bake, clean up the kitchen. By the time they’re done, your kitchen is clean and you just have to wait for them to cool. Total active time: about 10 minutes.
Consistency Tip
If you want perfect webs every time, test your Nutella consistency before you pipe it. Squeeze a tiny dot onto a plate. If it holds its shape but spreads slightly when you press it, it’s perfect. If it runs like water, it’s too thin—add a teaspoon of powdered sugar to thicken it. If it doesn’t budge when you press it, microwave for 5 more seconds.
Variations & Adaptations
Once you’ve mastered the basic spiderweb, you can play around. Here are a few variations I’ve tried and loved:
Peanut Butter Spiderweb
Swap the Nutella for creamy peanut butter. Microwave it for 15 seconds to loosen it up, then pipe and swirl exactly the same way. The peanut butter creates a slightly thicker web, and the salty-sweet combo is incredible. My kids actually prefer this version now.
White Chocolate Ghost Webs
Melt 1/2 cup white chocolate chips with 1 tablespoon coconut oil, then use that instead of Nutella. The white chocolate creates a pale, ghostly web that looks amazing against dark brownie batter. Dust with black cocoa powder for a spooky contrast.
Vegan Spiderweb Brownies
Use a vegan brownie mix and replace the eggs with flax eggs (1 tablespoon flaxseed meal + 3 tablespoons water per egg). Nutella is actually vegan-friendly (no dairy!), so you’re good there. The texture will be slightly less fudgy, but the web pattern works perfectly.
Mint Chocolate Web
Add 1/2 teaspoon peppermint extract to the brownie batter before baking. Swap the Nutella for melted dark chocolate mixed with a drop of green food coloring. The green web against dark brown batter is super festive for Christmas or St. Patrick’s Day.
My Personal Favorite: S’mores Spiderweb
After swirling the Nutella, sprinkle mini marshmallows and crushed graham crackers over the top before baking. The marshmallows toast slightly, the graham crackers add crunch, and you get all the flavors of a s’more in brownie form. I made this for a camping trip (well, a “camping” trip in my backyard) and it was a hit.
Serving & Storage Suggestions
These brownies are incredibly versatile. Here’s how to serve and store them for maximum deliciousness:
Serving Temperature
I like them best at room temperature, but warm is a close second. If you’re serving them warm, pop individual squares in the microwave for 10 seconds. The Nutella gets a little melty, and the brownie becomes almost pudding-like in the center. Cold brownies are good too, but the web pattern is less visible because the Nutella hardens.
Presentation Ideas
For Halloween parties, arrange the brownies on a black platter or a wooden board. Add a few plastic spiders on top for a fun touch. Dust with powdered sugar right before serving to mimic morning dew on a real spiderweb. I also like to serve them with a side of vanilla ice cream—the contrast of warm brownie and cold ice cream is unbeatable.
Complementary Dishes
These brownies pair beautifully with a glass of cold milk (obviously), but they’re also great with coffee, hot chocolate, or even a glass of red wine for the adults. If you’re serving them at a Halloween party, set up a “brownie bar” with toppings like whipped cream, sprinkles, and extra Nutella for drizzling.
Storage Instructions
Store leftover brownies in an airtight container at room temperature for up to 4 days. Layer them with parchment paper between each layer to prevent sticking. Do NOT refrigerate them—the fridge dries out brownies and makes them crumbly. If you live in a humid climate, add a piece of bread to the container to absorb excess moisture.
Freezing Instructions
These brownies freeze beautifully. Wrap individual squares in plastic wrap, then place them in a freezer-safe bag. They’ll keep for up to 3 months. To thaw, leave them on the counter for 30 minutes or microwave for 20 seconds. The spiderweb pattern stays intact after freezing—I’ve tested this multiple times.
Flavor Development
Honestly, these brownies taste even better the next day. The Nutella has time to meld with the brownie base, and the flavors become more complex. If you can resist eating them all on day one, you’re in for a treat on day two. (I’ve never managed to do this, but I’ve heard it’s true.)
Nutritional Information & Benefits
Let’s be real: these are brownies. They’re a treat, not a health food. But here’s the breakdown so you know what you’re working with:
| Nutrient | Per Serving (1/12 of recipe) |
|---|---|
| Calories | 290 |
| Total Fat | 14g |
| Saturated Fat | 5g |
| Cholesterol | 35mg |
| Sodium | 180mg |
| Total Carbohydrates | 40g |
| Sugars | 28g |
| Protein | 3g |
Health Benefits of Key Ingredients: Nutella contains hazelnuts, which are a good source of vitamin E and healthy fats. Cocoa powder (in the brownie mix) is rich in antioxidants called flavonoids, which may support heart health. So yes, there are some redeeming qualities here—but let’s not pretend this is a superfood.
Dietary Considerations: These brownies are nut-free (check your brownie mix label) except for the hazelnuts in Nutella. They contain gluten, dairy (in the Nutella and some brownie mixes), and eggs. For a gluten-free version, use a certified gluten-free brownie mix. For a dairy-free version, most box mixes are dairy-free, and Nutella is dairy-free as well.
Potential Allergens: Contains wheat, eggs, and tree nuts (hazelnuts). If you’re serving these at a party, label them clearly so guests with allergies know what they’re eating.
My Personal Wellness Perspective: I’m a firm believer in balance. These brownies aren’t an everyday thing—they’re a treat for special occasions, Halloween parties, or those nights when you just need something sweet. And honestly, a homemade treat made with real ingredients is always better than something processed from a package. Enjoy them, savor them, and don’t feel guilty about it.
Conclusion
These Quick Spiderweb Nutella Brownies are proof that you don’t need fancy tools or hours of time to create something truly impressive. They’re the Halloween dessert that looks like you tried really hard—but between you and me, the secret is just a toothpick and a jar of Nutella. I’ve made them for school parties, neighborhood gatherings, and lazy Tuesday nights when I just wanted to do something fun with my kids. Every single time, they disappear fast.
What I love most about this recipe is how forgiving it is. Your webs don’t have to be perfect. Your brownies don’t have to be bakery-level beautiful. Even the messiest attempt tastes incredible, and that’s the whole point. Cooking should be fun, not stressful. This recipe is fun.
So go ahead—grab that box of brownie mix, dig out the Nutella from the back of the pantry, and give it a try. Customize it with your favorite toppings, make it your own, and don’t forget to take a picture before they’re all gone. (Trust me, they will be gone.)
I’d love to hear how yours turn out! Drop a comment below and let me know if your spiderwebs came out looking like actual webs or more like abstract art. Either way, I’m sure they were delicious.
Happy Halloween, and happy baking!
Frequently Asked Questions
Can I use a homemade brownie recipe instead of a box mix?
Absolutely. Just make sure your homemade recipe is a fudgy style, not a cakey one. Cakey brownies are too stiff for the Nutella swirl to work properly—the web pattern tends to get lost. My favorite homemade version uses melted butter, cocoa powder, and an extra egg yolk for chewiness.
Why did my Nutella sink into the batter instead of staying on top?
This usually happens for one of two reasons: your Nutella was too warm and runny, or your brownie batter was too thin. Next time, microwave the Nutella for only 10 seconds (not 20), and make sure your batter is thick but pourable. If your batter seems thin, add 2 tablespoons of flour to thicken it up.
Can I make these brownies ahead of time for a party?
Yes! These brownies actually taste better the next day. Bake them the night before, let them cool completely, and store them in an airtight container at room temperature. The spiderweb pattern stays intact. Just dust with powdered sugar right before serving for that fresh-from-the-oven look.
How do I get clean slices without smearing the spiderweb?
Use a sharp chef’s knife and wipe it clean between each cut. For the cleanest slices, chill the brownies in the fridge for 30 minutes before cutting. The Nutella hardens slightly, so the web doesn’t smear. Let them come back to room temperature before serving.
Can I use a different chocolate-hazelnut spread instead of Nutella?
You can, but the results may vary. Some brands are thicker or thinner than Nutella, which affects how the swirl looks. I’ve had good luck with Justin’s Chocolate Hazelnut Butter (it’s a bit thicker, so microwave it a few seconds longer) and Trader Joe’s Cocoa & Hazelnut Spread (very similar consistency to Nutella). Avoid generic store brands that tend to be oily—they separate during baking.
Pin This Recipe!
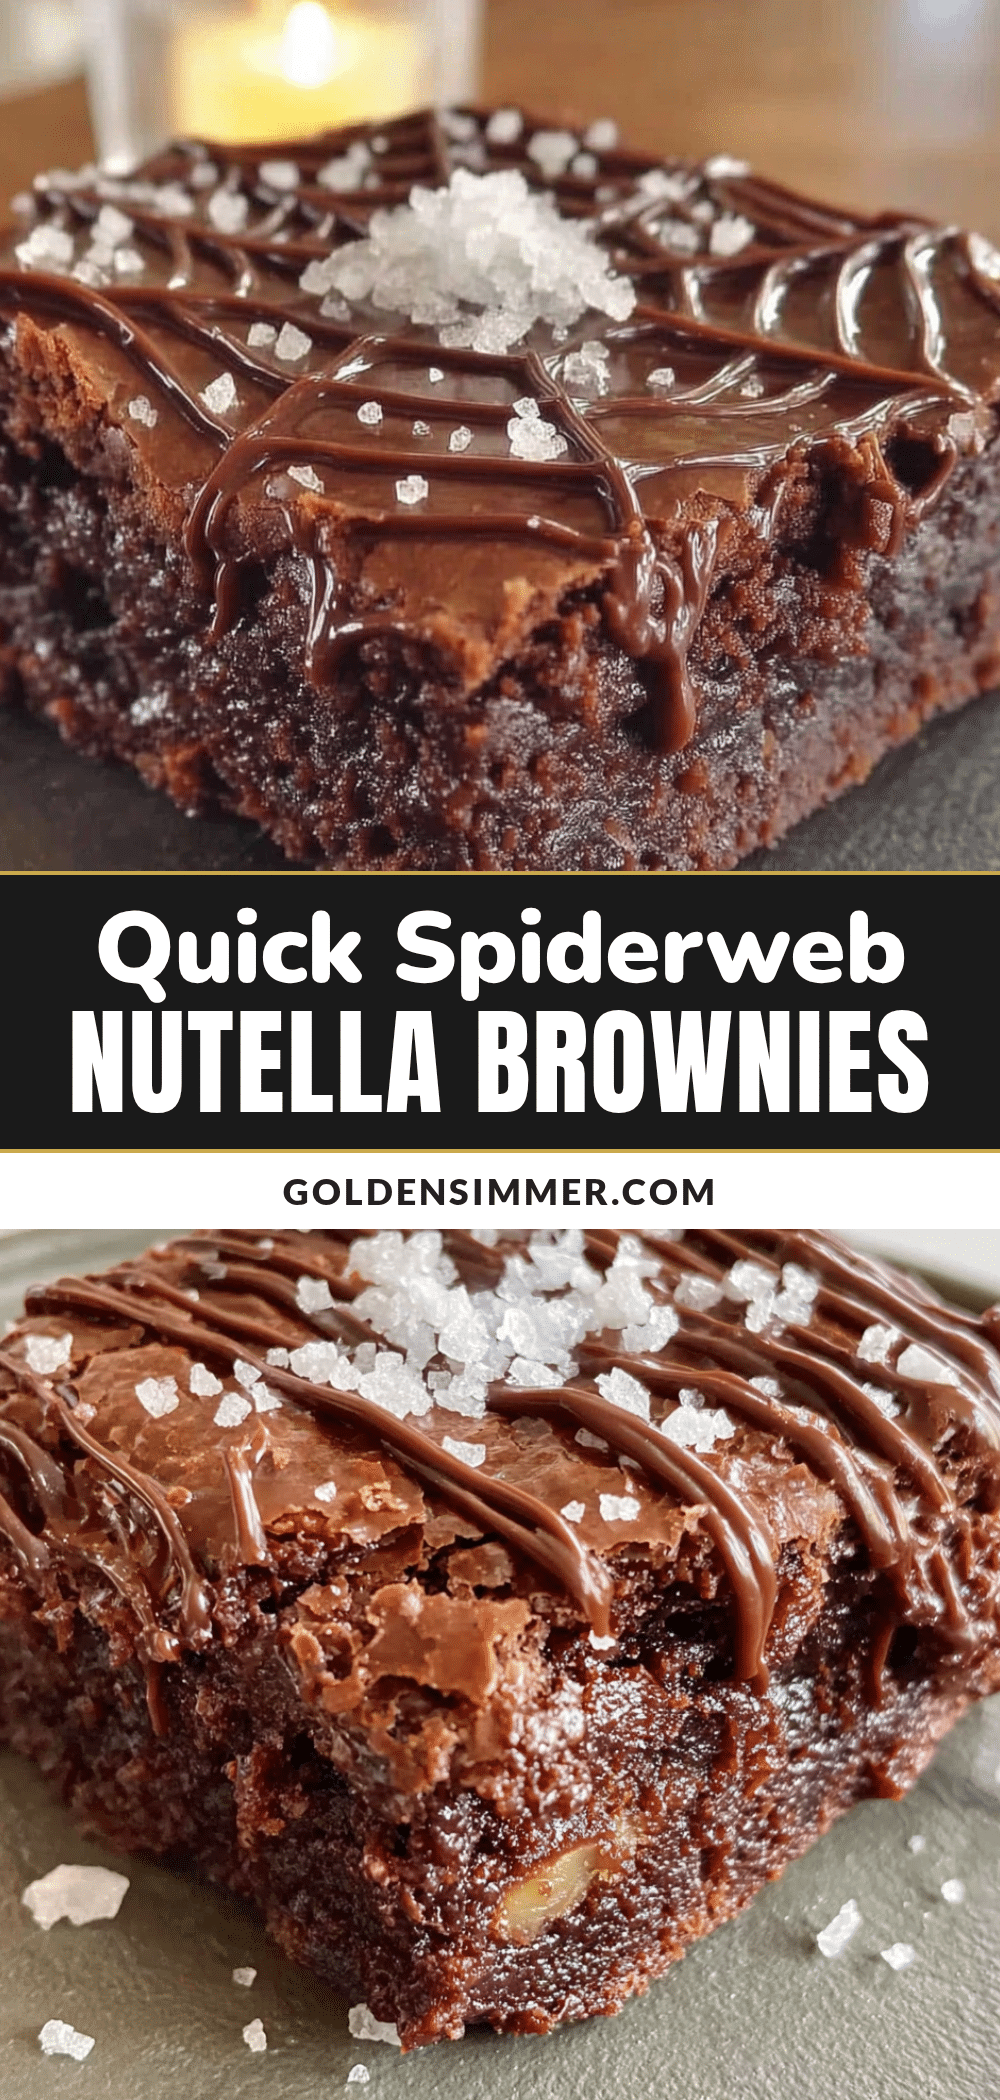
Quick Spiderweb Nutella Brownies: Easy Halloween Dessert
These Quick Spiderweb Nutella Brownies are a simple yet impressive Halloween treat. With a fudgy brownie base and a stunning spiderweb design made by swirling Nutella with a toothpick, they come together in about 30 minutes and are perfect for parties or a fun weeknight dessert.
- Prep Time: 10 minutes
- Cook Time: 25 minutes
- Total Time: 35 minutes
- Yield: 12 servings 1x
- Category: Dessert
- Cuisine: American
Ingredients
- 1 box (18 oz) brownie mix (preferably fudge or chewy style, such as Duncan Hines Chewy Fudge or Ghirardelli Dark Chocolate)
- Eggs (as called for on the box mix, usually 2 large, room temperature)
- Vegetable oil (as called for on the box mix, usually 1/2 cup; can substitute melted coconut oil or butter)
- Water (as called for on the box mix, usually 1/4 cup; coffee can be substituted)
- 1/3 cup Nutella (or other chocolate-hazelnut spread)
- 1 tablespoon powdered sugar (optional, for dusting)
Instructions
- Preheat oven to 350°F (175°C). Line a 9×13-inch baking pan with parchment paper, leaving overhang on two sides for easy removal. Alternatively, grease the pan thoroughly.
- In a medium bowl, combine the brownie mix, eggs, oil, and water according to package directions. Stir until just combined (about 40 strokes); do not overmix. The batter should be thick but pourable.
- Pour the batter into the prepared pan and spread evenly. Tap the pan gently on the counter to release air bubbles.
- Scoop the Nutella into a small piping bag or a zip-top bag. If using a zip-top bag, seal it and snip off a tiny corner (about 1/8 inch wide). If the Nutella is stiff, microwave the bag for 10 seconds to loosen it to a drizzling consistency.
- Pipe the Nutella in concentric circles over the brownie batter, starting from the center and working outward, leaving about 1 inch between circles.
- Using a toothpick held at a 45-degree angle, drag it from the center of the brownies outward toward the edge, through all the Nutella circles. Repeat this 6-8 times around the pan, spacing the drag marks evenly like spokes on a wheel. Then, drag the toothpick from the edge toward the center in between each spoke to create the spiderweb pattern. Work quickly (within 2 minutes) before the batter sets.
- Bake for 22-28 minutes. For fudgy brownies, bake 22 minutes (edges set, center slightly underdone). For firmer brownies, bake until a toothpick inserted in the center comes out with a few moist crumbs (26-28 minutes).
- Let the brownies cool in the pan for at least 15 minutes. Use the parchment handles to lift the brownies onto a cutting board. Slice into squares (12 large or 24 small). Dust with powdered sugar if desired. Serve at room temperature or warm.
Notes
For best results, use a fudgy-style brownie mix (not cakey). If Nutella is too thick, microwave for 10-15 seconds to loosen. Work quickly when creating the web pattern—you have about 2 minutes before the batter sets. For clean slices, chill brownies for 30 minutes before cutting. Brownies taste even better the next day.
Nutrition
- Serving Size: 1 square (1/12 of re
- Calories: 290
- Sugar: 28
- Sodium: 180
- Fat: 14
- Saturated Fat: 5
- Carbohydrates: 40
- Fiber: 1
- Protein: 3
Keywords: spiderweb brownies, Nutella brownies, Halloween dessert, easy brownies, fudgy brownies, quick dessert, chocolate hazelnut brownies



