Love this? Save it for later!
Share the inspiration with your friends
This was supposed to be a proper Halloween party spread. I had visions of bubbling cauldron dips, hand-painted sugar cookies shaped like tombstones, and a three-tiered cake that looked like a haunted mansion. Then my kids came home from school with that last-minute notice about the class party the next morning. It was 8 PM, the grocery store was about to close, and I was staring down a pantry full of pretzel sticks, cheese blocks, and a bag of candy eyes I’d bought on impulse. Honestly, I almost just sent in a bag of chips. But I grabbed a cutting board, started slicing, and ten minutes later I had this weird, wonderful, slightly chaotic arrangement of snacks that looked like a graveyard. The kids called it “the best thing ever,” and I called it survival. That board became the star of the party, and I’ve been making it ever since. It’s proof that you don’t need a ton of time or fancy ingredients to make something memorable. You just need a little creativity and the willingness to embrace the mess. Maybe you’ve been there—scrambling for a last-minute contribution to a school event or a work potluck. This board is for you. It’s quick, it’s spooky, and it’s so much better than store-bought.
Why You’ll Love This Quick Spooky Halloween Charcuterie Board in 15 Minutes
I’ve tested this board more times than I can count, and it never fails to deliver. It’s not just a snack platter; it’s a conversation starter, a crowd-pleaser, and a lifesaver for busy parents. Here’s why this recipe stands out:
- Ready in Under 15 Minutes: This is the ultimate last-minute Halloween hero. You can assemble it while the kids are getting their costumes on or while you’re waiting for trick-or-treaters to arrive. No stress, no fuss.
- Simple, Pantry-Friendly Ingredients: No need for a special trip to the store. Most of these items—cheese, crackers, pretzels, and a few spooky garnishes—are probably already in your kitchen. I’ve used everything from leftover cheddar to those random olives at the back of the fridge.
- Perfect for Any Halloween Gathering: Whether it’s a classroom party, a family movie night, or a work potluck, this board fits right in. It’s easy to transport, easy to serve, and everyone can grab what they like.
- A Guaranteed Crowd-Pleaser: I’ve yet to meet a kid (or adult) who can resist a board that looks like a graveyard. The fun presentation makes even simple foods feel special.
- Unbelievably Customizable: This is the kind of recipe you can tweak endlessly. Swap in your favorite cheeses, add some creepy-crawly gummies, or use a cookie cutter to make ghost-shaped cheese slices. It’s your board, your rules.
What makes this board different from the hundreds of other Halloween snack ideas out there? It’s the balance of speed and creativity. I’ve streamlined the process so you spend more time enjoying the party and less time slicing cheese. Plus, the “spooky” design is built into the arrangement—no special tools or artistic skills required. It’s comfort food with a side of Halloween magic, and it’s ready in the time it takes to find a good scary movie.
What Ingredients You Will Need for Your Spooky Board
This recipe uses simple, everyday ingredients that come together to create a visually striking and delicious board. The key is to choose items that contrast in color, texture, and shape, which makes the final arrangement look intentional and festive. Here’s what you’ll need, broken down by category:
For the “Graveyard” Base:
- Assorted Crackers (about 1 cup): I like to use a mix of shapes and sizes. Square butter crackers work well for “tombstones,” while round ones can be “moon rocks.” Ritz or Club crackers are my go-to brands for their sturdy texture.
- Pretzel Sticks (about 1 cup): These are your “fence posts” or “witch’s broomsticks.” They add a great salty crunch and a tall, vertical element to the board.
- Breadsticks (about 4-5): Use these as “logs” or “bones.” They’re great for dipping and add a rustic feel. Grissini or any thin, crunchy breadstick works perfectly.
For the “Spooky” Proteins:
- Block of Cheddar Cheese (about 8 oz): Use a sharp cheddar for the best flavor. I recommend cutting it into cubes and using a small cookie cutter (like a bat or a ghost) to make fun shapes. If you don’t have a cookie cutter, just cut it into small, uneven cubes—it adds to the “haunted” look.
- Block of Mozzarella Cheese (about 8 oz): The white color is perfect for ghosts. Cut it into small cubes or use a small round cutter to make “ghost heads.”
- Salami or Pepperoni (about 4 oz): Sliced salami adds a savory, meaty element. I like to fold the slices in half or roll them up to look like little “mummies.” You can also use prosciutto for a fancier touch.
- Black Olives (about 1/2 cup): These are your “spider bodies.” Use whole pitted black olives for the best effect. They add a briny, salty flavor that contrasts nicely with the cheese.
For the “Creepy” Produce:
- Red Grapes (about 1 cup): These look like little “eyeballs” when placed on the board. They add a pop of color and a sweet, juicy burst.
- Baby Carrots (about 1/2 cup): These can be arranged to look like “witch’s fingers.” You can even cut a small slit in the tip and insert an almond sliver for a “fingernail.”
- Strawberries (about 1 cup): Hull them and cut them in half. They look like little “hearts” or “bloody drips.” Their sweetness balances the savory elements perfectly.
For the “Spooky” Garnishes:
- Candy Eyes (about 1/4 cup): These are non-negotiable for the spooky factor. Scatter them on the board or stick them onto the olives with a tiny dab of cream cheese to make “spiders.”
- Pretzel Sticks (for “broomsticks”): You can use a few extra pretzel sticks and tie a small piece of string cheese around the end to make edible broomsticks.
- Optional: Gummy Worms or Spiders: For an extra kid-friendly touch, add a few gummy worms crawling out of a small bowl of dip or scattered on the board.
For the “Graveyard Dirt” Dip (Optional but Recommended):
- 1/2 cup Ranch Dressing or Hummus: Place this in a small bowl and surround it with crushed dark chocolate cookies or chocolate graham crackers to look like “dirt.”
Ingredient Selection Tips: When buying cheese, look for blocks that are firm and easy to cut. For the salami, I prefer a brand like Columbus or Boar’s Head for their consistent flavor. If you’re making this board for a party with dietary restrictions, you can easily swap the cheese for dairy-free alternatives and the salami for plant-based pepperoni. The visual effect will still be fantastic.
Equipment Needed
You don’t need a lot of fancy gear to make this board, which is part of its charm. Here’s what I use every time:
- A Large Cutting Board or Serving Platter (at least 12×16 inches): This is your canvas. A wooden board looks great, but a large white platter works just as well. If you don’t have one, use a baking sheet lined with parchment paper.
- A Small Cookie Cutter (bat, ghost, or pumpkin shape): This is optional but adds a lot of fun. I found a set of three on Amazon for under $10, and they’ve lasted for years.
- A Sharp Knife and a Cutting Board for Prep: You’ll need these for slicing the cheese and salami.
- A Small Bowl for the Dip: This holds your “graveyard dirt” dip. A ramekin or a small custard cup works perfectly.
- Optional: Toothpicks or Small Skewers: These are great for spearing olives or cheese cubes for easy grabbing.
I’ve made this board with just a knife and a baking sheet before, and it turned out great. Don’t overthink the equipment. The most important tool is your creativity.
Preparation Method: Building Your Spooky Board in 15 Minutes
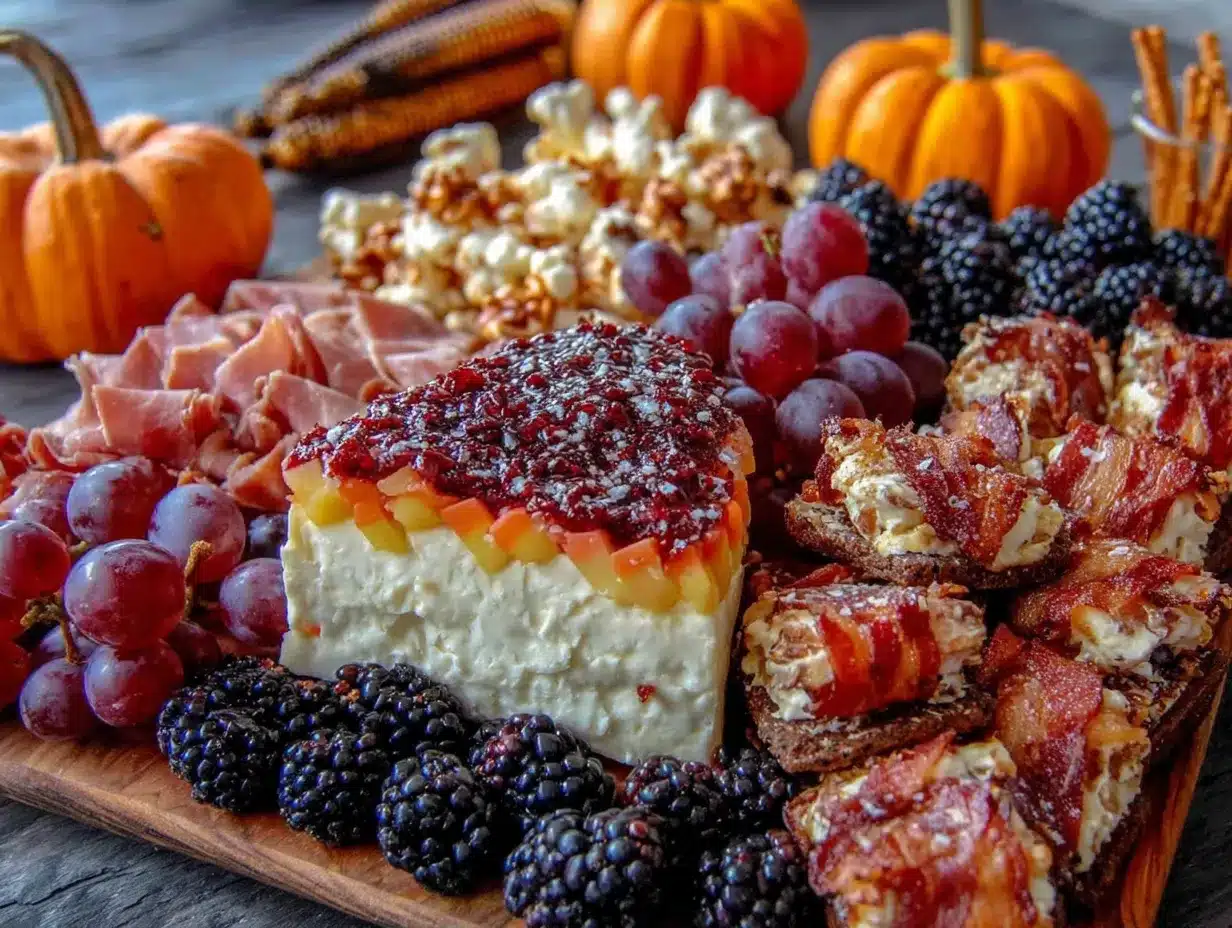
Follow these steps, and you’ll have a show-stopping board in no time. Set a timer—I bet you’ll finish in under 12 minutes once you get the hang of it.
- Prep Your Ingredients (5 minutes): Start by washing and drying your grapes, strawberries, and baby carrots. Cut the cheddar and mozzarella blocks into 1/2-inch cubes. If you have a cookie cutter, press it into the cheddar slices to make fun shapes. Slice the salami into thin rounds, then fold each round in half and then in half again to create a small triangle. Set everything aside in small bowls.
- Create the “Graveyard” Base (2 minutes): Place your large cutting board or platter on your work surface. Start by arranging the crackers in a loose, organic pattern. Leave some space between them. Think of them as the “headstones” in your graveyard. Don’t line them up perfectly—a slightly chaotic arrangement looks more authentic.
- Add the “Fence” (2 minutes): Take your pretzel sticks and place them around the edge of the board, sticking out at different angles. These are your “fence posts” or “witch’s broomsticks.” You can also lean a few against the crackers to create a sense of depth.
- Scatter the “Spooky” Proteins (3 minutes): Place the cheddar and mozzarella cubes in small clusters around the board. Tuck the folded salami slices between the cheese and crackers. Now, take your black olives and arrange them in a few spots. If you want to make “spiders,” use a tiny dab of cream cheese (or a bit of hummus) to stick two candy eyes onto each olive. Place these “spiders” on top of the cheese or crackers.
- Add the “Creepy” Produce (2 minutes): Scatter the red grapes (your “eyeballs”) in small groups. Arrange the baby carrots to look like “witch’s fingers” pointing in different directions. Place the halved strawberries (your “bloody drips”) near the edges of the board. The red and green colors will pop beautifully against the cheese and crackers.
- Create the “Graveyard Dirt” Dip (1 minute): Fill your small bowl with ranch dressing or hummus. Sprinkle crushed chocolate cookies on top until the dip is completely covered. Place this bowl in the center or a corner of the board. This is your “grave dirt.”
- Final Garnish (1 minute): Sprinkle the candy eyes all over the board. Tuck a few gummy worms into the “dirt” dip, letting them “crawl” out over the edge. Take a step back and look at your creation. If any area looks bare, add a few more crackers or grapes. The goal is to make it look abundant and slightly chaotic.
Pro Tip: If you’re making this board ahead of time (up to 2 hours), cover it loosely with plastic wrap and store it in the refrigerator. Add the gummy worms and candy eyes just before serving to keep them from getting soft. The crackers might get a little stale if left uncovered, so keep the board wrapped until you’re ready to serve.
Cooking Tips & Techniques for a Perfect Spooky Board
I’ve learned a few things the hard way, so you don’t have to. Here are my top tips for making this board look like a million bucks.
The “Rule of Threes” for Visual Appeal: When arranging the ingredients, group them in odd numbers. Three cubes of cheese here, five grapes there. It sounds silly, but our eyes find odd-numbered groupings more visually appealing. It makes the board look curated, not just dumped.
Don’t Overcrowd the Board: I made this mistake the first time. I crammed everything on, and it looked like a mess. Leave a little bit of space between the clusters of food. This allows the “graveyard” theme to breathe and makes it easier for guests to grab what they want. A little bit of empty board showing is actually a good thing—it’s like the “grass” in your graveyard.
Use Contrasting Colors and Textures: This is the secret to a beautiful board. Pair the sharp, orange cheddar with the soft, white mozzarella. Put the crunchy pretzels next to the juicy grapes. The visual and textural variety is what makes it so satisfying to eat.
The “Dip in the Middle” Trick: Placing your “graveyard dirt” dip in the center of the board anchors the whole design. It gives the eye a place to rest and creates a natural focal point. If your board is very long, you can use two small bowls of dip placed at opposite ends.
My Biggest Failure: The first time I made this, I forgot to cut the cheese into shapes. I just put a whole block of cheddar on the board. It looked… like a block of cheese. It tasted fine, but it didn’t have the “spooky” factor. Now, I always take the extra 30 seconds to cut the cheese into cubes or use a cookie cutter. It makes a huge difference.
Timing is Everything: This board is designed to be assembled in 15 minutes, but the actual prep time for the ingredients (washing, slicing, cutting shapes) is about 5 minutes. I like to do all the prep work first, then arrange everything at once. It’s faster and less messy.
Variations & Adaptations
This board is endlessly adaptable. Here are a few of my favorite variations, depending on who you’re serving and what you have on hand.
Kid-Friendly “Monster Mash” Board: Swap the salami for turkey or ham slices. Use mild cheddar and mozzarella. Add a bowl of ketchup or BBQ sauce for dipping. Replace the gummy worms with gummy spiders or fruit snacks. The kids will love the “monster” theme, and it’s still healthy enough for a school party.
Adult “Witch’s Brew” Board: For a grown-up Halloween party, upgrade the ingredients. Use prosciutto instead of salami, and add a wedge of brie or a slice of aged gouda. Replace the ranch dip with a balsamic glaze or a spicy honey. Add a few dried figs or dates for a sophisticated touch. Serve it with a glass of red wine, and you have a stunning appetizer for a Halloween cocktail party.
Gluten-Free “Ghostly Graveyard” Board: This is easy. Use gluten-free crackers and pretzels. Make sure your salami and cheese are certified gluten-free. For the “dirt” dip, use gluten-free chocolate cookies or crushed nuts. The rest of the ingredients (grapes, carrots, olives, strawberries) are naturally gluten-free. This version is just as delicious and safe for everyone.
Dairy-Free “Vampire’s Delight” Board: Swap the cheese for your favorite dairy-free alternatives. There are some great plant-based cheddar and mozzarella shreds on the market now. Use a dairy-free ranch or hummus for the dip. The visual effect is the same, and the flavor is still fantastic. I’ve made this for a friend with a dairy allergy, and she loved it.
My Personal Favorite: The “Zombie Apocalypse” Board: I made this variation for a Halloween movie night. I added a few “zombie fingers” by cutting a slit in the tip of each baby carrot and inserting an almond sliver for a “fingernail.” I also used a small round cookie cutter to make “bullet hole” shapes in the salami slices. It was a hit, and it took less than 5 extra minutes.
Serving & Storage Suggestions
This board is best served at room temperature, which is one of the reasons it’s so easy. The cheese and salami are more flavorful when they’re not ice-cold. I recommend taking the board out of the refrigerator about 15 minutes before you plan to serve it.
What to Serve With It: This board is a meal in itself, but you can pair it with a few simple sides. A bowl of popcorn “ghost poop” is a fun and easy addition. You can also serve it with a bowl of warm, spiced apple cider or a pitcher of “witches’ brew” punch. For a heartier meal, add a side of roasted pumpkin soup or a simple green salad.
Storage Instructions: If you have leftovers (which is rare in my house), you can store the components separately. Place the cheese and salami in an airtight container in the refrigerator for up to 3 days. The grapes and strawberries will last for 2 days. The crackers and pretzels should be stored in a sealed bag at room temperature. Do not store the assembled board—the crackers will get soggy, and the dip will dry out.
Reheating Tips: You don’t need to reheat anything on this board. If you want to serve the salami warm, you can quickly pan-fry the slices for 30 seconds per side before adding them to the board. This gives them a slightly crispy edge and a deeper flavor.
How Flavors Develop: If you have time, you can prep the cheese and salami a day in advance. The flavors will meld together in the refrigerator, and the board will taste even better the next day. Just don’t add the crackers or the garnish until you’re ready to serve.
Nutritional Information & Benefits
While this board is a fun treat, it also offers some surprising nutritional benefits. Here’s a quick breakdown per serving (about 1/6 of the board, without the dip):
- Calories: Approximately 350-400
- Protein: 15-20 grams (from cheese and salami)
- Fat: 20-25 grams (mostly from cheese and salami)
- Carbohydrates: 25-30 grams (from crackers, pretzels, and fruit)
- Fiber: 3-5 grams (from grapes, carrots, and whole-grain crackers)
Health Benefits of Key Ingredients: The cheese provides a good source of calcium and protein. The grapes and strawberries are packed with antioxidants and vitamin C. The olives offer healthy monounsaturated fats. Even the pretzels provide a quick source of energy. It’s not a “health food,” but it’s a balanced snack that’s far better than a bag of candy.
Dietary Considerations: This recipe can easily be adapted to be gluten-free, dairy-free, or nut-free. The main allergens are dairy (cheese) and gluten (crackers, pretzels). Always check the labels on your ingredients if you’re serving someone with allergies.
My Personal Wellness Perspective: I love that this board allows for a “treat” that still includes real, whole foods. The fruit and vegetables balance out the cheese and crackers, making it a snack that feels indulgent but is actually pretty balanced. It’s a great option for a Halloween party where you want to have fun without completely abandoning your healthy eating habits.
Conclusion
This Quick Spooky Halloween Charcuterie Board in 15 Minutes is more than just a snack—it’s a memory maker. It’s the board that saves you from a last-minute panic, the one that gets the kids excited, and the one that makes you look like a culinary genius even when you’re just winging it. I love that it’s a blank canvas for your creativity. You can make it as simple or as elaborate as you want, and it will always turn out great.
I encourage you to make this board your own. Swap in your family’s favorite snacks, use whatever cookie cutters you have, and don’t be afraid to get a little messy. The best boards are the ones that are made with love (and a little bit of chaos).
I’d love to see your creations! Share a photo of your Spooky Board in the comments below, or tag me on Pinterest. Tell me what variations you tried—I’m always looking for new ideas. Happy Halloween, and happy snacking!
Frequently Asked Questions
Can I make this board ahead of time? Yes, you can prep all the ingredients up to 2 hours in advance. Store the cheese and salami in the refrigerator, and keep the crackers and pretzels in a sealed bag. Assemble the board just before serving for the best texture.
What if I don’t have a cookie cutter for the cheese? No problem! Just cut the cheese into small cubes or use a knife to carve simple shapes like triangles or squares. The spooky theme is more about the arrangement than perfect shapes.
Can I use a different dip for the “graveyard dirt”? Absolutely. Hummus, guacamole, or a spinach artichoke dip all work great. Just make sure to top it with crushed dark cookies or nuts to create the “dirt” effect.
How do I keep the crackers from getting soggy? Don’t add the crackers to the board until you’re ready to serve. If you’re prepping ahead, keep them in a separate bag and add them at the last minute.
What can I use instead of candy eyes? You can use small dots of cream cheese or hummus to create “eyes.” Alternatively, you can use small pieces of black olive or capers for a savory version.
Pin This Recipe!
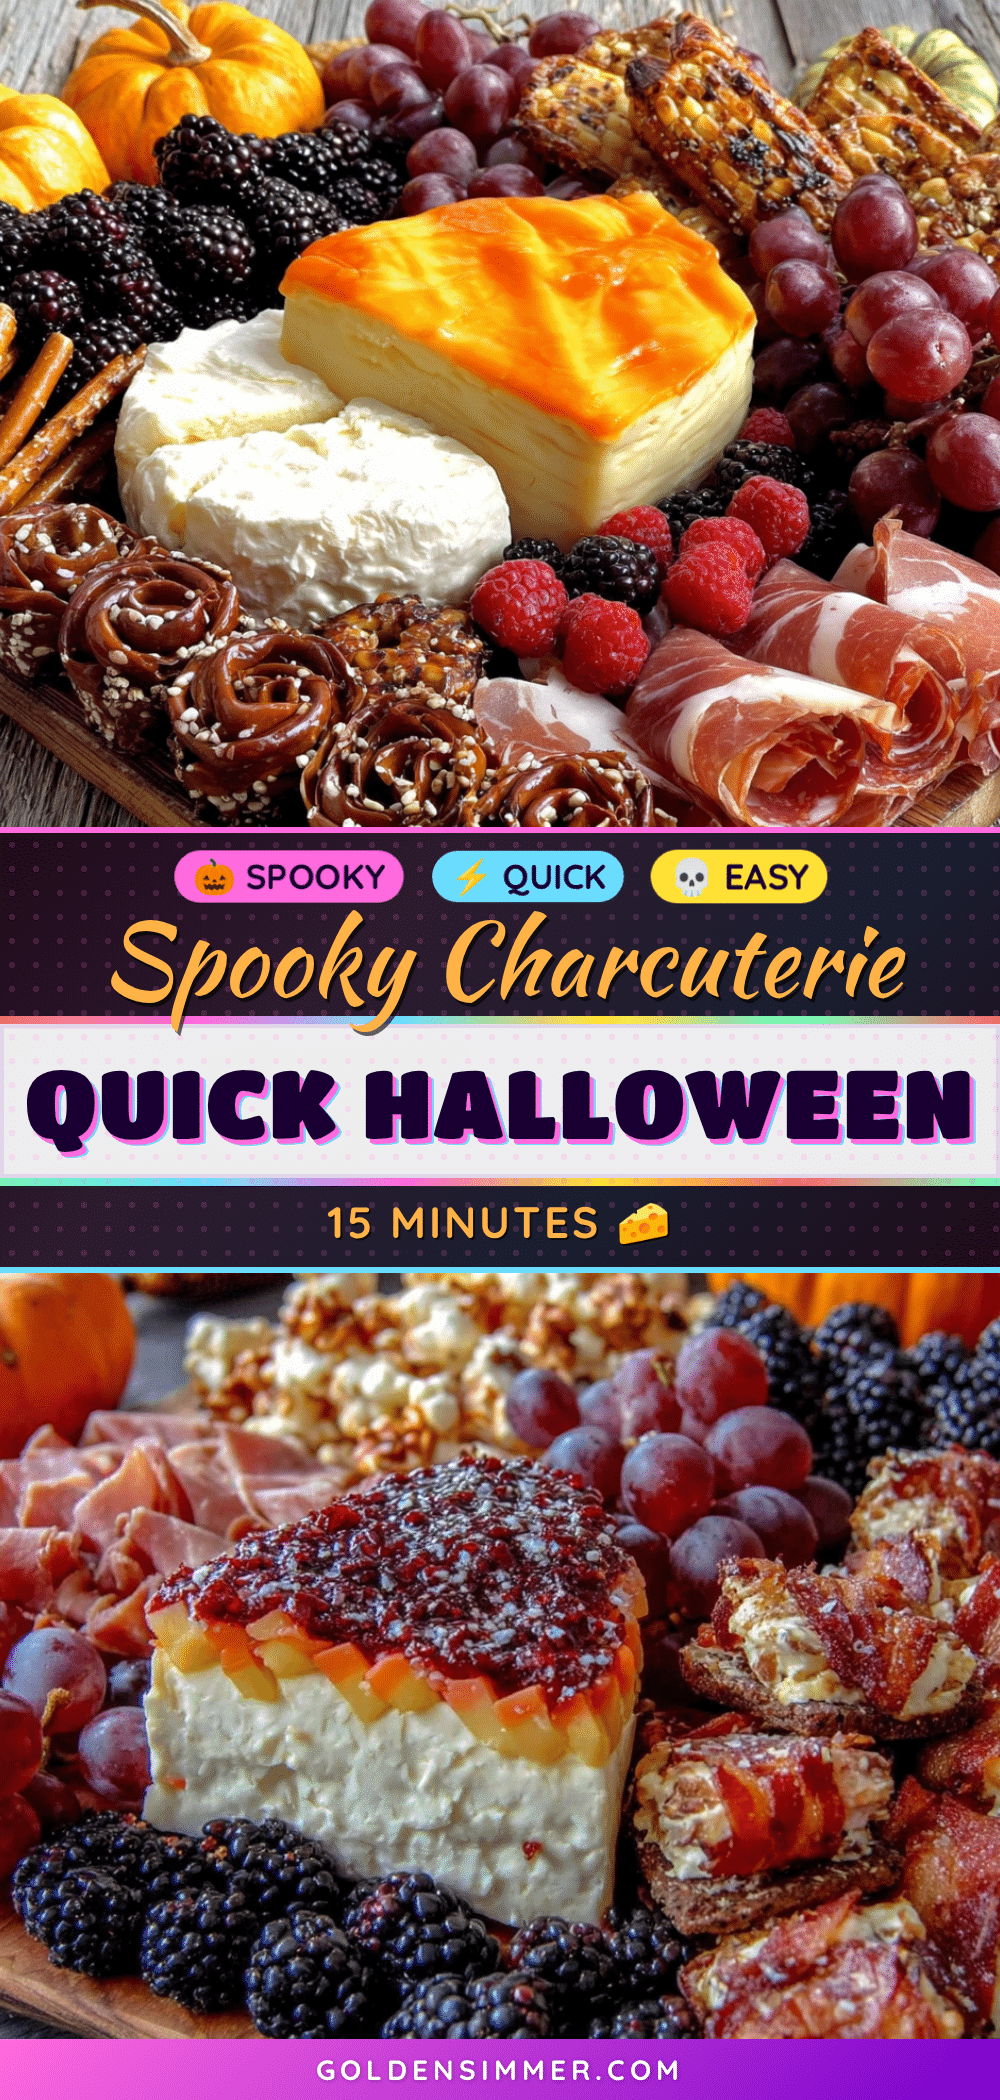
Quick Spooky Halloween Charcuterie Board in 15 Minutes
A last-minute Halloween hero that transforms simple pantry ingredients into a spooky, crowd-pleasing charcuterie board in under 15 minutes. Perfect for classroom parties, family movie nights, or any Halloween gathering.
- Prep Time: 15 minutes
- Cook Time: 0 minutes
- Total Time: 15 minutes
- Yield: 6 servings 1x
- Category: Appetizer
- Cuisine: American
Ingredients
- Assorted crackers (about 1 cup)
- Pretzel sticks (about 1 cup)
- Breadsticks (about 4-5)
- Block of cheddar cheese (about 8 oz)
- Block of mozzarella cheese (about 8 oz)
- Salami or pepperoni (about 4 oz)
- Black olives (about 1/2 cup)
- Red grapes (about 1 cup)
- Baby carrots (about 1/2 cup)
- Strawberries (about 1 cup)
- Candy eyes (about 1/4 cup)
- Optional: Gummy worms or spiders
- 1/2 cup ranch dressing or hummus
- Crushed dark chocolate cookies or chocolate graham crackers (for dip topping)
Instructions
- Prep your ingredients: Wash and dry grapes, strawberries, and baby carrots. Cut cheddar and mozzarella into 1/2-inch cubes. Use a small cookie cutter to make shapes from cheddar if desired. Slice salami into thin rounds, fold each in half and then in half again to create small triangles. Set everything aside in small bowls.
- Create the graveyard base: Place a large cutting board or platter on your work surface. Arrange crackers in a loose, organic pattern, leaving space between them to resemble headstones.
- Add the fence: Place pretzel sticks around the edge of the board, sticking out at different angles to resemble fence posts or witch’s broomsticks. Lean a few against crackers for depth.
- Scatter the spooky proteins: Place cheddar and mozzarella cubes in small clusters around the board. Tuck folded salami slices between cheese and crackers. Arrange black olives in a few spots. To make spiders, use a tiny dab of cream cheese or hummus to stick two candy eyes onto each olive, then place on top of cheese or crackers.
- Add the creepy produce: Scatter red grapes (eyeballs) in small groups. Arrange baby carrots to look like witch’s fingers pointing in different directions. Place halved strawberries (bloody drips) near the edges of the board.
- Create the graveyard dirt dip: Fill a small bowl with ranch dressing or hummus. Sprinkle crushed chocolate cookies on top until completely covered. Place the bowl in the center or a corner of the board.
- Final garnish: Sprinkle candy eyes all over the board. Tuck a few gummy worms into the dirt dip, letting them crawl out over the edge. Adjust any bare areas with additional crackers or grapes.
- Serve at room temperature. If making ahead, cover loosely with plastic wrap and refrigerate for up to 2 hours. Add gummy worms and candy eyes just before serving.
Notes
For best results, take the board out of the refrigerator about 15 minutes before serving. If making ahead, store cheese and salami in the refrigerator and keep crackers and pretzels in a sealed bag. Assemble just before serving to prevent soggy crackers. The ‘Rule of Threes’ for visual appeal: group ingredients in odd numbers. Don’t overcrowd the board; leave some space between clusters.
Nutrition
- Serving Size: 1/6 of board (withou
- Calories: 375
- Sugar: 12
- Sodium: 800
- Fat: 22.5
- Saturated Fat: 12
- Carbohydrates: 27.5
- Fiber: 4
- Protein: 17.5
Keywords: Halloween charcuterie board, spooky snack board, last-minute Halloween appetizer, graveyard board, kid-friendly Halloween snack