Love this? Save it for later!
Share the inspiration with your friends
My sister swore she hated Halloween baking. For years. Every October, she’d watch me roll dough and pipe frosting with this look—part pity, part confusion. “Too messy,” she’d say. “Too much effort for something that gets eaten in two seconds.” I’d just shrug and keep going. Then last year, I made these witch finger sugar cookies on a Tuesday afternoon, purely for myself, no pressure. I turned around from the sink and caught her—mid-sneak, one of the almond-nailed fingers halfway to her mouth, eyes wide like a kid caught stealing candy. She froze. I laughed. She finished the cookie, then quietly asked for the recipe. Honestly, that moment was better than any compliment. It’s funny how the right recipe can crack even the most stubborn resolve. Maybe you’ve been there—watching someone insist they don’t care about something, only to catch them proving themselves wrong. These cookies have that effect. They’re creepy enough to impress at a party, but simple enough that you won’t curse yourself halfway through. And let me tell you, when you see those little almond nails staring up from the baking sheet, you’ll understand why this is the one Halloween tradition I refuse to skip.
Why You’ll Love This Recipe
Let’s be real—Halloween is already chaotic. Between costumes, candy, and last-minute decorations, the last thing you need is a complicated baking project. These witch finger cookies are designed for actual humans with limited time and patience.
- Quick & Easy : From start to finish, these come together in under an hour. No chilling required unless you want to, which means you can bake them between trick-or-treaters ringing the doorbell.
- Simple Ingredients : You probably have everything in your pantry right now. Butter, sugar, flour, eggs, vanilla, and almonds. That’s it. No specialty stores, no expensive extracts.
- Perfect for Halloween Parties : These are the kind of cookies that make people stop and stare. They’re creepy, they’re fun, and they’re guaranteed conversation starters at any gathering.
- Crowd-Pleaser : I’ve brought these to school parties, office potlucks, and family gatherings. Kids love the gross factor. Adults love the buttery, melt-in-your-mouth texture. Everyone wins.
- Unbelievably Delicious : Here’s the thing—they’re not just a gimmick. These are genuinely good sugar cookies. Soft, slightly crisp edges, with that perfect almond flavor that lingers. You’ll eat more than you want to admit.
What makes these different from every other witch finger recipe out there? It’s the texture. I’ve tested versions that were too crumbly, too hard, or just plain bland. This one strikes that perfect balance—firm enough to hold their shape, tender enough to be satisfying. Plus, the almond nail trick is pure genius. It looks disturbingly real without requiring any artistic skill.
These cookies are the kind that make you feel like a Halloween hero without the stress. You’ll walk into that party carrying a platter of severed fingers, and everyone will assume you spent hours perfecting them. Let them wonder.
What Ingredients You Will Need
This recipe keeps things simple. No weird extracts, no hard-to-find decorations. Just honest ingredients that work together to create something genuinely spooky and delicious.
For the Cookie Dough
- 1 cup (2 sticks) unsalted butter, softened (I prefer Land O’Lakes for consistent results—it’s never too greasy)
- 1 cup granulated sugar (adds the right sweetness without overpowering)
- 1 large egg, room temperature (cold eggs can make the dough stiff and harder to shape)
- 1 teaspoon vanilla extract (use pure, not imitation—trust me, it matters here)
- ½ teaspoon almond extract (this is the secret to that bakery-style flavor; don’t skip it)
- 2 ½ cups all-purpose flour (spoon and level it—packed flour makes tough cookies)
- 1 teaspoon baking powder (helps them puff just slightly without losing their shape)
- ½ teaspoon salt (balances the sweetness and enhances the almond flavor)
For Decoration
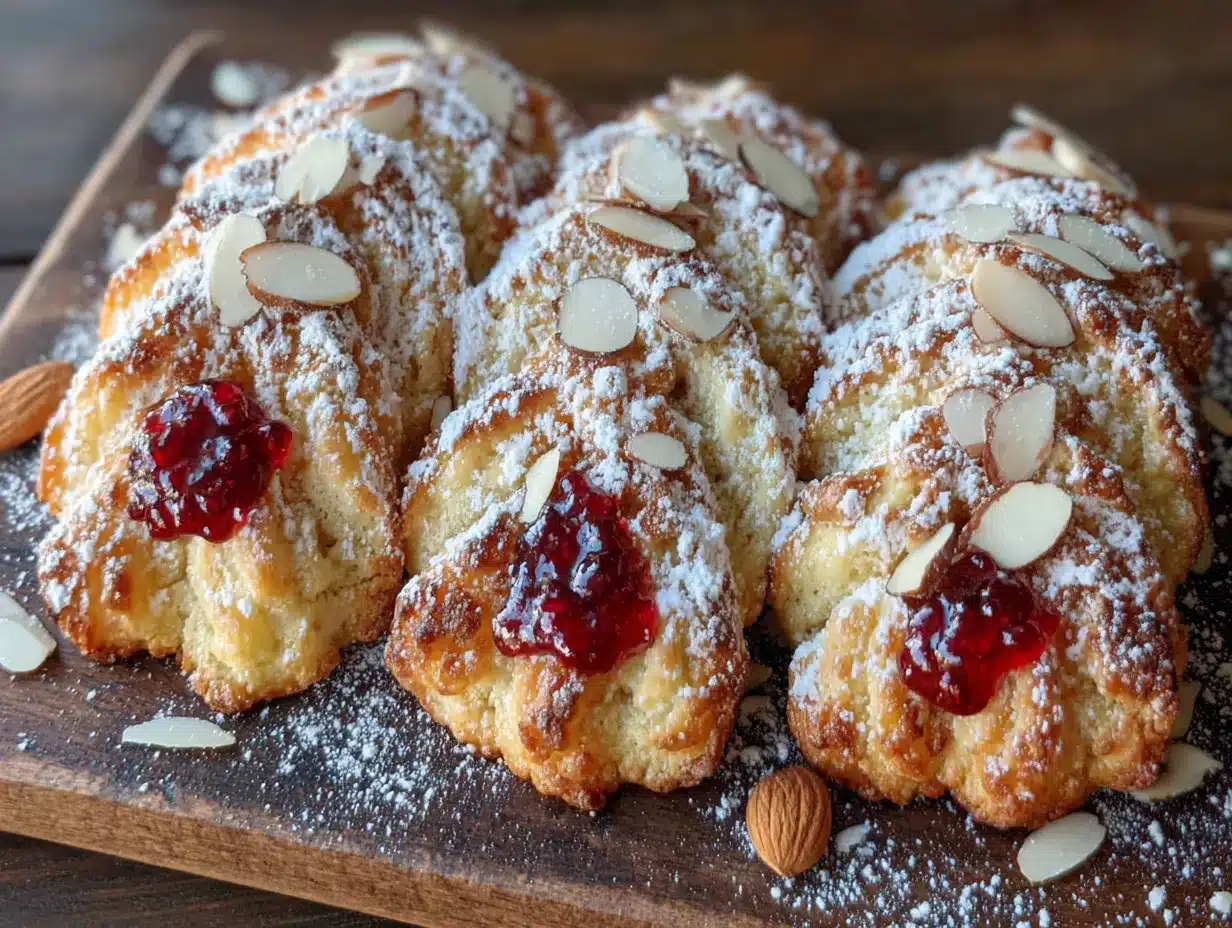
- About 30 whole blanched almonds (these become the fingernails; look for ones that are uniform in size if possible)
- Red food coloring (gel works best—you want that deep, bloody red, not pink)
- Optional: green or purple food coloring for tinting the dough (I usually skip this, but it’s fun for extra creepy factor)
Ingredient Tips from Experience
Let me save you some trial and error. First, don’t use margarine. I tried it once when I ran out of butter, and the cookies spread into flat, sad blobs. Butter is non-negotiable here. Second, if you’re dairy-free, you can substitute with a high-quality vegan butter stick—just make sure it’s the kind meant for baking, not the spreadable tub version.
For the almonds, I’ve used both blanched and unblanched. Blanched gives you that smooth, pale nail look that’s genuinely unsettling. Unblanched works too, but the brown skins make them look less realistic. Your call, depending on how gross you want them to be.
One more thing—if you’re making these with kids, consider using sliced almonds instead of whole ones. They’re easier to press in and less likely to break. Plus, they look like tiny little claws, which is somehow even cuter.
Equipment Needed
You don’t need much for this recipe, which is part of the beauty. Here’s what you’ll want on hand:
- Electric mixer (hand or stand—both work fine; I use my KitchenAid because it makes creaming butter and sugar effortless)
- Large mixing bowl (one is enough, no need to dirty multiple bowls)
- Baking sheets (two standard ones, lined with parchment paper or silicone mats)
- Parchment paper or silicone baking mats (non-stick is crucial—these cookies have a delicate shape)
- Small knife or offset spatula (for creating the knuckle indentations)
- Pastry brush or small paintbrush (for applying red food coloring at the nail bed)
- Cooling rack (optional but helpful for even cooling)
If you don’t have a pastry brush, a clean, unused makeup brush works surprisingly well. I discovered this hack when I couldn’t find my brush one year, and honestly, it might be better. Just make sure it’s one you’re willing to dedicate to baking.
Pro tip: Use light-colored baking sheets if you have them. Dark sheets absorb more heat and can cause the bottoms to brown too quickly. I learned this the hard way when my first batch came out with crispy bottoms and raw centers.
Preparation Method
Alright, let’s get our hands dirty. This is where the magic happens.
- Preheat your oven to 350°F (175°C). Line two baking sheets with parchment paper or silicone mats. Do not skip this—greased sheets will cause your fingers to spread into unrecognizable blobs.
- Cream the butter and sugar. In a large bowl, beat the softened butter and granulated sugar together until light and fluffy, about 3-4 minutes. You want it pale in color and airy. Scrape down the sides halfway through. This step is crucial—proper creaming gives you that tender, melt-in-your-mouth texture.
- Add the wet ingredients. Beat in the egg, vanilla extract, and almond extract until fully combined. The mixture might look slightly curdled at this point—don’t panic, that’s normal. It will come together once you add the flour.
- Mix the dry ingredients. In a separate bowl, whisk together the flour, baking powder, and salt. Gradually add this to the wet mixture, mixing on low speed until just combined. Stop as soon as you don’t see any more streaks of flour. Overmixing will make your cookies tough.
- Shape the fingers. Scoop about 1 tablespoon of dough and roll it into a log shape about 3 inches long. Place it on the prepared baking sheet. Gently taper one end to create the fingertip shape, and make the other end slightly wider to resemble the base of a finger. Repeat with remaining dough, spacing them about 2 inches apart.
- Create the knuckles. Using the back of a small knife or your fingernail, gently press 2-3 indentations along each finger to create knuckle lines. Don’t press too deep—you want them visible but not cutting through the cookie.
- Add the fingernails. Press one blanched almond firmly into the tapered end of each finger. Make sure it’s angled slightly upward, like a real nail. Push it in just enough so it stays put during baking.
- Bake. Place the sheets in the preheated oven and bake for 10-12 minutes, or until the edges are just barely golden. The centers should still look slightly soft. They will continue to set as they cool.
- Cool completely. Let the cookies rest on the baking sheet for 5 minutes, then transfer to a cooling rack. Do not attempt to add the blood effect while they’re hot—it will just run everywhere and look like a crime scene (unless that’s what you’re going for).
- Add the blood effect. Once completely cool, use a small brush to apply red food coloring around the base of each almond nail. Let it pool slightly in the crevices. For extra gore, dab a tiny bit on the “cut” end of the finger.
Here’s a mistake I made my first time: I rushed the shaping. My fingers looked more like lumpy potatoes than witch digits. Take your time with step 5. The more realistic the shape, the better the reaction. Also, keep a small bowl of water nearby to slightly dampen your hands if the dough gets sticky—it makes rolling much easier.
Cooking Tips & Techniques
Let me share what I’ve learned through trial and error so you don’t have to repeat my mistakes.
Temperature matters. If your butter is too cold, it won’t cream properly. If it’s too warm, your dough will be greasy and spread. Aim for butter that’s soft enough to leave a slight indent when you press it, but still holds its shape. If you forgot to take it out of the fridge, microwave it in 5-second bursts, rotating each time. I’ve ruined a batch by nuking it for 15 seconds straight—don’t do that.
Chill if you need to. While this recipe doesn’t require chilling, if your kitchen is warm or your dough feels too soft to shape, pop it in the fridge for 15 minutes. It makes rolling much easier. I do this when I’m baking on a humid day, and it saves me from frustration every time.
Watch the oven like a hawk. These cookies go from perfect to overdone in about 60 seconds. I pulled a batch out at 11 minutes last year, thinking they looked underdone, and they were perfect after cooling. The next batch I left for 13 minutes, and they were crispy and dry. Trust the 10-12 minute window and look for that slight golden edge.
Double up for efficiency. Since these cookies are shaped individually, they take longer to prepare than drop cookies. I like to shape all the fingers first, then bake them in batches. While one sheet bakes, I shape the next. This keeps the assembly line moving and prevents the dough from sitting too long.
The almond trick. If your almonds keep falling off during baking, you didn’t press them in firmly enough. Give them a good push—they should be nestled into the dough, not sitting on top. Also, make sure the almond is dry. Any moisture on the almond can create steam pockets that push it off.
Variations & Adaptations
One of the best things about this recipe is how flexible it is. Here are some ways to make it your own:
Dietary Adaptations
Gluten-free version: Substitute the all-purpose flour with a 1:1 gluten-free baking flour. I’ve used Bob’s Red Mill with great success. The texture will be slightly more crumbly, but the flavor is still spot-on. Add an extra tablespoon of butter to compensate for the dryness.
Dairy-free version: Use a high-quality vegan butter stick. I recommend Miyoko’s or Country Crock Plant Butter. Avoid tub margarines—they contain too much water and will cause spreading.
Flavor Twists
Chocolate witch fingers: Replace ¼ cup of flour with unsweetened cocoa powder. The chocolate version looks even more realistic, like dirt-caked fingers. I made these for a zombie-themed party, and they were a hit.
Spiced version: Add 1 teaspoon of cinnamon and ½ teaspoon of nutmeg to the dry ingredients. This gives the cookies a warm, fall flavor that pairs beautifully with the almond extract. Perfect for a cozy Halloween night in.
Decoration Variations
Green skin: Add green food coloring to the dough for a more witchy look. I’ve done this with gel coloring—start with a tiny amount and add more until you reach the desired shade. It’s subtle but effective.
Blood splatter effect: Instead of just painting around the nail, dip the “cut” end of the finger in red gel coloring mixed with a drop of corn syrup. It creates a glossy, gory effect that’s genuinely unsettling. My nephew refused to eat one because it looked “too real.” Mission accomplished.
Serving & Storage Suggestions
These cookies are best served at room temperature, arranged on a platter in a way that maximizes the creep factor. I like to scatter them casually, as if someone just dropped a handful of severed fingers. For extra effect, place them around a bowl of red punch or arrange them reaching out of a shallow dish.
At a party: I once served these on a black platter with fake spider webs draped around the edges. People couldn’t stop staring. They’re conversation starters in the best way possible.
Storage: Keep them in an airtight container at room temperature for up to 5 days. Layer them with parchment paper between each layer to prevent the nails from breaking off. Do not refrigerate—the moisture will soften the cookies and make them lose their shape.
Freezing: You can freeze the unbaked shaped fingers for up to 3 months. Place them on a baking sheet in the freezer until solid, then transfer to a freezer bag. Bake directly from frozen, adding 2-3 minutes to the baking time. This is my favorite make-ahead trick for busy Halloween weeks.
Reheating: If you’re serving them the next day and want that fresh-from-the-oven texture, pop them in a 300°F oven for 3-4 minutes. Let them cool slightly before serving. The nails might get slightly warm, but they’ll hold up fine.
One thing I’ve noticed: these cookies actually taste better on day two. The almond flavor deepens, and the texture becomes even more tender. So don’t stress about baking them the day before.
Nutritional Information & Benefits
Let’s be honest—these are Halloween treats, not health food. But here’s what you’re working with per cookie (based on 30 cookies):
- Calories: ~140
- Fat: 7g
- Carbohydrates: 18g
- Protein: 2g
- Sugar: 8g
On the plus side, the almonds provide a small dose of vitamin E and healthy fats. They’re also a good source of magnesium, which is nice for a treat that’s mostly butter and sugar. The portion size is naturally controlled—one or two of these is usually enough to satisfy a sweet craving.
If you’re watching your sugar intake, you can reduce the granulated sugar to ¾ cup without significantly affecting the texture. I’ve tested this, and the cookies are still sweet enough to feel like a treat.
For anyone with nut allergies, you can substitute the almond extract with additional vanilla extract and use a small piece of candied cherry or a chocolate chip for the nail instead. It won’t look quite as realistic, but it will still be delicious and safe.
Conclusion
These witch finger cookies are proof that Halloween baking doesn’t have to be complicated to be memorable. They’re simple enough for a Tuesday night, impressive enough for a party, and delicious enough that you’ll find yourself making them even when it’s not October.
What I love most about this recipe is how it brings people together. There’s something about shaping dough into creepy little fingers that makes everyone laugh. Kids love getting their hands dirty. Adults love the shock value. And at the end of the day, you have a platter of genuinely good cookies that everyone will remember.
So go ahead—give these a try. Customize them however you like. Make them green, make them bloody, make them chocolate. The recipe is forgiving, and the result is always worth it.
I’d love to hear how yours turn out! Drop a comment below with your favorite variation, or tag me in your Halloween baking photos. Happy haunting, and happy baking!
Frequently Asked Questions
Can I make these cookies ahead of time?
Absolutely. You can prepare the dough up to 2 days in advance and keep it wrapped in the fridge. You can also shape the fingers and freeze them unbaked for up to 3 months. Just bake from frozen, adding a few extra minutes.
Why did my cookies spread too much?
This usually happens if the butter was too soft or the dough wasn’t chilled. Next time, chill the shaped cookies for 15 minutes before baking. Also, make sure you’re measuring your flour correctly—too little flour can cause spreading.
Can I use something other than almonds for the nails?
Yes! Sliced almonds, slivered almonds, or even small pieces of white chocolate work well. For a nut-free option, use a small candy corn or a piece of dried fruit. The look won’t be as realistic, but it will still be fun.
How do I get the red food coloring to look like blood?
Use gel food coloring mixed with a tiny drop of corn syrup for a glossy, realistic effect. Apply it with a small brush around the base of the almond and let it pool slightly. For extra gore, dab a bit on the cut end of the finger.
Can I use this dough for other Halloween shapes?
Definitely. This sugar cookie dough works great for cut-out cookies too. Roll it to ¼-inch thickness and use any Halloween cookie cutters. Just adjust the baking time to 8-10 minutes for smaller shapes. The flavor is versatile enough for any spooky design.
Pin This Recipe!

Best Easy Witch Finger Cookies for Halloween Treats
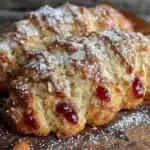
These witch finger cookies are creepy, fun, and surprisingly easy to make. With a buttery sugar cookie base and almond fingernails, they’re the perfect Halloween treat that looks impressive but comes together in under an hour.
- Prep Time: 20 minutes
- Cook Time: 12 minutes
- Total Time: 32 minutes
- Yield: 30 cookies 1x
- Category: Dessert
- Cuisine: American
Ingredients
- 1 cup (2 sticks) unsalted butter, softened
- 1 cup granulated sugar
- 1 large egg, room temperature
- 1 teaspoon vanilla extract
- ½ teaspoon almond extract
- 2 ½ cups all-purpose flour
- 1 teaspoon baking powder
- ½ teaspoon salt
- About 30 whole blanched almonds
- Red food coloring (gel works best)
- Optional: green or purple food coloring for tinting the dough
Instructions
- Preheat your oven to 350°F (175°C). Line two baking sheets with parchment paper or silicone mats.
- Cream the butter and sugar. In a large bowl, beat the softened butter and granulated sugar together until light and fluffy, about 3-4 minutes. Scrape down the sides halfway through.
- Add the wet ingredients. Beat in the egg, vanilla extract, and almond extract until fully combined.
- Mix the dry ingredients. In a separate bowl, whisk together the flour, baking powder, and salt. Gradually add this to the wet mixture, mixing on low speed until just combined.
- Shape the fingers. Scoop about 1 tablespoon of dough and roll it into a log shape about 3 inches long. Place it on the prepared baking sheet. Gently taper one end to create the fingertip shape, and make the other end slightly wider to resemble the base of a finger. Repeat with remaining dough, spacing them about 2 inches apart.
- Create the knuckles. Using the back of a small knife or your fingernail, gently press 2-3 indentations along each finger to create knuckle lines.
- Add the fingernails. Press one blanched almond firmly into the tapered end of each finger, angled slightly upward.
- Bake. Place the sheets in the preheated oven and bake for 10-12 minutes, or until the edges are just barely golden.
- Cool completely. Let the cookies rest on the baking sheet for 5 minutes, then transfer to a cooling rack.
- Add the blood effect. Once completely cool, use a small brush to apply red food coloring around the base of each almond nail. Let it pool slightly in the crevices. For extra gore, dab a tiny bit on the ‘cut’ end of the finger.
Notes
For best results, use room temperature butter and eggs. If dough is too soft, chill for 15 minutes before shaping. Watch the oven closely—cookies go from perfect to overdone quickly. For a glossy blood effect, mix red gel food coloring with a drop of corn syrup. Cookies taste even better on day two.
Nutrition
- Serving Size: 1 cookie
- Calories: 140
- Sugar: 8
- Sodium: 80
- Fat: 7
- Saturated Fat: 4
- Carbohydrates: 18
- Fiber: 1
- Protein: 2
Keywords: witch finger cookies, Halloween cookies, sugar cookies, spooky cookies, easy Halloween treats, almond cookies, creepy cookies