Love this? Save it for later!
Share the inspiration with your friends
Introduction
My neighbor, Mrs. Alvarez, watched me fumbling with a soggy ear of corn one humid Saturday afternoon and didn’t say anything at first. Then she nudged over a small dish of golden, melted butter infused with garlic and a sprinkle of paprika, muttering, “Try it this way.” The way she shared that crispy grilled garlic butter corn on the cob recipe wasn’t like a formal lesson—it was more like a quiet moment of sharing between two folks who love good food and simple pleasures. Honestly, I was skeptical at first because I thought corn just needed a little butter and salt. But the way the garlic butter caramelized on the grill? It changed the whole game.
That cracked ceramic bowl she handed me—the one with a chip on the rim—felt like a little treasure. Maybe you’ve been there: caught between the chaos of a weekend cookout and wanting something easy but impressive. I forgot to bring extra napkins that day (classic me), and the buttery drips made a mess, but that didn’t matter. The sweet, smoky crunch of that corn stuck with me in a way few summer sides ever have. I keep making it because it’s more than just corn; it’s a conversation starter, a little burst of sunshine on a plate, and the kind of recipe that makes you pause and smile in the middle of a busy day.
Why You’ll Love This Recipe
Having tested this crispy grilled garlic butter corn on the cob through countless backyard barbecues and quick weeknight dinners, I can tell you it’s a winner for so many reasons. Here’s why it deserves a spot in your recipe lineup:
- Quick & Easy: Ready in under 20 minutes, perfect for those spontaneous grill sessions or when you need a fast side dish.
- Simple Ingredients: No need for fancy trips to specialty stores—just butter, garlic, fresh corn, and a handful of pantry staples.
- Perfect for Summer Gatherings: Whether it’s a picnic, a potluck, or a cozy dinner on the porch, this corn fits right in.
- Crowd-Pleaser: Kids and adults alike rave about that crispy, garlicky crust and juicy inside.
- Unbelievably Delicious: The balance of smoky grill marks, buttery richness, and garlic punch makes this corn more than just a side dish—it’s a highlight.
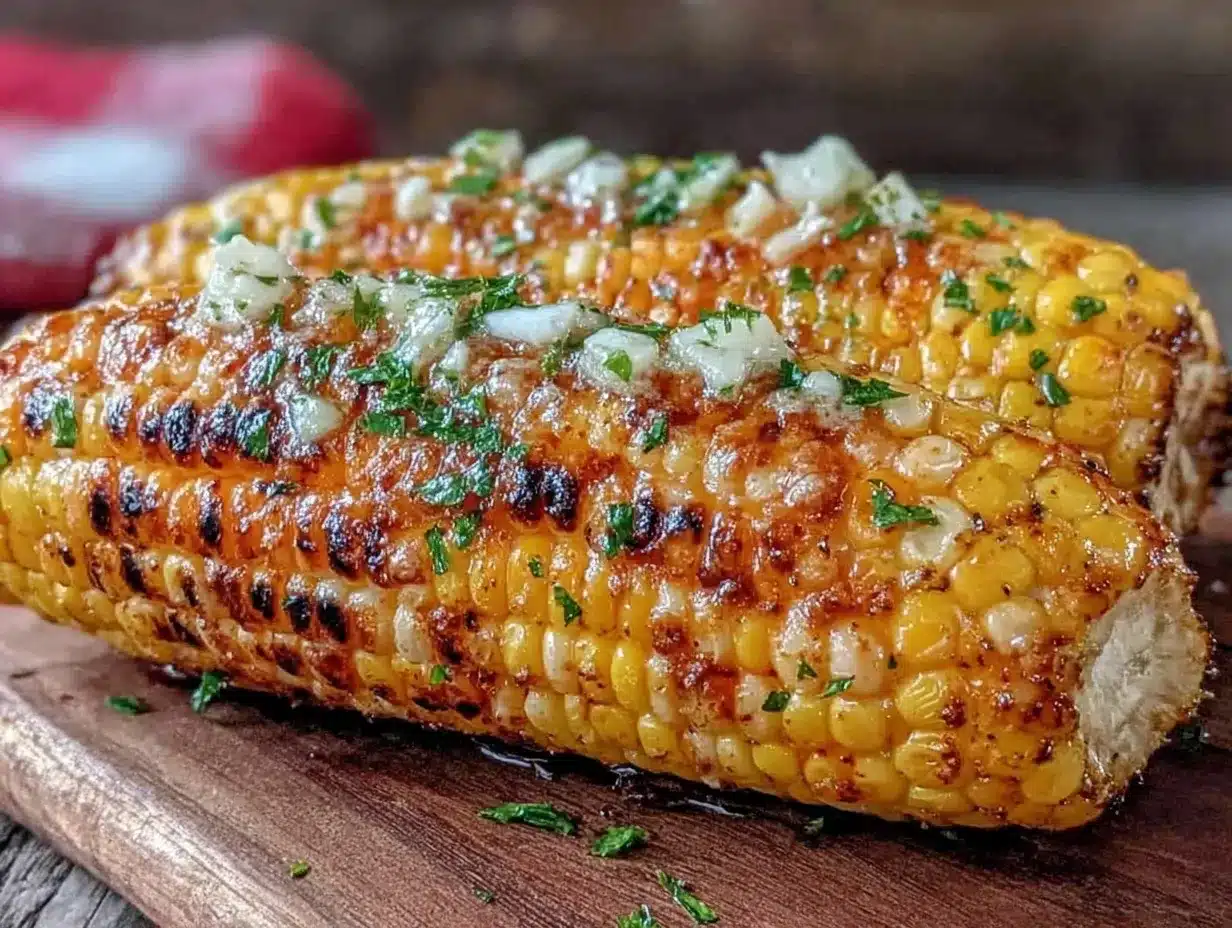
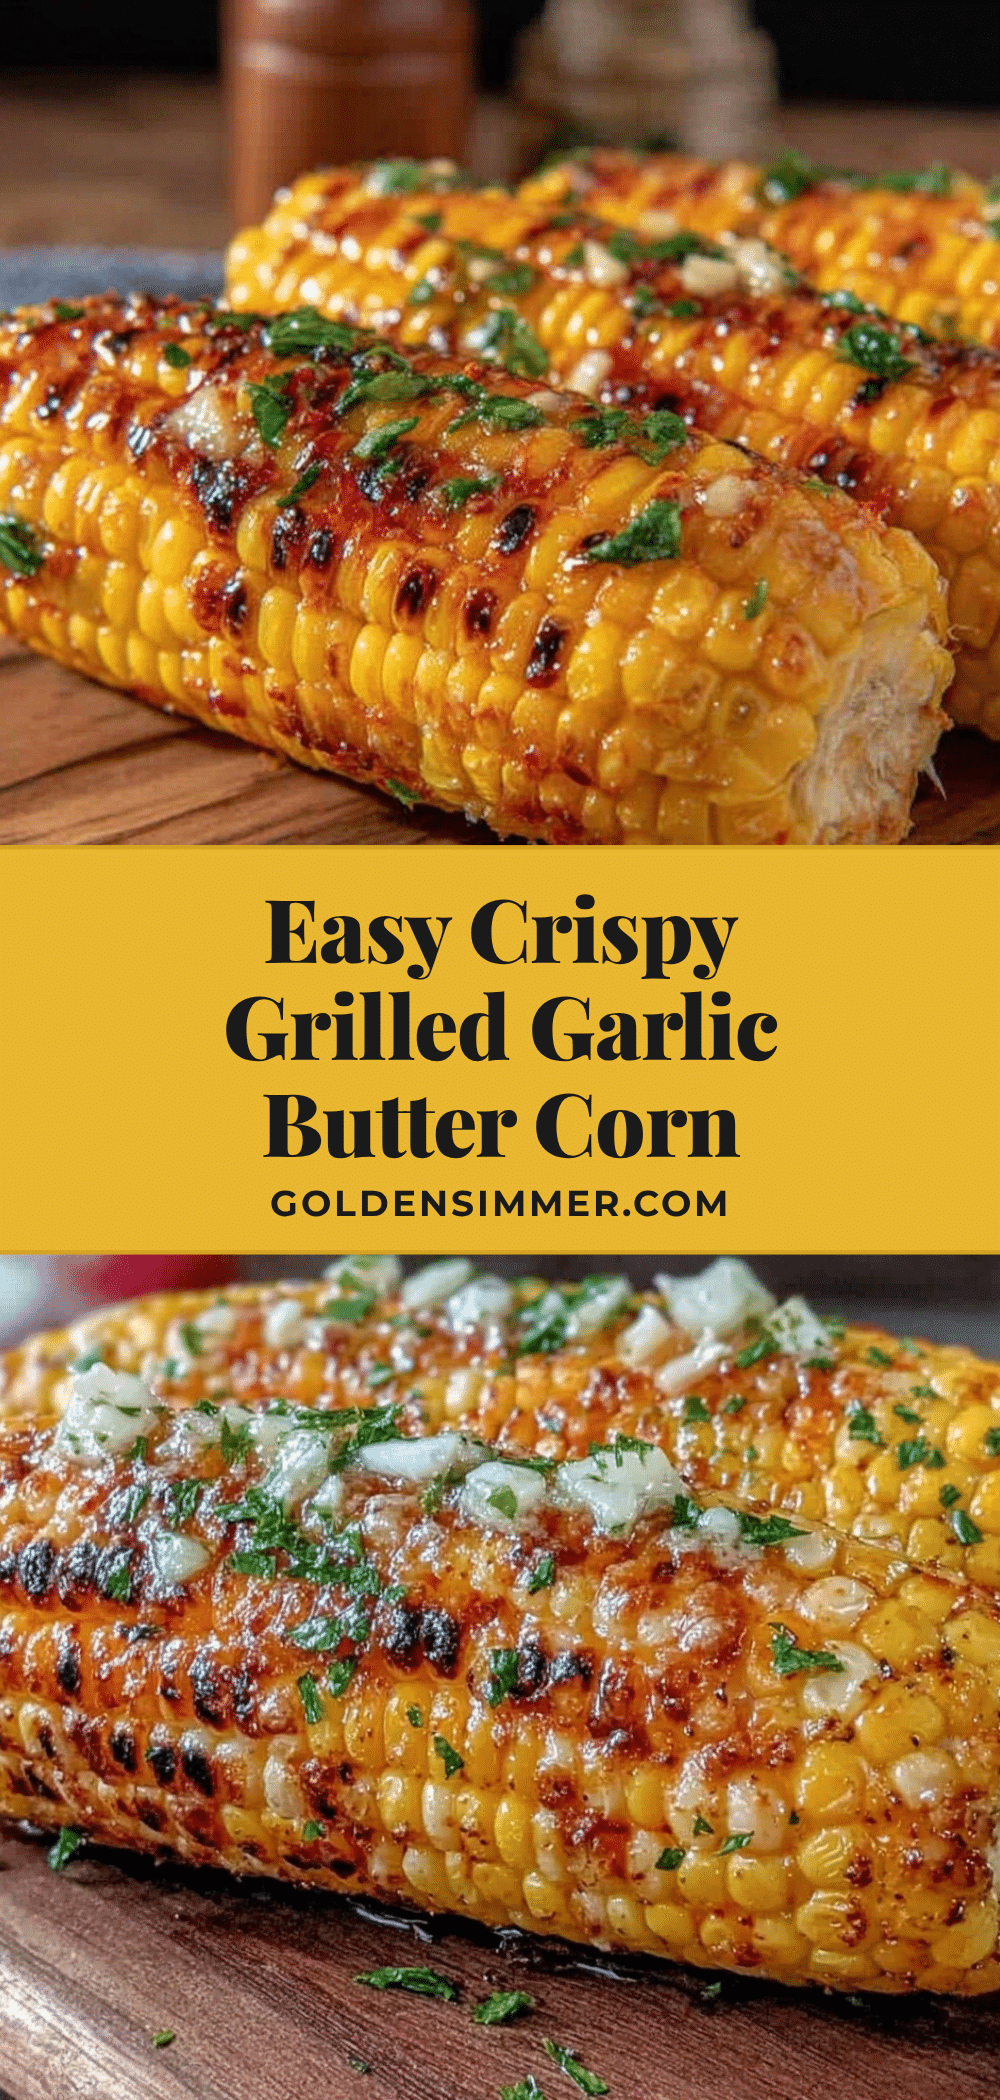
This isn’t just any grilled corn recipe. The secret is in the garlic butter, which gets crispy edges on the grill without burning, thanks to a little patience and the right timing. Plus, I like to add a pinch of smoked paprika for a subtle smoky depth that pairs perfectly with the natural sweetness of the corn. Let me tell you, after the first bite, you’ll understand why this recipe sticks around—it’s that kind of soul-satisfying comfort food that feels fresh and familiar all at once.
What Ingredients You Will Need
This crispy grilled garlic butter corn on the cob recipe uses simple, wholesome ingredients to deliver bold flavor and a satisfying texture without any fuss. Most are pantry staples, and if you’re lucky enough to find fresh corn in season, you’re already halfway there!
- Fresh corn on the cob: about 4 ears, husked (look for plump kernels and fresh green husks if you keep them on for grilling)
- Unsalted butter: 4 tablespoons, softened (I prefer Kerrygold for its rich flavor)
- Garlic cloves: 3 large, finely minced (fresh is best for that punchy garlic flavor)
- Smoked paprika: 1 teaspoon (adds a subtle smoky warmth without overpowering)
- Salt: 1 teaspoon, or to taste (sea salt flakes work great)
- Freshly ground black pepper: ½ teaspoon
- Fresh parsley: 2 tablespoons, chopped (optional, for brightness)
- Olive oil: 1 tablespoon (to help crisp the corn)
Ingredient tips: If you want a dairy-free version, swap the butter for a plant-based margarine or coconut oil. For a little heat, add a pinch of cayenne or chili flakes to the garlic butter mix. In summer, sometimes I swap parsley for fresh basil for a different herbal note.
Equipment Needed
- Grill: charcoal or gas grill works fine; I personally like charcoal for that authentic smoky flavor
- Small mixing bowl: to combine garlic butter
- Brush: silicone or a small spoon for applying the butter mixture evenly
- Tongs: essential for turning the corn safely on the grill
- Aluminum foil: optional, if you prefer to grill corn wrapped to steam it first
If you don’t have a grill, a grill pan on the stove can work, but get ready for a bit more elbow grease. When using a grill, keep your tools handy and well-maintained; a good brush and tongs can make all the difference. Budget tip: a basic grill brush and tongs set from your local store will do just fine without breaking the bank.
Preparation Method
- Prep the corn: Start by removing the husks and silks from each ear of corn. Rinse under cold water to remove any remaining silk strands. Pat dry with a towel. (This should take about 5 minutes.)
- Make the garlic butter: In a small bowl, combine the softened butter, minced garlic, smoked paprika, salt, and pepper. Mix until smooth and well combined. Set aside. (Prep this while the grill heats up.)
- Preheat the grill: Light your grill to medium-high heat, aiming for about 400°F (204°C). If using charcoal, wait until the coals are covered with white ash.
- Oil the corn: Using a brush, lightly coat each ear of corn with olive oil to help crisp the kernels and prevent sticking.
- Grill the corn: Place the corn directly on the grill grates. Cook for 10-12 minutes, turning every 2-3 minutes to get even char marks all around. You should hear a satisfying sizzle and see golden brown spots developing. Watch closely to avoid burning.
- Apply garlic butter: During the last 3 minutes of grilling, brush the garlic butter mixture generously all over the corn. Turn the ears to let the butter melt and crisp on the surface without burning the garlic.
- Finish and garnish: Remove the corn from the grill and, if desired, sprinkle with chopped fresh parsley for a burst of color and freshness.
- Serve hot: Serve immediately for the best crispy texture and flavor.
Pro tip: If you’re worried about burning the garlic, apply half the butter at the start and the rest near the end. Also, don’t rush the turning—consistent heat and patience give you that irresistible crispiness.
Cooking Tips & Techniques
Grilling corn sounds simple, but getting that perfect crispy garlic butter crust takes a little finesse. Here’s what I learned the hard way:
- Don’t skip oiling the corn: It really helps with even charring and stops the kernels from drying out.
- Low and slow beats high and fast: Medium-high heat keeps the corn juicy inside while letting the garlic butter crisp up without burning.
- Turn often: I’ve had burned spots before because I left one side too long. Turning every 2-3 minutes helps all sides get that beautiful golden color.
- Use softened butter: Room temperature butter blends better with garlic and spices, making it easier to brush evenly.
- Watch the garlic: Garlic burns quickly and turns bitter, so apply the butter in stages or keep a close eye when it’s on the grill.
Honestly, one time I got distracted (phone call, classic), and the corn got a bit too dark on one side. But it still tasted amazing—just a little crunchier than usual! Cooking is forgiving like that, and sometimes those “mistakes” add character. Overall, timing and attention make all the difference.
Variations & Adaptations
This crispy grilled garlic butter corn on the cob is pretty versatile, and I like to switch it up depending on mood and occasion:
- Spicy Kick: Add cayenne pepper or chili powder to the garlic butter for a fiery twist.
- Herbaceous Twist: Swap parsley with fresh cilantro or tarragon for a different herbal note.
- Cheesy Upgrade: After grilling, sprinkle with grated Parmesan or crumbled Cotija cheese for a creamy, salty finish.
- Vegan Version: Use vegan butter or coconut oil and skip the cheese toppings.
- Oven Roasting: No grill? Wrap the corn in foil with garlic butter and roast at 425°F (220°C) for 25 minutes, then broil for a few minutes to get crisp edges.
One time, I tried brushing the butter on before grilling and then again after. It gave a layered flavor that was surprisingly good—sort of like double duty for that buttery garlicky punch. Feel free to experiment until you find your perfect combo.
Serving & Storage Suggestions
This corn is best served fresh off the grill when it’s warm, crispy, and buttery. I like to plate it with a sprinkle of fresh herbs and a wedge of lemon on the side for squeezing. It pairs wonderfully with grilled meats, fresh salads, or even a light bean salad for a vegetarian spread.
If you have leftovers (rare, but it happens), wrap the corn in foil and store it in the refrigerator for up to 2 days. To reheat, unwrap and warm under a broiler or on a hot grill for 3-5 minutes, turning occasionally to restore some crispiness.
Flavors actually deepen after resting overnight, so if you want to prep ahead, you can brush on the garlic butter and refrigerate the corn before grilling the next day. Just give it a final brush of butter right before serving.
Nutritional Information & Benefits
Each serving of this crispy grilled garlic butter corn on the cob (one ear) contains approximately:
| Calories | 180-220 |
|---|---|
| Fat | 12g (mostly from butter) |
| Carbohydrates | 20g |
| Protein | 3g |
| Fiber | 2g |
Corn is a good source of fiber and antioxidants, while garlic offers immune-boosting properties. Using unsalted butter lets you control the sodium level, making the dish suitable for most diets. For gluten-free eaters or those watching carbs, this recipe fits right in—just watch the butter quantity if you’re tracking fat intake. I love that it’s a fresh way to enjoy summer’s bounty without compromising on flavor or indulgence.
Conclusion
If you’re looking for a simple yet unforgettable summer side, this crispy grilled garlic butter corn on the cob is just the thing. It brings together the sweetness of corn, the richness of butter, and the punch of garlic in a way that feels both fresh and comforting. Customize it with your favorite herbs or a spicy twist—honestly, the sky’s the limit.
I keep coming back to this recipe because it’s easy, fast, and always earns compliments without much fuss. Plus, it’s perfect for sharing—whether that’s with neighbors like Mrs. Alvarez or your family on a warm evening. Give it a try, and don’t forget to tell me how your version turned out—I’d love to hear your twists or tips!
FAQs about Crispy Grilled Garlic Butter Corn on the Cob
- Can I make this recipe without a grill?
Yes! You can roast the corn in the oven wrapped in foil and finish under the broiler for crispiness or use a grill pan on the stovetop. - How do I prevent the garlic from burning on the grill?
Apply the garlic butter in stages, brushing some at the start and the rest during the last few minutes of grilling to avoid burning. - Is there a dairy-free alternative for the butter?
Absolutely. Use plant-based margarine or coconut oil for a vegan or dairy-free version. - Can I prepare the garlic butter ahead of time?
Yes, make the garlic butter and refrigerate it for up to 2 days. Bring it to room temperature before applying to the corn. - What’s the best way to store leftover grilled corn?
Wrap leftovers in foil or place in an airtight container in the fridge for up to 2 days. Reheat on the grill or under the broiler for best flavor and texture.
For more easy summer sides that pair perfectly with your grilled corn, you might enjoy my crispy garlic chicken or a fresh summer tomato salad. Both bring their own burst of flavor to any backyard meal!
Pin This Recipe!
Crispy Grilled Garlic Butter Corn on the Cob
A quick and easy summer side dish featuring fresh corn grilled to crispy perfection with a flavorful garlic butter and smoked paprika coating.
- Prep Time: 10 minutes
- Cook Time: 12 minutes
- Total Time: 22 minutes
- Yield: 4 servings 1x
- Category: Side Dish
- Cuisine: American
Ingredients
- 4 ears fresh corn on the cob, husked
- 4 tablespoons unsalted butter, softened
- 3 large garlic cloves, finely minced
- 1 teaspoon smoked paprika
- 1 teaspoon salt, or to taste
- ½ teaspoon freshly ground black pepper
- 2 tablespoons fresh parsley, chopped (optional)
- 1 tablespoon olive oil
Instructions
- Remove husks and silks from each ear of corn. Rinse under cold water and pat dry with a towel (about 5 minutes).
- In a small bowl, combine softened butter, minced garlic, smoked paprika, salt, and pepper. Mix until smooth and well combined. Set aside.
- Preheat grill to medium-high heat (about 400°F). If using charcoal, wait until coals are covered with white ash.
- Brush each ear of corn lightly with olive oil to help crisp the kernels and prevent sticking.
- Place corn directly on grill grates. Cook for 10-12 minutes, turning every 2-3 minutes to get even char marks.
- During the last 3 minutes of grilling, brush garlic butter mixture generously over the corn, turning to let butter melt and crisp without burning garlic.
- Remove corn from grill and sprinkle with chopped fresh parsley if desired.
- Serve immediately for best crispy texture and flavor.
Notes
To avoid burning garlic, apply half the garlic butter at the start and the rest near the end of grilling. Turn corn every 2-3 minutes for even charring. Use softened butter for easier application. For a dairy-free version, substitute butter with plant-based margarine or coconut oil. Add cayenne or chili flakes for heat. Leftovers can be stored in foil in the fridge for up to 2 days and reheated on grill or broiler.
Nutrition
- Serving Size: 1 ear of corn
- Calories: 180220
- Sugar: 6
- Sodium: 230
- Fat: 12
- Saturated Fat: 7
- Carbohydrates: 20
- Fiber: 2
- Protein: 3
Keywords: grilled corn, garlic butter corn, summer side dish, easy corn recipe, smoky grilled corn, barbecue side