Love this? Save it for later!
Share the inspiration with your friends
The neighborhood potluck was in six hours and I’d completely forgotten. Not just a little forgotten—the kind of forgotten where you’re scrolling through your phone at 10 AM and realize the group chat has been buzzing for two days about who’s bringing what. Everyone else was bringing elaborate things. Layered dips. Homemade breads. One person was apparently attempting a full-on charcuterie board with edible flowers. I had three apples. A bag of cinnamon I bought for a different recipe that never happened. And honestly? A growing sense of panic that felt a lot like the time I showed up to a meeting dressed for the gym.
I stood in my kitchen staring at those apples like they might magically transform into something impressive. They didn’t. But the oven did its thing, and about an hour later I walked into that potluck with a container of these light & crispy baked apple chips. I was embarrassed to even set them down next to the edible flowers situation. But here’s the thing—and maybe you’ve been there—people went for the chips first. They kept going back. Someone asked for the recipe before I even had a chance to apologize for not bringing a real dish. That’s the kind of recipe this is. It’s the one you make when you have nothing, and somehow it steals the show anyway.
Why You’ll Love This Recipe
Let me tell you why these light & crispy baked apple chips have earned a permanent spot in my snack rotation. I’ve tested this method about a dozen times now, tweaking the thickness, the temperature, the timing. What I landed on is the version that works every single time without making you babysit the oven.
- Quick & Easy: Active prep time is about 10 minutes. The oven does the rest. You can be doing laundry or answering emails while these bake.
- Simple Ingredients: You need apples, cinnamon, and maybe a pinch of salt. That’s it. No weird syrups or specialty flours.
- Perfect for Snackers: Great for kids, adults, anyone trying to eat a little better without feeling deprived.
- Crowd-Pleaser: I’ve brought these to book club, to the office, and to that aforementioned potluck. They disappear every time.
- Unbelievably Delicious: The texture is what gets you. Crispy, shattery, with just enough cinnamon warmth to feel like a treat.
What makes this different from other baked apple chip recipes? Most tell you to slice thin and bake low, but they don’t tell you about the paper towel trick or why you shouldn’t overcrowd the baking sheets. I learned those things the hard way—through batches that came out chewy instead of crispy, or worse, burned on the edges while still soft in the middle. This method fixes all of that.
This recipe is the kind of snack that makes you feel good about eating it. Not because it’s virtuous, but because it actually tastes like something you’d choose on purpose. It’s comfort food reimagined—simpler, cleaner, but with the same satisfying crunch you want from a chip.
What Ingredients You Will Need
This recipe uses simple, wholesome ingredients to deliver that perfect crispy texture and warm cinnamon flavor. You probably have most of these in your kitchen right now.
- Apples, 3 large (Honeycrisp, Fuji, or Gala work best—they hold their shape and have natural sweetness)
- Cinnamon, 1 to 2 teaspoons (I prefer McCormick or Simply Organic for the strongest flavor)
- Salt, a tiny pinch (optional, but it balances the sweetness beautifully)
Ingredient Selection Tips: Look for apples that are firm with no soft spots. The variety matters more than you think. Honeycrisp gives you the best balance of sweet and tart, plus they stay crisp during baking. Fuji apples are sweeter and make for a more candy-like chip. Avoid Red Delicious—they turn mealy and don’t crisp up well.
Substitution Guidance: If you want a sugar-free version, you don’t need to add anything. The apples caramelize naturally. For a different spice profile, try pumpkin pie spice or a mix of nutmeg and cardamom. You can also leave the cinnamon out entirely for plain apple chips—they’re still delicious.
Equipment Needed
You don’t need much for this recipe, which is part of its charm. Here’s what you’ll want to have ready:
- Mandoline slicer or sharp chef’s knife (a mandoline gives you even slices, which is key for even baking)
- Baking sheets, 2 large (rimmed sheets work best to catch any juices)
- Parchment paper (silicone baking mats also work, but parchment is easier to clean)
- Paper towels (for blotting the apple slices)
- Cooling rack (optional, but helps the chips crisp faster after baking)
If you don’t have a mandoline, a sharp knife and a steady hand will work. Just try to keep the slices as even as possible—thicker slices take longer and might not get fully crispy. I’ve used both and honestly, the mandoline is worth the $20 investment if you make these often.
Preparation Method
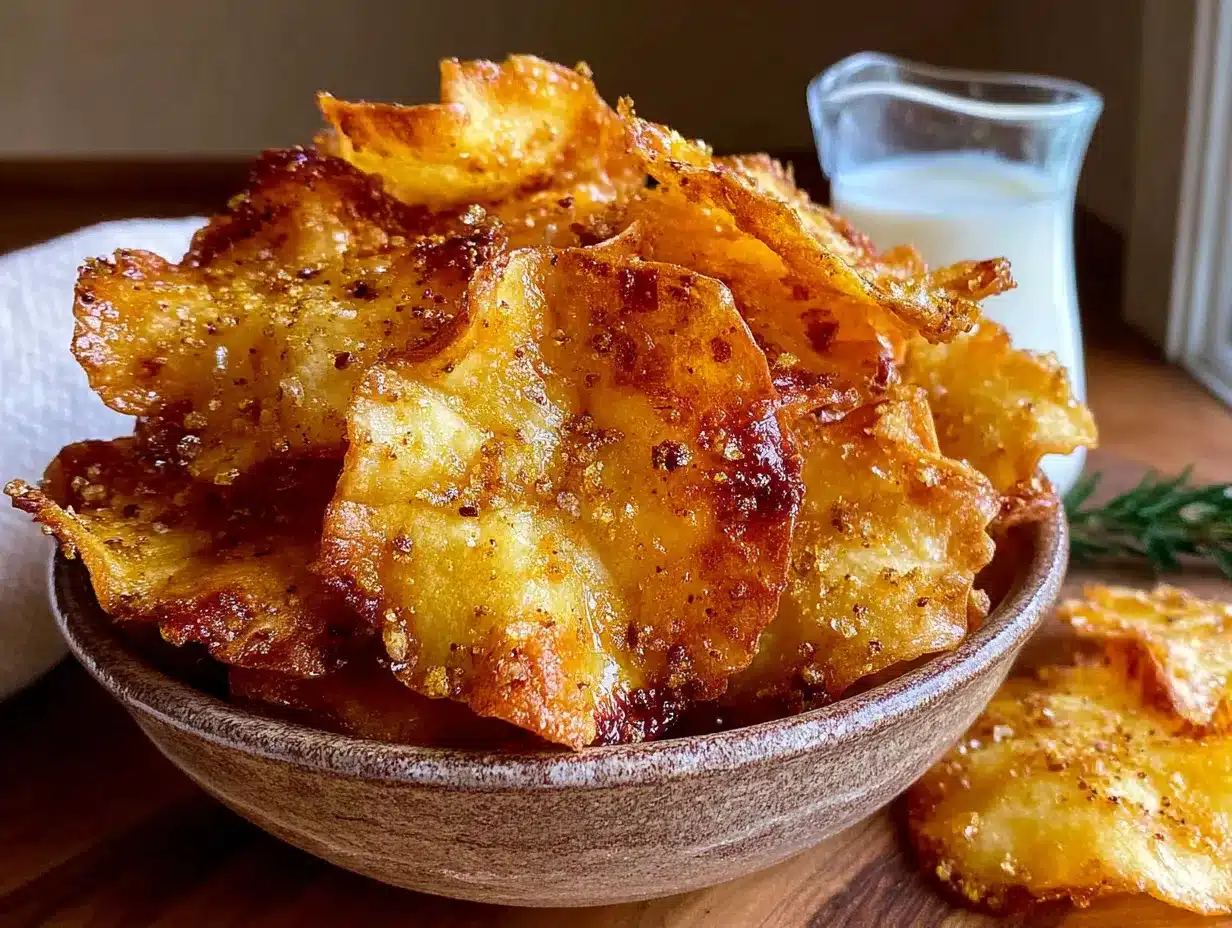
Let’s get to the good part. Follow these steps and you’ll have perfectly crispy apple chips every time.
- Preheat your oven to 225°F (110°C). This low temperature is the secret to drying the apples out without burning them. Line two baking sheets with parchment paper.
- Wash and core your apples. You don’t need to peel them—the skin adds color and fiber. If you have an apple corer, great. Otherwise, cut the apple into quarters and remove the core with a knife.
- Slice the apples as thin as possible. Aim for about 1/8 inch (3 mm) thick. A mandoline makes this step take about 30 seconds. If you’re using a knife, take your time. The thinner the slices, the crispier the chips.
- Blot the slices with paper towels. This is the step most recipes skip, and it makes all the difference. Lay the slices in a single layer on paper towels, then press another paper towel on top. Let them sit for 5 minutes. This removes excess moisture that would otherwise steam the apples instead of drying them.
- Arrange the slices on the baking sheets. Place them in a single layer with a little space between each slice. Overcrowding traps steam and leads to chewy chips. You might need to bake in batches if you’re making a large amount.
- Sprinkle with cinnamon. Use a fine-mesh strainer for even distribution. Flip the slices and sprinkle the other side too. Add a tiny pinch of salt if you’re using it.
- Bake for 60 minutes. Rotate the baking sheets halfway through. The chips should look dry but not browned at this point.
- Flip the slices and bake for another 30 to 45 minutes. They’re done when they feel dry to the touch and curl slightly at the edges. They’ll still be a little pliable when hot but will crisp up as they cool.
- Let them cool completely on the baking sheets. This takes about 15 minutes. Don’t rush this step—the chips finish crisping as they cool. Transfer them to a cooling rack if you want them extra crispy.
Sensory Cues: You’ll know they’re done when the edges start to curl and the apples look like thin, translucent wafers. They should smell like baked apples and cinnamon—warm and almost pie-like. If they smell toasty or burnt, you’ve gone too far.
Personal Tip: I always set a timer for the flip step. It’s easy to get distracted and forget, and 15 minutes of over-baking can turn your chips from golden to charcoal. Trust me, I’ve done it.
Cooking Tips & Techniques
Here’s where I share the things I wish someone had told me before my first few attempts. Consider this your shortcut to perfect apple chips.
The Paper Towel Trick is non-negotiable. I know it seems like an extra step, but skipping it is why your first batch might come out chewy instead of crispy. The moisture on the surface of the apple slices turns to steam in the oven, and steam is the enemy of crispiness. Blot them well and you’re already halfway there.
Even Slicing Matters More Than You Think I learned this the hard way when half my chips were burnt and the other half were still soft. If your slices vary in thickness, they’ll finish at different times. A mandoline is the easiest fix, but if you’re using a knife, take the extra minute to make them uniform.
Don’t Crowd the Pan This was my second mistake. I tried to fit as many slices as possible on one baking sheet, thinking I’d save time. Instead, the chips steamed each other and came out limp. Give them breathing room. It’s worth doing two batches.
Cool Completely Before Storing If you put warm chips in a container, the trapped moisture will soften them overnight. I’ve made this mistake more times than I’d like to admit. Let them sit out for a full 15 to 20 minutes after baking. They should snap when you break one in half.
Variations & Adaptations
This recipe is flexible, and I love playing around with different flavors. Here are a few variations I’ve tried and loved.
Spiced Apple Chips: Skip the cinnamon and use pumpkin pie spice or chai spice blend instead. The cardamom and ginger notes add a cozy warmth that’s perfect for fall.
Savory Apple Chips: Leave out the cinnamon and sprinkle with flaky sea salt and a pinch of black pepper. These are surprisingly good with cheese boards or dipped in hummus.
Honey-Glazed Apple Chips: Before baking, lightly brush the slices with a mixture of honey and water (1 tablespoon honey to 2 tablespoons water). Bake as directed, but check earlier—the sugar can cause faster browning.
Different Apple Varieties: Granny Smith apples make a tarter chip that’s great if you prefer less sweetness. Pink Lady apples are another favorite—they’re naturally sweet and hold their shape beautifully.
Dehydrator Method: If you have a food dehydrator, arrange the slices in a single layer and dry at 135°F (57°C) for 6 to 8 hours. The texture is even crispier than oven-baked, and you can do larger batches.
Serving & Storage Suggestions
These light & crispy baked apple chips are best served at room temperature. They’re perfect straight out of the container as a snack, but they also shine in a few other ways.
Serving Ideas: Pile them on a cheese board alongside sharp cheddar and walnuts. Crumble them over yogurt or oatmeal for added crunch. Dip them in almond butter or melted dark chocolate for a more indulgent treat. I’ve even used them as a topping for ice cream—trust me, it works.
Storage: Keep your apple chips in an airtight container at room temperature. They’ll stay crispy for up to a week. If you live in a humid environment, add a silica gel packet to the container to absorb excess moisture. Don’t store them in the refrigerator—the moisture will make them soft.
Reheating: If your chips lose their crunch after a few days, spread them on a baking sheet and bake at 250°F (120°C) for 5 to 8 minutes. Let them cool completely before returning them to the container. They’ll crisp right back up.
Flavor Development: The cinnamon flavor actually deepens after a day or two. I’ve noticed the chips taste even better on day two than they do fresh out of the oven. Something about the spices settling makes them more aromatic.
Nutritional Information & Benefits
These apple chips are a snack you can feel good about. Here’s the nutritional breakdown for one serving (about one apple’s worth of chips):
| Nutrient | Amount per Serving |
|---|---|
| Calories | 95 |
| Total Fat | 0g |
| Sodium | 1mg |
| Total Carbohydrates | 25g |
| Dietary Fiber | 4g |
| Sugars | 19g (natural) |
| Protein | 0g |
Health Benefits: Apples are packed with fiber and vitamin C. The fiber helps with digestion and keeps you full longer. Cinnamon has anti-inflammatory properties and can help regulate blood sugar. This snack is naturally gluten-free, vegan, and free of added sugars—the sweetness comes entirely from the apples themselves.
Dietary Considerations: This recipe is suitable for gluten-free, dairy-free, vegan, and paleo diets. If you’re on a low-FODMAP diet, stick with Fuji or Granny Smith apples, which are lower in fermentable sugars.
Conclusion
These light & crispy baked apple chips are proof that you don’t need a pantry full of fancy ingredients to make something genuinely good. They’re the recipe I turn to when I want a snack that feels like a treat but doesn’t leave me feeling heavy. They’re also the recipe that saved me from showing up empty-handed to that potluck, and honestly, I’m still a little smug about it.
I hope you give these a try and make them your own. Play with the spices, try different apple varieties, find your favorite way to serve them. And when you do, I’d love to hear about it. Drop a comment below and tell me how they turned out—what apples you used, what you dipped them in, or if you came up with a variation I haven’t tried yet. Your version might just be the one I make next.
Happy snacking, and remember—sometimes the simplest recipes are the ones that surprise you most.
Frequently Asked Questions
Can I use any type of apple for this recipe?
Yes, but the best results come from firm, crisp varieties like Honeycrisp, Fuji, Gala, or Granny Smith. Avoid Red Delicious or McIntosh—they tend to turn mealy and won’t crisp up as well.
Why did my apple chips turn out chewy instead of crispy?
This usually happens for one of three reasons: the slices were too thick, the baking sheet was overcrowded, or you skipped the paper towel blotting step. Try thinner slices, more space between them, and always blot off excess moisture before baking.
Can I make these in an air fryer?
Absolutely. Arrange the slices in a single layer in the air fryer basket and cook at 300°F (150°C) for 12 to 15 minutes, shaking the basket halfway through. Keep an eye on them—air fryers cook faster than ovens.
How do I store leftover apple chips?
Store them in an airtight container at room temperature for up to a week. If they soften, spread them on a baking sheet and reheat at 250°F (120°C) for 5 to 8 minutes, then cool completely before storing again.
Can I add sugar or other sweeteners?
You can, but it’s not necessary. The apples have plenty of natural sweetness. If you want a sweeter chip, lightly brush the slices with a honey-water mixture before baking. Watch them closely—added sugar can cause faster browning.
Pin This Recipe!

Light & Crispy Baked Apple Chips With Cinnamon – Best Easy Snack

These light and crispy baked apple chips are the perfect easy snack, made with just apples, cinnamon, and a pinch of salt. They’re a crowd-pleaser that steals the show at any gathering.
- Prep Time: 10 minutes
- Cook Time: 1 hour 30 minutes
- Total Time: 1 hour 40 minutes
- Yield: 4 servings 1x
- Category: Snack
- Cuisine: American
Ingredients
- 3 large apples (Honeycrisp, Fuji, or Gala)
- 1 to 2 teaspoons cinnamon
- 1 tiny pinch salt (optional)
Instructions
- Preheat your oven to 225°F (110°C). Line two baking sheets with parchment paper.
- Wash and core your apples. Do not peel them.
- Slice the apples as thin as possible, about 1/8 inch (3 mm) thick.
- Blot the slices with paper towels to remove excess moisture. Let them sit for 5 minutes.
- Arrange the slices in a single layer on the baking sheets with space between each slice.
- Sprinkle with cinnamon using a fine-mesh strainer. Flip and sprinkle the other side. Add a tiny pinch of salt if using.
- Bake for 60 minutes, rotating the baking sheets halfway through.
- Flip the slices and bake for another 30 to 45 minutes until dry and curled at the edges.
- Let them cool completely on the baking sheets for about 15 minutes before serving.
Notes
The paper towel trick is non-negotiable for crispiness. Even slicing is key. Don’t crowd the pan. Cool completely before storing. For extra crispiness, use a dehydrator at 135°F (57°C) for 6 to 8 hours.
Nutrition
- Serving Size: 1 apple's worth of c
- Calories: 95
- Sugar: 19
- Sodium: 1
- Carbohydrates: 25
- Fiber: 4
Keywords: baked apple chips, cinnamon apple chips, healthy snack, easy snack, apple chips recipe



