Love this? Save it for later!
Share the inspiration with your friends
My sister had refused to eat anything that looked like a vegetable for breakfast for, oh, about twenty-seven years. Twenty-seven years of scrambled eggs, plain toast, and the occasional sad bowl of cereal. Then last October, I was testing out this Light Jack-O’-Lantern Egg Breakfast Skillet just for myself—a little seasonal fun on a Tuesday morning, nobody around to judge. I heard her padding into the kitchen in her slippers, and before I could even say a word, there she was, peering over my shoulder. “What is that?” she asked, pointing at the bright orange pepper rings and the sunny egg in the middle. I told her it was a vegetable. She ate it. She asked for another. Honestly, I didn’t say a word. I just handed her a fork and let the skillet do the talking.
That’s the thing about this recipe. It doesn’t try to convince you to eat your veggies. It just makes them look so good—so fun, so bright, so undeniably cute—that you forget you’re being healthy. I mean, let’s face it, a jack-o’-lantern face made out of bell pepper, with an egg cooked right in the middle? That’s not health food. That’s art. You know that feeling when something tastes so good it feels almost accidental? That’s this skillet. It’s simple, it’s fast, and somehow, it makes a Tuesday in October feel like a tiny celebration.
I kept making it all through that fall, and every time, I found myself smiling at the pan. The little pepper face, the golden yolk, the way the whole thing comes together in fifteen minutes flat. It’s the kind of recipe that proves you don’t need a lot of time or fancy ingredients to make something memorable. You just need a little imagination and a willingness to let a bell pepper smile back at you. And honestly, isn’t that what fall cooking is all about?
Why You’ll Love This Recipe
Let me tell you, I’ve tested a lot of breakfast skillets in my day. Some were too heavy, some took forever, and some just didn’t deliver on the flavor front. This one? It’s different. Here’s why I keep coming back to it—and why I think you will too.
- Quick & Easy: Comes together in under 15 minutes, perfect for busy weekday mornings or when you want something festive without the fuss.
- Simple Ingredients: No fancy grocery trips needed. You likely already have eggs, bell peppers, and a few spices in your kitchen right now.
- Perfect for Fall Mornings: Great for Halloween breakfasts, cozy weekend brunches, or surprising the kids before school with something fun.
- Crowd-Pleaser: Always gets rave reviews from both kids and adults—even vegetable skeptics (like my sister) ask for seconds.
- Unbelievably Delicious: The texture and flavor combo is next-level comfort food. The sweet, slightly charred pepper, the runny yolk, the hint of smoky paprika—it’s a party in a skillet.
What makes this recipe different from the rest? It’s the technique. Instead of just cracking an egg into a pepper ring, I’ve perfected the timing so the pepper gets tender but not mushy, and the egg stays perfectly runny in the center. Plus, that little jack-o’-lantern face? It’s not just for show. Those carved-out features let the heat circulate evenly, so every bite is cooked to perfection. This isn’t just another egg-in-a-hole recipe—it’s your best version.
This recipe isn’t just good—it is the kind that makes you close your eyes after the first bite. It’s comfort food reimagined: lighter, faster, but with the same soul-soothing satisfaction. Perfect for impressing guests without stress, or turning a simple morning into something memorable.
What Ingredients You Will Need
This recipe uses simple, wholesome ingredients to deliver bold flavor and satisfying texture without the fuss. Most of these are pantry staples, so you probably have everything on hand already.
- Large orange bell peppers (2): Look for wide, squat peppers with flat bottoms—they’ll sit steady in the pan. I prefer organic ones from the farmers’ market when they’re in season. The orange color is key for that jack-o’-lantern look.
- Large eggs (2): Room temperature eggs cook more evenly. I like using pasture-raised eggs for the richer yolk color and flavor.
- Olive oil (1 tablespoon): Use a good quality extra-virgin for the best flavor, or avocado oil if you prefer a neutral taste.
- Smoked paprika (½ teaspoon): This adds that subtle, warm smokiness that makes the whole dish feel cozy. I recommend the Spanish variety from Penzeys or Simply Organic.
- Garlic powder (¼ teaspoon): A tiny pinch goes a long way. Don’t skip it—it adds depth without being overpowering.
- Salt and black pepper (to taste): I use fine sea salt and freshly ground black pepper for the best flavor.
- Fresh chives or parsley (1 tablespoon, chopped): For garnish. This adds a pop of green and a fresh finish.
- Optional: Red pepper flakes (a pinch): If you like a little heat, this is a nice addition. My sister now insists on it.
Substitution guidance: Use any color bell pepper you like—red, yellow, or even green (though green will be a bit more bitter). For a dairy-free option, the recipe is already dairy-free. If you want to add cheese, a sprinkle of shredded cheddar or feta in the last minute of cooking is lovely. For a gluten-free option, this recipe is naturally gluten-free, but serve with a side of gluten-free toast if desired.
Equipment Needed
You don’t need much for this recipe, which is part of the beauty. Here’s what I use:
- A 10-inch non-stick skillet: This is my go-to for eggs. I’ve had my Calphalon non-stick for years, and it’s perfect for this. A well-seasoned cast iron skillet works too, just be careful with the eggs sticking.
- A small sharp paring knife: For carving the jack-o’-lantern faces. A pumpkin carving tool works in a pinch, but a paring knife gives you more control.
- A small bowl: To hold the pepper scraps. Or eat them as a snack while you cook—I won’t judge.
- A spatula: Thin, flexible silicone spatulas work best for getting under the eggs without breaking the yolks.
- A lid or a piece of foil: To cover the skillet while the eggs cook. This helps the tops set without flipping.
Budget-friendly tip: Don’t have a non-stick skillet? A well-greased stainless steel pan works fine, just watch the heat. And if you don’t have a lid, a baking sheet or even a dinner plate works as a cover.
Preparation Method
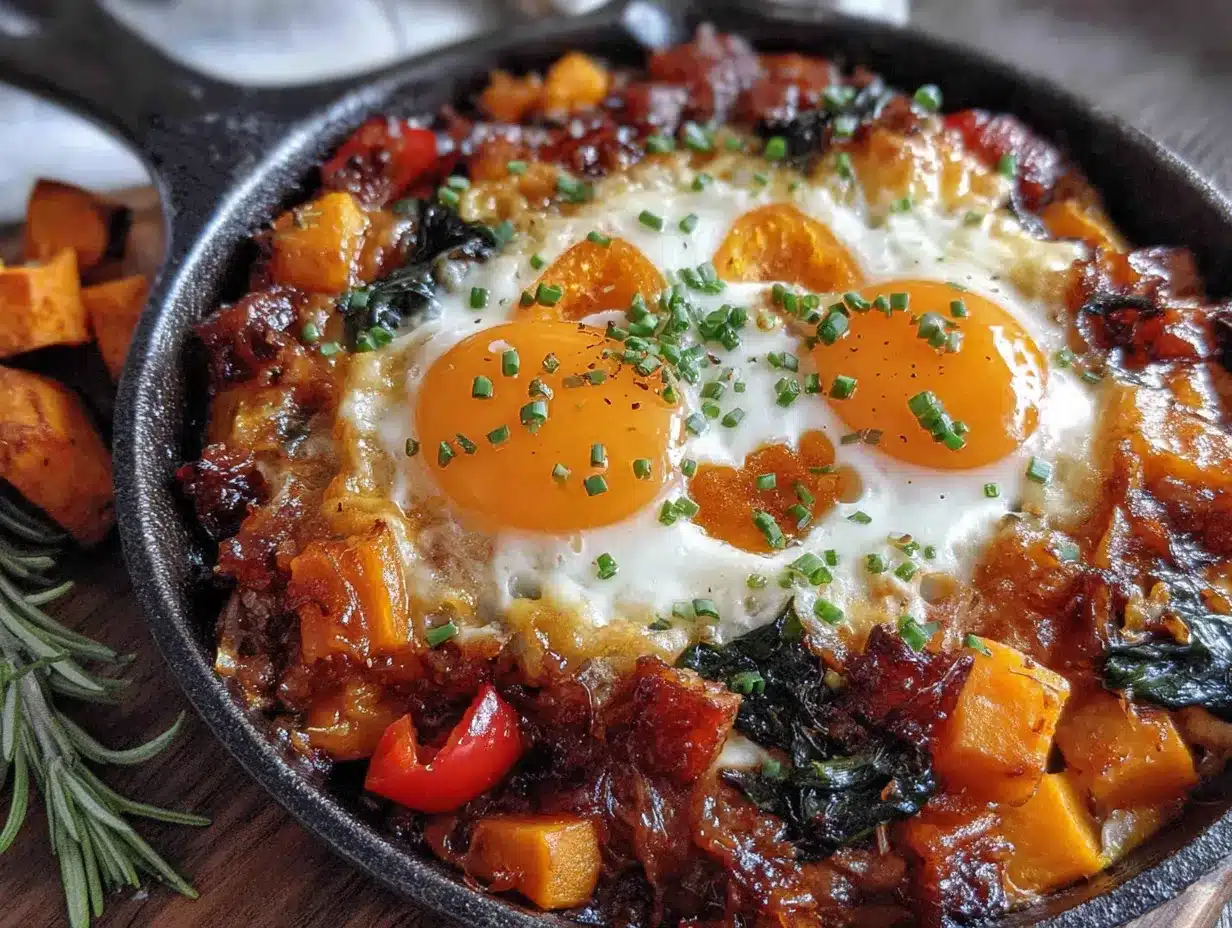
Let’s get cooking. This whole thing takes about 15 minutes from start to finish, so get your ingredients ready first.
- Prep the peppers (2 minutes): Wash and dry your bell peppers. Slice off the top ½ inch and the bottom ¼ inch to create flat surfaces. Remove the seeds and membranes from the inside. Now, using your paring knife, carve a simple jack-o’-lantern face on one side of each pepper. Triangles for eyes, a jagged smile—keep it simple. Don’t cut all the way through; just score the surface about ¼ inch deep. Set the peppers aside.
- Heat the skillet (1 minute): Place your skillet over medium heat and add the olive oil. Let it warm up for about 30 seconds until it shimmers. Don’t let it smoke—medium heat is your friend here.
- Place the peppers (1 minute): Carefully set the peppers cut-side down in the skillet. Let them cook for about 1 minute, just until the bottoms start to soften and you get a little char on the carved faces. This is where the magic starts—the pepper will smell sweet and smoky.
- Flip and crack the eggs (30 seconds): Using your spatula, gently flip the peppers over so the carved faces are facing up. Crack one egg directly into the center of each pepper ring. The yolk should sit in the middle, with the white filling the ring. If any white spills over the edge, that’s okay—it’ll cook up crispy and delicious.
- Season and cover (10 seconds): Sprinkle the smoked paprika, garlic powder, salt, and pepper evenly over the eggs. If you’re using red pepper flakes, add them now. Immediately cover the skillet with your lid or foil.
- Cook the eggs (5-7 minutes): Let the eggs cook covered over medium-low heat. For runny yolks, cook for about 5 minutes. For firmer yolks, go for 7 minutes. The whites should be set and opaque, and the peppers should be tender but still holding their shape. Peek under the lid after 4 minutes to check progress.
- Garnish and serve (30 seconds): Remove the lid and sprinkle the fresh chives or parsley over the top. Use your spatula to carefully lift each pepper-egg combo out of the skillet. Serve immediately while the yolk is still warm and runny.
Personal tip: I like to toast a piece of sourdough while the eggs cook. Then I slide the whole pepper-egg onto the toast and let the yolk soak into the bread. It’s next-level good.
Cooking Tips & Techniques
I’ve made this recipe about a dozen times now, and I’ve learned a few things the hard way. Here are my best tips so you don’t have to make the same mistakes.
Don’t rush the pepper prep. The first time I made this, I carved the faces too deep and the egg leaked through the holes. Keep your cuts shallow—about ¼ inch deep is perfect. You want the pepper to hold its shape and keep the egg contained.
Watch your heat. Medium heat is your sweet spot. Too high and the peppers will burn before the eggs set. Too low and the eggs will take forever and turn rubbery. I keep it at medium for the initial sear, then drop to medium-low once the eggs go in. Trust me on this one.
Use a lid. This is non-negotiable. The steam from the lid cooks the tops of the eggs evenly without flipping. Without a lid, you’ll end up with runny whites and overcooked bottoms. I learned this the hard way when I tried to skip the lid and ended up with a mess.
Fresh eggs matter. Fresh eggs have firmer whites that hold their shape better in the pepper ring. If your eggs are older, the whites will spread more. For the best results, use eggs that are less than a week old.
Let the peppers sit flat. Before you carve, make sure the bottom of the pepper is completely flat. If it wobbles, trim a tiny slice off the bottom until it sits steady. A wobbly pepper means a spilled egg, and nobody wants that.
Variations & Adaptations
This recipe is endlessly adaptable. Here are a few of my favorite variations.
Cheesy Jack-O’-Lantern: After you crack the egg into the pepper, sprinkle a tablespoon of shredded cheddar or Monterey Jack cheese on top before covering. The cheese melts into the egg and creates a gooey, delicious crust. I tried this with pepper jack once, and it added a nice kick.
Veggie Loaded: Add a handful of fresh spinach or a few cherry tomato halves to the skillet around the peppers before covering. They’ll cook in the steam and make the whole dish feel more substantial. My sister actually likes this version better than the original—she adds mushrooms too.
Spicy Southwest: Swap the smoked paprika for chipotle powder and add a spoonful of salsa to the pan before serving. Top with sliced avocado and a squeeze of lime. This is my go-to when I want something with a little more kick.
Meat Lover’s: Cook a few slices of crumbled bacon or chopped ham in the skillet before adding the peppers. Remove the meat, then proceed with the recipe. Sprinkle the cooked meat over the eggs just before covering. It adds a salty, smoky crunch that’s hard to beat.
Sweet Potato Base: For a heartier version, slice a sweet potato into ½-inch rounds and roast them at 400°F for 15 minutes. Use the roasted sweet potato rounds instead of bell peppers. The natural sweetness pairs beautifully with the egg and paprika. I tried this for a fall brunch, and it was a hit.
Serving & Storage Suggestions
This dish is best served immediately, while the yolk is still warm and runny and the pepper is tender. But here’s how to make the most of it.
Serving temperature: Serve hot off the stove. The contrast between the warm egg and the slightly charred pepper is part of the magic. I like to serve it on a warm plate to keep it from cooling down too fast.
Presentation: Place the pepper-egg on a plate with the carved face facing up. Garnish with fresh chives or parsley for a pop of green. A side of toast or a simple green salad rounds out the meal nicely. For a Halloween-themed table, serve on a dark plate with a few candy corn scattered around—just for fun.
Complementary dishes: This skillet pairs beautifully with crispy roasted potatoes, a side of fresh fruit, or a simple arugula salad with lemon vinaigrette. For drinks, a hot cup of coffee or a fresh orange juice is perfect.
Storage instructions: Leftovers can be stored in an airtight container in the refrigerator for up to 2 days. The pepper will soften, but the flavor will still be good. I don’t recommend freezing this dish, as the texture of the egg and pepper will suffer.
Reheating methods: The best way to reheat is in a skillet over medium-low heat with a splash of water and a lid. This steams the pepper back to tenderness without drying out the egg. Microwave works in a pinch, but the egg will be a bit rubbery. I’ve also found that reheating in a 350°F oven for 5 minutes works well if you’re doing a batch.
Flavor development: Honestly, this dish is best fresh. The pepper loses its slight crunch after refrigeration, and the egg yolk won’t be runny anymore. But if you have leftovers, chop everything up and toss it into a breakfast burrito—it’s a whole new meal.
Nutritional Information & Benefits
Here’s the nutritional breakdown for one serving (one pepper with one egg), based on using one tablespoon of olive oil total for the recipe:
- Calories: Approximately 180-200 calories per serving
- Protein: 12 grams
- Fat: 14 grams (mostly healthy fats from olive oil and egg yolk)
- Carbohydrates: 6 grams
- Fiber: 2 grams
- Vitamin C: 150% of the daily value (from the bell pepper)
- Vitamin A: 20% of the daily value
Health benefits: Bell peppers are packed with vitamin C, which supports immune health—perfect for fall and winter. Eggs provide high-quality protein and choline, which is great for brain health. The olive oil adds heart-healthy monounsaturated fats. This is a balanced, nutrient-dense meal that keeps you full and satisfied without weighing you down.
Dietary considerations: This recipe is naturally gluten-free, dairy-free, and low-carb (only 6 grams of carbs per serving). It’s also vegetarian and can be made vegan by substituting the egg with a tofu scramble or chickpea flour mixture. Potential allergens include eggs (obviously) and nightshades (bell peppers).
I love that this recipe lets me enjoy a fun, festive breakfast without derailing my healthy eating goals. It’s proof that eating well doesn’t have to be boring.
Conclusion
So there you have it—a Light Jack-O’-Lantern Egg Breakfast Skillet that’s as fun to make as it is to eat. It’s quick, it’s simple, and it turns an ordinary morning into something a little bit special. Whether you’re making it for Halloween breakfast, a cozy fall brunch, or just because you want to smile at your skillet, this recipe delivers.
I love this recipe because it reminds me that cooking doesn’t have to be complicated to be joyful. A bell pepper, an egg, a little paprika—that’s all it takes to create something that feels like a celebration. And honestly, isn’t that the best kind of cooking? The kind that makes you feel like you’ve made something wonderful, even on a busy Tuesday morning.
I’d love to hear how yours turns out! Did you carve a scary face or a silly one? Did you add cheese or go full veggie? Drop a comment below and let me know. And if you loved this recipe, share it with a friend who needs a little fall fun in their life. Happy cooking, and happy Halloween!
Frequently Asked Questions
Can I make this recipe ahead of time?
This dish is best served fresh, but you can prep the peppers the night before. Carve the faces, remove the seeds, and store the peppers in an airtight container in the refrigerator. In the morning, just pull them out and cook as directed. It saves about 5 minutes of prep time.
What if my bell pepper won’t sit flat?
This happens sometimes! Just trim a thin slice off the bottom of the pepper until it sits flat on your cutting board. A flat bottom is essential for keeping the egg contained inside the ring. If the pepper is still wobbly, try a different pepper—some are just naturally more round than others.
Can I use a different type of pepper?
Absolutely. Red, yellow, or orange bell peppers all work beautifully. Green bell peppers are a bit more bitter, but they’re still fine. For a smaller version, try using mini sweet peppers—just adjust the cooking time down to 3-4 minutes. Poblano peppers work too, but they’re spicier, so keep that in mind.
How do I know when the egg is done?
For runny yolks, cook for about 5 minutes covered. The whites should be set and opaque, and the yolk should still jiggle when you gently shake the pan. For firmer yolks, cook for 7 minutes. If you’re unsure, use a thermometer—the egg white should reach 160°F for food safety.
Can I double this recipe?
Yes, but you’ll need a larger skillet or work in batches. A 12-inch skillet can comfortably hold 3-4 pepper rings. If you’re making a big batch for a crowd, I recommend cooking in two skillets simultaneously or keeping the first batch warm in a 200°F oven while you finish the rest.
Pin This Recipe!

Light Jack-O-Lantern Egg Breakfast Skillet

A fun and festive 15-minute breakfast skillet featuring bell peppers carved like jack-o’-lanterns with eggs cooked inside. Perfect for Halloween mornings or cozy fall brunches.
- Prep Time: 5 minutes
- Cook Time: 10 minutes
- Total Time: 15 minutes
- Yield: 2 servings 1x
- Category: Breakfast
- Cuisine: American
Ingredients
- 2 large orange bell peppers
- 2 large eggs, room temperature
- 1 tablespoon olive oil
- ½ teaspoon smoked paprika
- ¼ teaspoon garlic powder
- Salt and black pepper to taste
- 1 tablespoon fresh chives or parsley, chopped
- Optional: a pinch of red pepper flakes
Instructions
- Wash and dry bell peppers. Slice off the top ½ inch and bottom ¼ inch to create flat surfaces. Remove seeds and membranes. Using a paring knife, carve a simple jack-o’-lantern face on one side of each pepper, scoring about ¼ inch deep. Set aside.
- Place a 10-inch non-stick skillet over medium heat and add olive oil. Let warm for about 30 seconds until shimmering.
- Place peppers cut-side down in the skillet. Cook for about 1 minute until bottoms soften and get a slight char.
- Flip peppers so carved faces are facing up. Crack one egg into the center of each pepper ring.
- Sprinkle smoked paprika, garlic powder, salt, and pepper evenly over the eggs. Add red pepper flakes if using. Immediately cover the skillet with a lid or foil.
- Cook over medium-low heat for 5 minutes for runny yolks or 7 minutes for firmer yolks, until whites are set and opaque and peppers are tender.
- Remove lid, sprinkle with fresh chives or parsley. Carefully lift each pepper-egg combo out of the skillet and serve immediately.
Notes
For best results, use fresh eggs with firm whites. Keep pepper carvings shallow (about ¼ inch deep) to prevent egg leakage. If pepper wobbles, trim a thin slice off the bottom to make it flat. Serve immediately for runny yolk. Leftovers can be stored in an airtight container in the refrigerator for up to 2 days; reheat in a skillet with a splash of water and a lid.
Nutrition
- Serving Size: 1 pepper with 1 egg
- Calories: 190
- Sugar: 3
- Sodium: 200
- Fat: 14
- Saturated Fat: 3
- Carbohydrates: 6
- Fiber: 2
- Protein: 12
Keywords: jack-o-lantern eggs, Halloween breakfast, bell pepper eggs, egg skillet, fall breakfast, healthy breakfast, 15-minute recipe