Love this? Save it for later!
Share the inspiration with your friends
The neighborhood bake sale was in twelve hours and I had completely forgotten. Everyone else would be bringing those picture-perfect layer cakes with frosting swoops and tiny edible flowers. I had a half-gallon of apple cider in my fridge, a carton of buttermilk about to expire, and a vague memory that someone on the internet had made donuts in a muffin tin once. Honestly? I almost just grabbed a box of store-bought cookies on my way out the door. But then I thought about the smell. You know that feeling when you want your house to smell like autumn, but you don’t have time to peel apples or roll out pie dough? That was me at 9 PM on a Tuesday, staring into my pantry like it held the answers to my problems.
So I did what any reasonable person with no plan and a mild panic does. I started mixing things together. The cider went into a saucepan first, bubbling down until it smelled like a candle shop threw up in my kitchen. I used the same bowl for wet and dry ingredients because who has time to wash extra dishes? Ten minutes of stirring, fifteen minutes in the oven, and I had these little golden rings that looked nothing like fancy bakery donuts but smelled like everything good about fall. I drizzled a quick maple glaze over them while they were still warm, just to make them look slightly more intentional. Then I went to bed, fully expecting to grab that box of cookies in the morning.
The bake sale started at 8 AM. By 8:45, my sad little table was empty. People kept coming back for “just one more” of those apple cider donuts, asking me for the recipe, telling me they tasted like their grandmother’s kitchen but without all the work. I stood there in my too-big sweater, trying to explain that I’d thrown them together in a panic the night before. Nobody believed me. And honestly? That’s kind of how the best recipes happen, right? When you stop trying so hard and just let the ingredients do what they do. These donuts have saved me at least three times since then — for last-minute hostess gifts, for Saturday mornings when the kids are cranky, for that moment when you need something warm and sweet and you need it now. Maybe you’ve been there too.
Why You’ll Love This Recipe
Let me tell you why these little guys have become my secret weapon for everything from lazy Sunday mornings to “I forgot about the potluck” emergencies. I’ve made this recipe at least two dozen times now, tweaking the ratios, testing the bake times, and even accidentally using salted butter once when I meant unsalted. (Spoiler: it was still delicious.) Here’s what you’re getting yourself into.
- Quick & Easy: From start to finish, these donuts are ready in under 30 minutes. That’s faster than driving to the donut shop, and you don’t have to put on real pants.
- Simple Ingredients: You probably already have everything except maybe the apple cider. No fancy extracts, no special flours, no hunting down hard-to-find spices.
- Perfect for Fall Gatherings: These are made for apple picking trips, pumpkin carving parties, Thanksgiving mornings, and cozy sweater weather. But honestly? I make them in July too.
- Crowd-Pleaser: Kids devour them. Adults sneak them. I’ve watched people eat three in a row without blinking. They’re just that good.
- Unbelievably Delicious: The secret is reducing the apple cider first. It concentrates all that tart-sweet flavor into something almost magical. The texture is soft and tender, with a slightly crisp edge that gets even better after the glaze soaks in.
What makes this different from every other apple cider donut recipe out there? It’s the buttermilk. I tested this with regular milk, with yogurt, with sour cream, and even with a splash of heavy cream. Buttermilk gives you that tangy background note that makes the apple cider flavor pop. Plus, it reacts with the baking soda to create a tender crumb that feels like you spent way more time than you actually did. This isn’t just another version of a fall donut. It’s the one you’ll come back to again and again because it works every single time.
These donuts have gotten me out of more jams than I can count. They’re the thing I bring to new neighbors, to teacher appreciation days, to those moments when you just need to show up with something warm and homemade. And the best part? When people ask for the recipe, they never believe me when I say it took fifteen minutes.
What Ingredients You Will Need
This recipe uses simple, honest ingredients to deliver big flavor without a complicated shopping list. Most of these are pantry staples, and the ones that aren’t are easy to find at any grocery store. Let’s break down what each ingredient does and how to choose the best ones.
For the Donuts
- Apple Cider, 1 cup (240 ml) — This is the star of the show. Don’t use apple juice, which is too sweet and lacks that tangy complexity. Look for fresh, unfiltered apple cider in the refrigerated section of your grocery store. I prefer Martinelli’s or whatever local brand your store carries. You’ll reduce this on the stovetop to concentrate the flavor, so buy a little extra if you want to sip some while you cook.
- All-Purpose Flour, 1¾ cups (220g) — Standard all-purpose flour gives these donuts the perfect structure. Spoon and level your flour into the measuring cup — don’t scoop directly from the bag or you’ll pack it down and end up with dry donuts. If you want to experiment, you can substitute up to half the flour with whole wheat pastry flour for a nuttier flavor.
- Granulated Sugar, ½ cup (100g) — Regular white sugar adds sweetness and helps create that tender crumb. I’ve tried this with coconut sugar and it works, but the texture is slightly denser. Stick with granulated for the best results.
- Light Brown Sugar, ¼ cup (50g), packed — This adds moisture and a subtle molasses flavor that pairs beautifully with the apple cider. Make sure you pack it firmly into your measuring cup. If you’re out of brown sugar, you can substitute ¼ cup granulated sugar mixed with 1 tablespoon of molasses.
- Buttermilk, ½ cup (120 ml) — This is my secret ingredient for tender, flavorful donuts. The acidity in buttermilk tenderizes the gluten and reacts with the baking soda for a beautiful rise. If you don’t have buttermilk, you can make a quick substitute by adding 1½ teaspoons of lemon juice or white vinegar to ½ cup of regular milk. Let it sit for 5 minutes before using.
- Unsalted Butter, 4 tablespoons (57g), melted and slightly cooled — Butter adds richness and flavor. I use unsalted so I can control the salt level. If you only have salted butter, reduce the added salt in the recipe by ¼ teaspoon. Melt it gently in the microwave or on the stovetop, then let it cool for a minute so it doesn’t cook the eggs.
- Large Egg, 1 — The egg provides structure and helps bind everything together. Make sure it’s at room temperature for the best incorporation. If you forgot to take it out of the fridge, place it in a bowl of warm water for 5 minutes.
- Vanilla Extract, 1 teaspoon — Pure vanilla extract adds warmth and depth. I recommend Nielsen-Massey or Simply Organic for the best flavor. Avoid imitation vanilla if you can — it has a harsh, artificial taste.
- Baking Powder, 1½ teaspoons — This helps the donuts rise and creates a light texture. Make sure your baking powder is fresh — test it by dropping a little into hot water; it should bubble immediately.
- Baking Soda, ½ teaspoon — The baking soda reacts with the buttermilk to create additional lift and helps with browning. Don’t skip it even if the recipe seems like it has enough leavening.
- Ground Cinnamon, 1½ teaspoons — Cinnamon is the classic fall spice that complements apple cider perfectly. I use Saigon cinnamon for a more intense flavor, but regular cinnamon works great too.
- Ground Nutmeg, ¼ teaspoon — Just a touch of nutmeg adds warmth without being overpowering. Freshly grated nutmeg is incredible here if you have it.
- Salt, ½ teaspoon — Salt balances the sweetness and enhances all the other flavors. I use fine sea salt for baking. Don’t skip it — your donuts will taste flat without it.
For the Maple Glaze
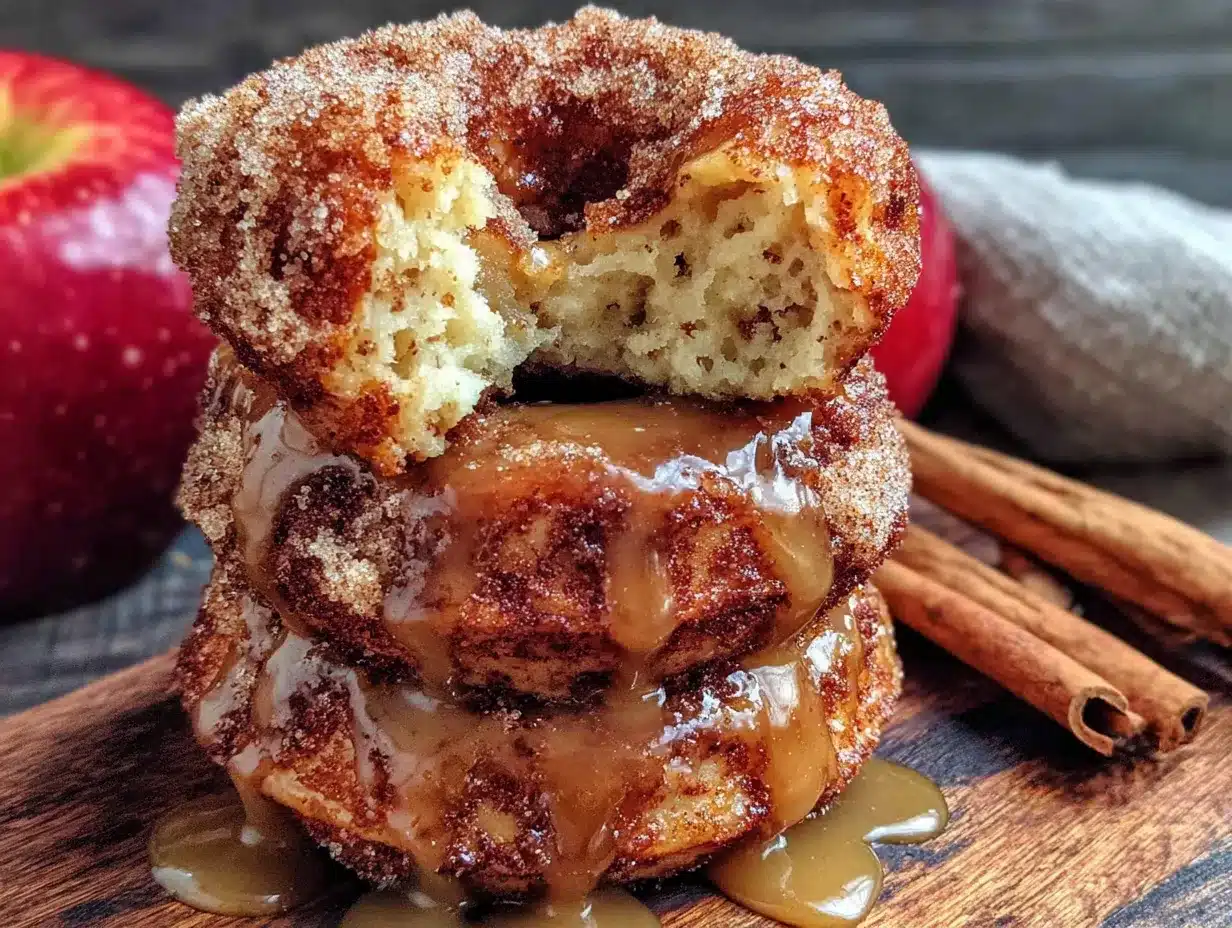
- Powdered Sugar, 1 cup (120g) — This creates the base of the glaze. Sift it if it’s lumpy for a smooth finish. You can adjust the amount to get your desired consistency.
- Pure Maple Syrup, 3 tablespoons (45 ml) — Use the real stuff, not pancake syrup. Grade A amber or dark amber maple syrup has the best flavor for baking. I love Maple Grove Farms or Coombs Family Farms for their rich, authentic taste.
- Milk or Heavy Cream, 1-2 tablespoons (15-30 ml) — This thins the glaze to the perfect drizzling consistency. Heavy cream makes a richer glaze, but milk works fine. Add it slowly until you reach the consistency you like.
- Vanilla Extract, ½ teaspoon — A little extra vanilla in the glaze ties everything together. You can skip this if you want the maple flavor to be the star.
Equipment Needed
You don’t need a fancy stand mixer or a deep fryer for these donuts. Here’s what you’ll actually use:
- Donut Pan (6-cavity or 12-cavity) — This is the only specialized equipment you need. I use a Wilton non-stick donut pan that I’ve had for years. If you don’t have one, you can make these as donut holes in a mini muffin tin, or even as regular muffins (just adjust the baking time to 15-18 minutes).
- Small Saucepan — For reducing the apple cider. A 1-quart saucepan works perfectly. I’ve used the same cheap one from my college days and it’s never let me down.
- Mixing Bowls — You’ll need two medium bowls, one for dry ingredients and one for wet. I love my Pyrex glass mixing bowls because they’re microwave-safe and easy to clean.
- Whisk — A standard wire whisk is all you need. No electric mixer required, which means less cleanup.
- Rubber Spatula — For scraping every last bit of batter into the pan. I have a OXO Good Grips spatula that has survived countless baking sessions.
- Piping Bag or Ziploc Bag — To pipe the batter into the donut pan. This makes the process much cleaner and easier. If you don’t have a piping bag, a gallon-sized ziploc bag with the corner snipped off works perfectly.
- Cooling Rack — A wire rack allows air to circulate around the donuts so they cool evenly. If you don’t have one, you can use a clean kitchen towel laid flat on the counter.
- Measuring Cups and Spoons — For accurate measurements. I recommend having both dry and liquid measuring cups for best results.
Budget-friendly tip: You can find donut pans at most thrift stores for a couple of dollars. I found my first one at a garage sale for fifty cents and it worked like a charm for years.
Preparation Method
Alright, let’s get to the good part. Here’s exactly how to make these donuts, with all the little tricks I’ve learned along the way.
- Preheat your oven to 350°F (175°C). Place your donut pan on a baking sheet — this makes it easier to move in and out of the oven and catches any drips. Lightly spray the donut cavities with non-stick cooking spray. I use Baker’s Joy because it has flour in it, which helps the donuts release perfectly. If you’re using regular spray, dust the cavities with a little flour after spraying.
- Reduce the apple cider. Pour 1 cup of apple cider into a small saucepan. Bring it to a boil over medium-high heat, then reduce the heat to medium-low and let it simmer. You want it to reduce down to about ¼ cup (60 ml). This takes about 10-12 minutes. The cider will get syrupy and smell intensely of apples. Watch it carefully toward the end — it can burn quickly once it gets thick. When it’s done, pour it into a small bowl to cool while you prepare the rest of the ingredients.
- Mix the dry ingredients. In a medium bowl, whisk together 1¾ cups all-purpose flour, ½ cup granulated sugar, ¼ cup packed light brown sugar, 1½ teaspoons baking powder, ½ teaspoon baking soda, 1½ teaspoons ground cinnamon, ¼ teaspoon ground nutmeg, and ½ teaspoon salt. Whisk until everything is evenly distributed. I like to use a fork to break up any lumps in the brown sugar before whisking.
- Mix the wet ingredients. In another medium bowl, whisk together the reduced apple cider, ½ cup buttermilk, 4 tablespoons melted unsalted butter, 1 large egg, and 1 teaspoon vanilla extract. Whisk until the egg is fully incorporated and the mixture is smooth. Don’t worry if the butter solidifies a little when it hits the cold buttermilk — that’s totally fine.
- Combine wet and dry ingredients. Pour the wet ingredients into the dry ingredients. Use a rubber spatula to fold everything together gently. Mix just until you can’t see any more streaks of flour — about 12-15 strokes. Overmixing will make your donuts tough and dense. A few small lumps are okay. The batter will be thick but scoopable, like a slightly looser muffin batter.
- Fill the donut pan. Transfer the batter to a piping bag or a ziploc bag with the corner snipped off. Pipe the batter into each donut cavity, filling them about ¾ full. Don’t overfill or the donuts will lose their hole. If you don’t have a bag, you can use a small spoon, but it’s messier and harder to get even amounts. I’ve definitely done it the spoon way and it works, just takes a little more patience.
- Bake the donuts. Place the pan in the preheated oven and bake for 10-12 minutes. Start checking at 10 minutes — the donuts should be golden brown on top and a toothpick inserted into the thickest part should come out clean or with just a few moist crumbs. The donuts will spring back slightly when you touch them. Don’t overbake or they’ll be dry.
- Cool the donuts. Let the donuts cool in the pan for 2-3 minutes. Then carefully turn them out onto a wire cooling rack. If any stick, gently loosen the edges with a small offset spatula or butter knife. Let them cool for about 5 minutes before glazing. They should be warm but not hot — the glaze will soak in better if they’re still slightly warm, but if they’re too hot, the glaze will just run right off.
- Make the maple glaze. While the donuts are cooling, make the glaze. In a small bowl, whisk together 1 cup powdered sugar, 3 tablespoons pure maple syrup, ½ teaspoon vanilla extract, and 1-2 tablespoons of milk or heavy cream. Start with 1 tablespoon of milk and add more until the glaze is thick but pourable — it should drizzle off your whisk in a steady ribbon. If it’s too thin, add more powdered sugar. If it’s too thick, add more milk.
- Glaze the donuts. Dip the top of each warm donut into the glaze, letting any excess drip back into the bowl. Place the glazed donuts back on the cooling rack, glaze side up. The glaze will set as the donuts cool. For extra decadence, you can double-dip after the first layer sets, but I find one layer is plenty sweet.
- Serve and enjoy. These are best eaten the same day, ideally within a few hours of baking. The glaze stays slightly soft and the donuts are incredibly tender. If you can wait, let them sit for about 10 minutes after glazing so the glaze firms up a little.
Cooking Tips & Techniques
I’ve made these donuts enough times to know exactly what can go wrong and how to fix it. Here are my hard-earned lessons.
Don’t skip reducing the cider. I know it’s an extra step and you’re busy. I tried making these once without reducing the cider, just using a full cup straight from the bottle. The donuts were bland and watery. Reducing concentrates the apple flavor and removes excess liquid that would make your batter too loose. It’s worth the ten minutes, I promise. Set a timer so you don’t forget about it on the stove.
Room temperature ingredients matter. I used to think this was one of those fussy baking rules that didn’t actually matter. I was wrong. Cold buttermilk and cold eggs will make your melted butter solidify into little chunks. The batter will still work, but the texture won’t be as tender. Take your egg and buttermilk out of the fridge about 20 minutes before you start. If you forget, place the egg in a bowl of warm water for 5 minutes and microwave the buttermilk for 10 seconds.
Watch your bake time closely. My first batch came out dry because I left them in for 14 minutes, thinking “a few extra minutes couldn’t hurt.” They could hurt. These donuts bake fast. Start checking at 10 minutes. Every oven runs a little differently — my friend’s oven takes exactly 11 minutes, mine takes 12. Get to know your oven and adjust accordingly.
Pipe, don’t spoon. I know it’s an extra step to fill a bag, but trust me on this. Spooning the batter into the donut cavities is messy, uneven, and almost guarantees you’ll get batter in the center hole. A piping bag gives you control and keeps your pan clean. Plus, it’s faster. If you’re really against piping bags, use a small cookie scoop to portion the batter, then use your finger to gently push it into the cavities.
Glaze while warm. This is the key to that thin, crackly glaze that soaks slightly into the donut. If you wait until they’re completely cool, the glaze will just sit on top and can peel off. If you glaze them too hot, it’ll run off completely. The sweet spot is about 5 minutes out of the oven — warm enough that the glaze melts a little, cool enough that it stays put.
Double the recipe. Seriously. These disappear fast. I’ve never had leftovers, even when I thought I was making too many. The recipe makes 6 donuts, which sounds like a lot until you eat two and your partner eats two and suddenly there’s only two left for the morning. Make a double batch and freeze the extras (unglazed) for later.
Variations & Adaptations
One of the best things about this recipe is how flexible it is. Here are some ways I’ve adapted it over the years.
Gluten-Free Version: Substitute the all-purpose flour with a 1:1 gluten-free baking flour blend. I’ve had great success with King Arthur Measure for Measure and Bob’s Red Mill 1 to 1. Add an extra tablespoon of buttermilk since gluten-free flours tend to absorb more liquid. The texture will be slightly more tender and delicate, but still delicious.
Vegan Version: Replace the buttermilk with ½ cup of unsweetened almond milk mixed with 1½ teaspoons of apple cider vinegar. Use a flax egg (1 tablespoon ground flaxseed mixed with 3 tablespoons water, let sit for 5 minutes) instead of the regular egg. Substitute the melted butter with 4 tablespoons of melted coconut oil or vegan butter. The donuts will be a little denser but still incredibly flavorful.
Spice It Up: Add ¼ teaspoon of ground cloves, ¼ teaspoon of ground ginger, and a pinch of allspice to the dry ingredients for a more complex spice profile. I made this version for a Friendsgiving brunch and everyone asked for the recipe. It gives the donuts a chai-like warmth that’s perfect for cold mornings.
Apple Cider Donut Holes: Use a mini muffin tin instead of a donut pan. Fill each cavity about ¾ full and bake for 8-10 minutes. You’ll get about 18-24 donut holes. These are perfect for snacking and portion control — or lack thereof.
Maple Bacon Version: Cook 4 strips of bacon until crispy, then crumble them. Make the donuts as directed, but after glazing, immediately sprinkle the bacon crumbles on top. The salty, smoky bacon against the sweet maple glaze is absolutely ridiculous in the best way. I made these for a brunch potluck and they were gone in five minutes.
Caramel Apple Version: Drizzle the donuts with store-bought or homemade caramel sauce instead of the maple glaze. Sprinkle with a little flaky sea salt. This turns them into something that feels fancy enough for a dinner party but takes almost no extra effort.
Serving & Storage Suggestions
These donuts are best served warm, within a few hours of baking. The glaze stays slightly soft and the donuts are at their peak tenderness. Here’s how to make the most of them.
Serving Temperature: Serve at room temperature or slightly warm. If you’re serving them later in the day, pop them in a 300°F oven for 3-4 minutes to warm them up. The glaze will soften slightly and the donuts will taste freshly baked. A warm donut with a cup of hot coffee or spiced apple cider is basically fall in a bite.
Presentation Ideas: Arrange the donuts on a wooden board or a cake stand for a rustic look. Sprinkle a little extra cinnamon on top of the glazed donuts for visual appeal. For a brunch spread, place them next to a bowl of fresh apple slices and a pitcher of hot mulled cider. They also look beautiful stacked in a mason jar or a vintage milk bottle.
Complementary Dishes: These donuts pair beautifully with a hot cup of coffee, chai tea, or spiced apple cider. For a full fall breakfast, serve them alongside scrambled eggs, crispy bacon, and fresh fruit. They also make a great dessert with a scoop of vanilla ice cream or a dollop of whipped cream.
Storage Instructions: Store leftover donuts in an airtight container at room temperature for up to 2 days. Place a paper towel in the bottom of the container to absorb excess moisture. Don’t refrigerate them — the fridge will dry them out and make the glaze sticky. If you live in a humid climate, the glaze might get a little tacky, but they’ll still taste great.
Freezing Instructions: Freeze unglazed donuts for up to 3 months. Let them cool completely, then place them in a single layer on a baking sheet and freeze for 1 hour. Transfer the frozen donuts to a freezer-safe bag or container. To serve, thaw at room temperature for about 30 minutes, then warm in a 300°F oven for 5 minutes. Glaze after warming. I always keep a batch in the freezer for emergencies — they’ve saved me from showing up empty-handed more times than I can count.
How Flavors Develop: These donuts are actually even better the next day. The flavors meld together and the texture becomes more moist and tender. If you can resist eating them all immediately, save a couple for the next morning. The glaze might not be as pretty, but the taste is incredible.
Nutritional Information & Benefits
Let’s be real — these are donuts, not health food. But they’re made with real ingredients and you can feel good about what you’re eating. Here’s the breakdown for one donut with glaze (based on a recipe that makes 6 donuts).
| Nutrient | Amount per Donut |
|---|---|
| Calories | 290 |
| Total Fat | 9g |
| Saturated Fat | 5g |
| Cholesterol | 45mg |
| Sodium | 310mg |
| Total Carbohydrates | 50g |
| Dietary Fiber | 1g |
| Sugars | 32g |
| Protein | 4g |
Health Benefits of Key Ingredients: Apple cider is rich in antioxidants and polyphenols, which support immune health and reduce inflammation. Cinnamon has anti-inflammatory properties and can help regulate blood sugar levels. Buttermilk provides calcium and probiotics that support gut health. While these donuts are a treat, they’re made with wholesome ingredients that offer more nutritional value than a packaged donut from the store.
Dietary Considerations: This recipe contains gluten, dairy, and eggs. For gluten-free and vegan options, check the variations section above. These donuts are nut-free (as written), making them a safe option for school events or parties where nut allergies are a concern. They are not low-carb or keto-friendly due to the flour and sugar content.
My Personal Perspective: I believe in balance. These donuts are a celebration food, not an everyday breakfast. But when you do indulge, make it count. Use real maple syrup, good butter, and fresh apple cider. Enjoy every bite without guilt. Life is too short for mediocre donuts.
Conclusion
These quick baked apple cider donuts have become my go-to for every fall occasion, and I think they’ll become yours too. They’re fast enough for a weekday morning, impressive enough for a party, and simple enough that you can make them without breaking a sweat. The combination of reduced apple cider, warm spices, and that sweet maple glaze is just about perfect.
What I love most about this recipe is how forgiving it is. You can mess up the timing, forget an ingredient, or use the wrong pan, and they’ll still turn out delicious. That’s the kind of recipe I want in my back pocket — the one that doesn’t require perfection, just a little effort and a lot of love.
So go ahead and give these a try. Make them for your next fall gathering, your Sunday morning coffee, or your Tuesday night craving. Customize them with your favorite spices, try the variations, or just follow the recipe exactly as written. Either way, you’re going to end up with something warm, sweet, and absolutely irresistible.
I’d love to hear how they turn out for you! Drop a comment below and let me know if you tried any variations, or share a photo of your donuts on Pinterest and tag me. Happy baking, friends! 🍎🍩
Frequently Asked Questions
Can I make these donuts without a donut pan?
Absolutely! You can use a mini muffin tin to make donut holes, or a regular muffin tin to make donut muffins. For mini muffins, bake for 8-10 minutes. For regular muffins, bake for 15-18 minutes. The texture will be slightly different, but the flavor will be just as good. You can also shape the batter into rings on a parchment-lined baking sheet, though they’ll spread a bit more.
Why did my donuts come out dry?
Dry donuts usually mean they were overbaked. Start checking at 10 minutes and pull them out as soon as a toothpick comes out clean. Another possible cause is overmixing the batter — mix just until the flour disappears. Finally, make sure you’re measuring your flour correctly by spooning it into the measuring cup and leveling it off, rather than scooping directly from the bag.
Can I use apple juice instead of apple cider?
You can, but the flavor won’t be as intense. Apple juice is sweeter and less tangy than apple cider. If you’re using apple juice, I recommend adding an extra ¼ teaspoon of cinnamon and a squeeze of lemon juice to mimic the complexity of apple cider. The reduced liquid will still provide that concentrated apple flavor, just with a different profile.
How do I get the glaze to stick better?
Glaze the donuts while they’re still warm but not hot — about 5 minutes after they come out of the oven. The warmth helps the glaze adhere and soak in slightly. If your glaze is too thin, add more powdered sugar. If it’s too thick, add more milk. The consistency should be like thick honey — it should drizzle off your whisk in a steady ribbon but hold its shape on the donut.
Can I freeze these donuts with the glaze on?
I don’t recommend it. The glaze can get sticky and messy during thawing. Instead, freeze the donuts unglazed. When you’re ready to serve them, thaw at room temperature, warm them in a 300°F oven for 5 minutes, then glaze them fresh. The glaze only takes about 2 minutes to make, and the results are much better. Trust me on this one — I learned the hard way.
Pin This Recipe!
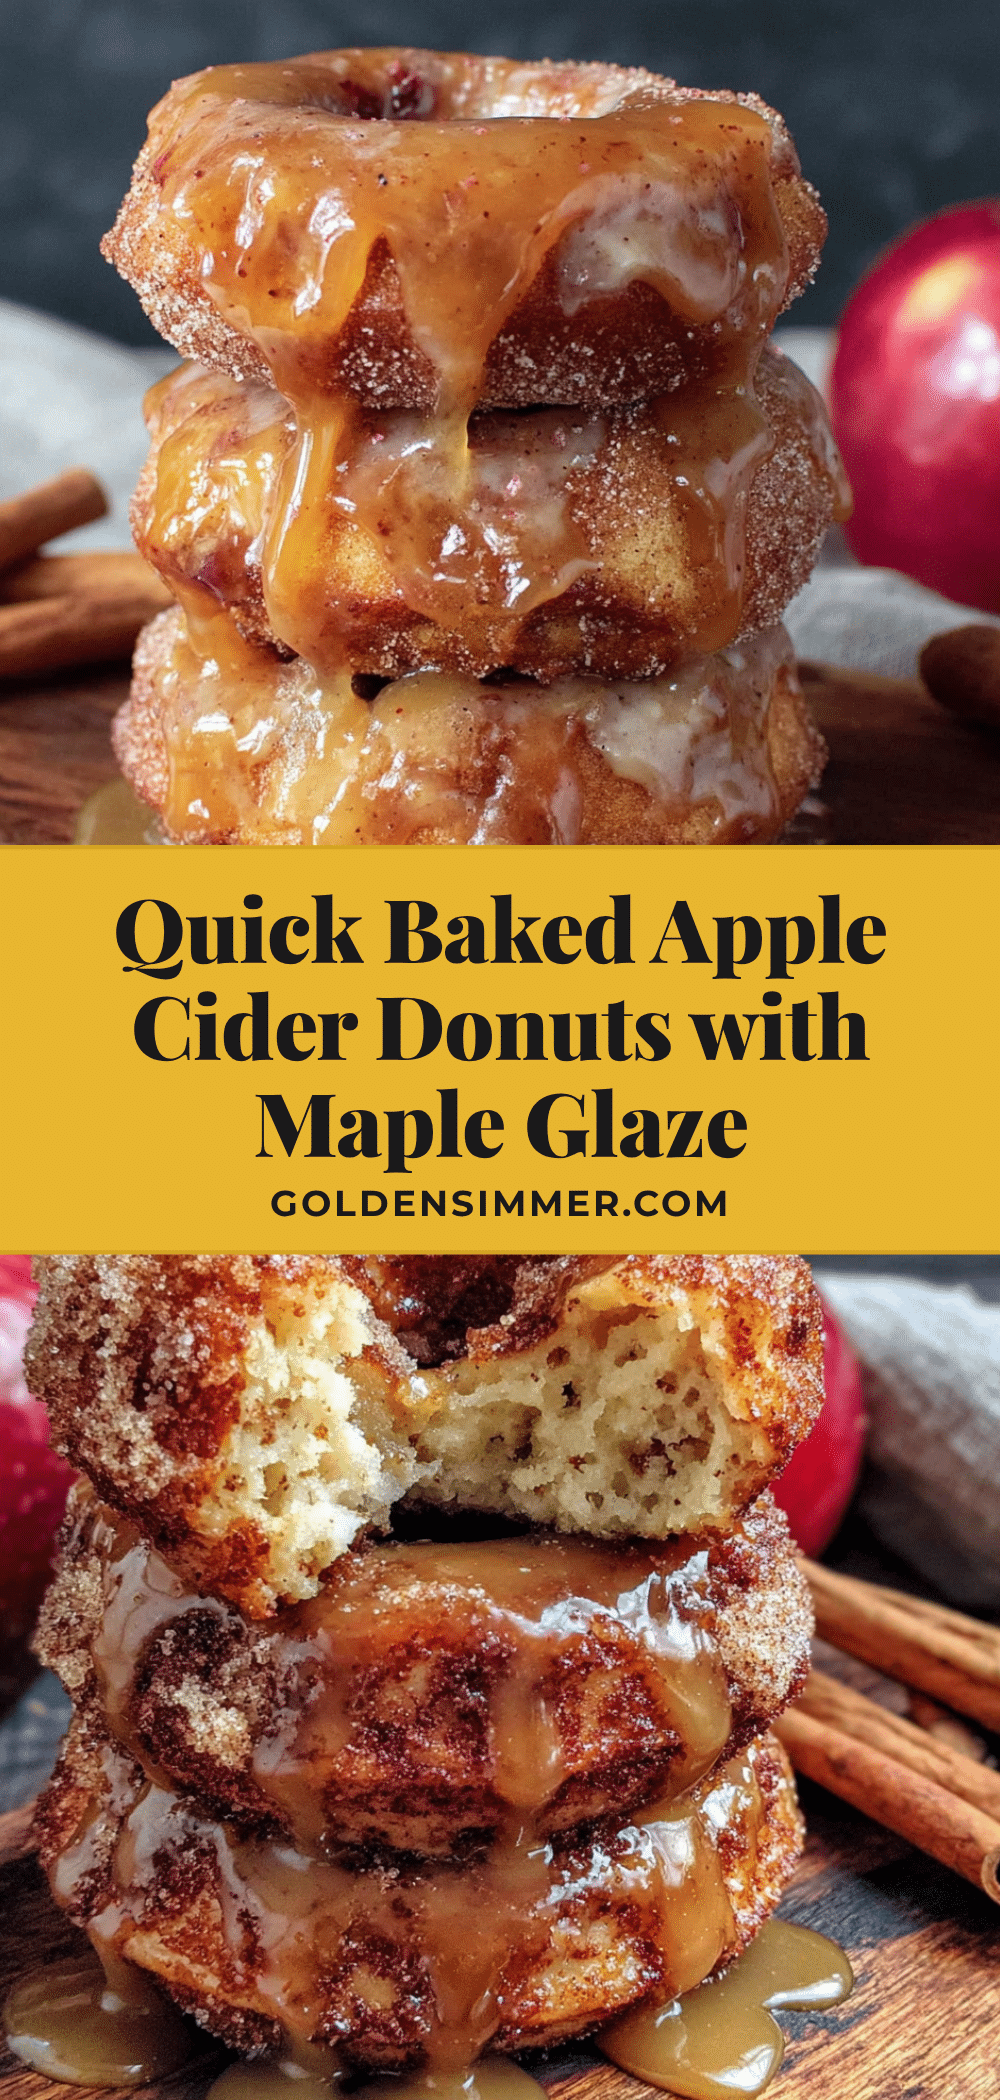
Quick Baked Apple Cider Donuts with Easy Maple Glaze
These quick and easy baked apple cider donuts are ready in under 30 minutes, featuring a tender crumb from reduced apple cider and buttermilk, topped with a simple maple glaze. Perfect for fall gatherings, last-minute treats, or cozy mornings.
- Prep Time: 15 minutes
- Cook Time: 12 minutes
- Total Time: 27 minutes
- Yield: 6 servings 1x
- Category: Dessert
- Cuisine: American
Ingredients
- 1 cup (240 ml) apple cider
- 1¾ cups (220g) all-purpose flour
- ½ cup (100g) granulated sugar
- ¼ cup (50g) packed light brown sugar
- ½ cup (120 ml) buttermilk
- 4 tablespoons (57g) unsalted butter, melted and slightly cooled
- 1 large egg
- 1 teaspoon vanilla extract
- 1½ teaspoons baking powder
- ½ teaspoon baking soda
- 1½ teaspoons ground cinnamon
- ¼ teaspoon ground nutmeg
- ½ teaspoon salt
- 1 cup (120g) powdered sugar
- 3 tablespoons (45 ml) pure maple syrup
- 1–2 tablespoons (15–30 ml) milk or heavy cream
- ½ teaspoon vanilla extract
Instructions
- Preheat your oven to 350°F (175°C). Place your donut pan on a baking sheet and lightly spray the donut cavities with non-stick cooking spray.
- Reduce the apple cider: Pour 1 cup of apple cider into a small saucepan. Bring to a boil over medium-high heat, then reduce heat to medium-low and simmer until reduced to about ¼ cup (60 ml), about 10-12 minutes. Pour into a small bowl to cool.
- Mix the dry ingredients: In a medium bowl, whisk together flour, granulated sugar, brown sugar, baking powder, baking soda, cinnamon, nutmeg, and salt.
- Mix the wet ingredients: In another medium bowl, whisk together reduced apple cider, buttermilk, melted butter, egg, and vanilla extract until smooth.
- Combine wet and dry ingredients: Pour wet ingredients into dry ingredients and fold gently with a rubber spatula until just combined (12-15 strokes). Do not overmix.
- Fill the donut pan: Transfer batter to a piping bag or ziploc bag with the corner snipped off. Pipe batter into each donut cavity, filling about ¾ full.
- Bake the donuts: Bake for 10-12 minutes, until golden brown and a toothpick inserted into the thickest part comes out clean. Let cool in pan for 2-3 minutes, then turn out onto a wire rack.
- Make the maple glaze: In a small bowl, whisk together powdered sugar, maple syrup, vanilla extract, and 1-2 tablespoons of milk until thick but pourable.
- Glaze the donuts: Dip the top of each warm donut into the glaze, letting excess drip off. Place glazed donuts back on the rack, glaze side up. Let set for about 10 minutes before serving.
Notes
Don’t skip reducing the cider—it concentrates the apple flavor. Glaze while donuts are warm (about 5 minutes out of the oven) for best adherence. For gluten-free, use a 1:1 gluten-free flour blend. For vegan, use almond milk with vinegar, flax egg, and coconut oil. Freeze unglazed donuts for up to 3 months.
Nutrition
- Serving Size: 1 donut
- Calories: 290
- Sugar: 32
- Sodium: 310
- Fat: 9
- Saturated Fat: 5
- Carbohydrates: 50
- Fiber: 1
- Protein: 4
Keywords: apple cider donuts, baked donuts, fall recipe, maple glaze, quick donuts, easy donuts, buttermilk donuts



